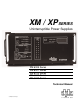
XM / XP SERIES Uninterruptible Power Supplies XM 6005 Series XM 6007 Series XM 6010 Series XM 6012 Series XM 6015 Series Technical Manual ©1997 Alpha Technologies 017-039-B0-006 06/99
IMPORTANT SAFETY INSTRUCTIONS CONTAINED IN THIS MANUAL CAUTION RISK OF ELECTRICAL SHOCK CAUTION: TO REDUCE THE RISK OF ELECTRICAL SHOCK, AND ENSURE THE SAFE OPERATION OF THIS UNIT, THE FOLLOWING SYMBOLS HAVE BEEN PLACED THROUGHOUT THE MANUAL. WHERE THESE SYMBOLS APPEAR, SERVICING SHOULD BE PERFORMED ONLY BY QUALIFIED PERSONNEL. DANGEROUS VOLTAGE A DANGEROUS VOLTAGE EXISTS IN THIS AREA OF THE POWER SUPPLY. USE EXTREME CAUTION. ATTENTION IMPORTANT OPERATING INSTRUCTIONS.
IMPORTANT TECHNICAL NOTE CAUTION: When operating the XP Series Uninterruptible Power Supply, a minimum load of at least 1.0 Amperes (approximately 10% of the output rating of the power supply) must be connected to the output. Failure to do so could damage the load or the unit’s ferroresonant power transformer. Damage caused by this condition will not be covered under warranty. For further information, contact Alpha Technologies or your nearest Alpha representative.
IMPORTANT SAFETY PRECAUTIONS THE POWER SUPPLY SHOULD BE SERVICED ONLY BY QUALIFIED PERSONNEL. THE POWER SUPPLY CONTAINS MORE THAN ONE LIVE CIRCUIT. EVEN THOUGH AC IS NOT PRESENT AT THE INPUT, IT MAY BE PRESENT AT THE OUTPUT. WHEN USING AN EXTERNAL SERVICE DISCONNECT, VERIFY THAT IT IS EQUIPPED WITH A HIGH MAGNETIC CIRCUIT BREAKER PROPERLY RATED (AMPERAGE) FOR USE WITH THE POWER SUPPLY.
BATTERY CHARGING ALWAYS REFER TO THE BATTERY MANUFACTURER’S RECOMMENDATION FOR SELECTING CORRECT FLOAT AND EQUALIZE CHARGE VOLTAGES. FAILURE TO DO SO COULD DAMAGE THE BATTERIES. VERIFY THE POWER SUPPLY’S BATTERY CHARGER FLOAT AND EQUALIZE CHARGE VOLTAGES. REFER TO THE POWER SUPPLY’S OPERATION MANUAL. BATTERIES ARE TEMPERATURE SENSITIVE.
XP Series Uninterruptible Power Supplies Table of Contents 1. INTRODUCTION 1.1 1.2 1.2.1 1.2.2 1.2.3 1.3 2. The XP Series Uninterruptible Power Supply Theory of Operation AC (LINE) Operation Inverter (STANDBY) Operation Charger Operation Specifications FRONT PANEL 2.1 2.1.1 2.1.2 2.1.3 2.1.4 2.1.5 2.2 2.2.1 2.2.2 2.2.3 2.2.4 2.3 2.3.1 2.3.2 2.3.3 2.4 2.4.1 2.5 2.5.1 2.5.2 2.5.3 2.5.4 3.
Table of Contents, continued 4. STANDARD FEATURES 4.1 4.2 4.3 4.4 4.5 5. OPTIONAL FEATURES 5.1 5.2 5.3 5.4 5.5 5.6 5.7 5.8 5.9 5.10 5.11 5.12 5.13 5.14 5.15 5.16 5.17 5.18 5.19 5.20 5.21 5.22 5.23 5.24 5.25 6.
Table of Contents, continued 7. 37 OPERATION 7.1 XM Power Module Start-up and Testing 7.1.1 AC Line Operation (LINE POWER) 7.1.2 Inverter Operation (STANDBY) 7.2 Identifying Modes of Operation 7.2.1 System Status Block 7.2.1.1 AC LINE Operation 7.2.1.2 STANDBY Operation 7.2.1.3 TRANSFER or SELF-TEST Mode 7.2.2 Charger Status Block 7.2.2.1 FLOAT Mode 7.2.2.2 EQUALIZE Mode 7.2.2.3 RECHARGE Mode 7.2.3 APM (Automatic Performance Monitor) Status Block 7.2.3.1 SELF-TEST Mode 7.2.3.2 BATTERY FAILURE 7.2.3.
Table of Contents, continued ILLUSTRATIONS (contained in the manual) XM Series Front Panel APM Status Block Charger Status Block System Status Block Output Current Display Standby Data Display XM Series Side Panel PME and PWE Enclosures UPE and UPE/M Enclosures 120 VAC and 220 or 240 VAC Input Circuit Breaker Assemblies SPI (Service Power Inserter) Module Installation and Wiring Diagram Battery Date Code Identification, Numbering and RTS Placement ABC-12 Battery Charger Main Circuit Module Assembly APM Logi
1. INTRODUCTION INTRODUCTION 1.1 THE XP SERIES UNINTERRUPTIBLE POWER SUPPLY Alpha XP Series Uninterruptible Power Supplies (UPS) are designed for powering signal processing equipment in Cable Television and Broadband LAN distribution systems. The power supply, which consists of an XM Series Power Module and a pole or groundmount enclosure, provides the critical load with current-limited, regulated AC power that is free from disturbances such as spikes, surges, brownouts or blackouts.
1. INTRODUCTION 1.2 Theory of Operation The XP Series Uninterruptible Power Supply consists of an XM Series power module, a pole or ground-mount enclosure, and a set of gelled electrolyte, no maintenance batteries. The power module contains a ferroresonant transformer, resonant capacitor, dualmode temperature-compensated battery charger, DC to AC converter (inverter), transfer / isolation relay, and a main circuit module assembly containing the logic circuit.
1. INTRODUCTION 1.2 Theory of Operation, continued 1.2.2 Inverter (STANDBY) Operation When the incoming AC line voltage drops significantly, or a complete power outage occurs, the control logic’s line monitor activates STANDBY operation. The battery powered inverter comes on-line (in-phase with the failing AC line) as the transfer / isolation relay switches to prevent AC power from back-feeding to the utility.
1. INTRODUCTION 1.3 SPECIFICATIONS MODEL XM6005 CONFIGURATION -24 J5 INPUT Voltage (VAC) 100 Frequency (Hz) 50 Current Max. (A)1 6.7 Low AC Ref. (VAC) 80 XM6005 -24 J6 XM6007 - XM6007 E XM6007 P XM6010 - XM6010 E XM6010 P 100 60 6.7 80 120 60 7.2 95 230 50 4 182 220 60 4.2 174 120 60 9 95 230 50 4.7 182 220 60 5 174 OUTPUT Voltage (VAC) Current Max. (A) Power (VA) 60 5.3 320 60 5.
1. INTRODUCTION 1.3 SPECIFICATIONS, continued Regulation Input Voltage (VAC) Input Frequency (Hz) Output Voltage (VAC) Output Frequency (Hz) Inverter Frequency Stability Output Current Limit Transfer Time Efficiency Battery Type Battery Low Voltage Cutout 24 VDC Systems 36 VDC Systems 48 VDC Systems +/- 15% +/- 3% +/- 5% +/- 1% +/-0.05% 150% of maximum output rating Uninterrupted Output 90% or better (LINE) 80% typical (STANDBY) Gelled electrolyte (or equiv) 12 VDC batteries 1.75 Volts per cell 21.
2. FRONT PANEL THE XM SERIES FRONT PANEL 2.4 2.5 2.1 2.2 2.3 2.1 - APM Automatic Performance Monitor (optional) "Test/Reset" Switch "Not Installed" LED "Test in Progress" LED "Check Batteries" LED "Check Inverter" LED 2.2 - Charger Status Block "Charge Mode" Switch "Float" LED "Equalize" LED "Recharge" LED 2.3 - System Status Block "Line Power" LED "Standby Power" LED "AC Output" LED 2.4 - Output Current Display LED Display 2.
2. FRONT PANEL FRONT PANEL 2.1 APM (Automatic Performance Monitor) Status Block On units equipped with an optional APM logic upgrade, the XM Series power module automatically self-tests the batteries and inverter. The duration and intervals are user programmable (see section 6.10). If a failure is detected during self-test, either the red "CHECK BATTERIES" or red "CHECK INVERTER" LEDs in the APM status block will flash to indicate the circuit that has failed.
2. FRONT PANEL 2.2 Charger Status Block The XM Series power module is equipped with a dual mode, temperature-compensated battery charger. The "CHARGER STATUS" block is broken into categories to reflect the different charging modes: 2.2.1 "CHARGE MODE" Switch The "CHARGE MODE" switch is used to manually sequence the battery charger through float and equalize modes. On non-APM units, equalize can only be initiated by pressing the "CHARGE MODE" switch.
2. FRONT PANEL 2.3 System Status Block The "SYSTEM STATUS" block is broken into three categories to quickly identify the power supply's operational status: running on AC line power; running on batteries; and nominal output power to the load. 2.3.1 "LINE POWER" (green) LED The green "LINE POWER" LED indicates that power from the utility is present and that the power supply is operating in AC LINE mode. 2.3.
2. FRONT PANEL 2.4 Output Current Display The amount of current from the power supply to the load is indicated by the "OUTPUT CURRENT" display. The LED display is useful for determining the overall status of the load. When there is no load connected, the LEDs on the display will be OFF. In situations where LEDs light above the rated output of the power supply, such as 18 or 20 Amps, an overload or short circuit condition exists in the load. 2.4.
2. FRONT PANEL 2.5 Standby Data Display (SDD) The optional, dual-function LED "STANDBY DATA" display is used to keep track of accumulated inverter run time, and to record the number of standby events that have occurred. The "ELAPSED TIME" clock is activated only when the power supply is in inverter mode. Elapsed time will continue to accumulate until the clock is reset. The "STANDBY EVENTS" counter displays the number of standby events that have lasted longer than 60 seconds duration.
2. SIDE PANEL THE XM SERIES SIDE PANEL 7 8 9 6 10 11 1 2 3 4 5 1. - AC Power Cord (Connects to the enclosure's convenience outlet.) 2. - Standby Status Relay (SSR) White (1) = Common; Red (2) = N.O. / N.C. (Select contact normally open / closed with wire on back plane board.) 3. - Remote Indicator Lamp (LRI) Black (3) = Negative; Red (4) = Positive (Connects to pole-mount enclosure's optional external lamp) 4.
3. SIDE PANEL SIDE PANEL 3.1 AC Power Cord The AC power cord plugs directly into the enclosure’s convenience outlet. Since the power module does not have an ON/OFF switch, the utility circuit breaker should be used as the main switch. In situations where the power supply is to be completely powered down, first switch the battery breaker OFF. This will prevent the unit from going into inverter operation when utility AC is removed. 3.
3. SIDE PANEL 3.7 Battery Circuit Breaker The 60 Amp battery circuit breaker is used to disconnect the batteries from the module's DC circuit. With the breaker turned off, the power supply will not transfer to standby mode. The inverter is disabled and the battery charger is unable to charge the batteries. If a short circuit occurs in the DC circuitry, or battery polarity is accidently reversed, the breaker will trip. 3.
4. STANDARD FEATURES STANDARD FEATURES XP Series Uninterruptible Power Supplies are available in the following packages: XM Series Power Module with standard control logic; Pole-mount enclosure (PME) complete with galvanized mounting brackets, Service Power Inserter (SPI), “High Magnetic” circuit breaker and duplex receptacle. Optional pole (PWE) and ground-mount (UPE and UPE/M) enclosures are available. Batteries are separate. 4.
5. OPTIONAL FEATURES OPTIONAL FEATURES The following options can be ordered factory installed or, in most instances, can be field retrofitted by qualified service personnel. 5.1 APM-XP (Automatic Performance Monitor) The APM-XP is a field replaceable, plug-in logic card that plugs directly into the edge connector located on the back of the main circuit module.
5. OPTIONAL FEATURES 5.7 LA-P (Lightning Arrestor) The LA-P consists of a 350 Joule, Metal Oxide Varistor (MOV). It plugs directly into the enclosure’s convenience outlet, eliminating the need for hard-wired MOVs. Enclosed in a plastic housing, the LA-P is used to provide additional protection from voltage spikes caused by lightning and other power disturbances. No wiring is necessary. 5.
5. OPTIONAL FEATURES 5.17 APP60S (Service Power Supply) The APP60S is a portable, non-standby power supply used to provide conditioned AC power to the load when the main power module is out of service. A front panel switch allows the APP60S to be set for 30 VAC or 60 VAC applications. Used in conjunction with the “Jones” connector and "ALT/ON" switch located on the enclosure's SPI (Service Power Inserter), power can be transferred from the main module to the APP60S without interrupting the load. 5.
5. OPTIONAL FEATURES 5.23 AC Series (Amp Clamp) Alpha Technologies’ Amp Clamps are designed to protect active and passive equipment (such as amplifiers and power inserters) from voltage surges and transients. Amp Clamps can be ordered as retrofit kits, or factory installed in the desired host hardware. A Product/Serial Number label is included with each kit so that retrofitted equipment can be easily identified.
6. INSTALLATION INSTALLATION To ensure operator safety: 1. Power supplies should be installed only by qualified personnel and in accordance with applicable electrical codes. 2. Use eye protection whenever working with batteries. 3. Use only sealed, lead-acid type batteries (gelled-electrolyte or equiv., 55 Ah min.) 4. Use a bucket truck, or suitable climbing equipment such as a safety harness and climbing spikes, whenever installing or servicing pole-mount installations. 6.
6. INSTALLATION 6.2 Pole-mount Enclosure Installation (PME and PWE) PME and PWE enclosures are designed to be mounted on wooden poles; however, special brackets are available for concrete pole applications. Mounting bolts should go completely through the wooden pole and be secured from the back with a large washer and nut. The two galvanized mounting brackets mount between the enclosure and pole. Most codes require the base of the enclosure to be located a minimum height from the ground.
6. INSTALLATION 6.3 Ground-mount Enclosure Installation (UPE and UPE/M) UPE and UPE/M enclosures are designed to bolt directly to a Pedestal Support or concrete pad. Four 1/2" holes are provided in the base of the enclosure to accommodate 3/8" Anchor or J-bolts. Secure the enclosure using a flat washer, lock washer and 3/8" nut at each mounting bolt. Note: Enclosures must be mounted flush with a smooth surface and not over-torqued to prevent damage.
6. INSTALLATION 6.4 Connecting Utility Power CAUTION: THE FOLLOWING SHOULD BE PERFORMED ONLY BY QUALIFIED SERVICE PERSONNEL AND IN COMPLIANCE WITH LOCAL ELECTRICAL CODES. CONNECTION TO UTILITY POWER MUST BE APPROVED BY THE LOCAL UTILITY BEFORE INSTALLING THE POWER SUPPLY. NOTE: UL AND NEC REQUIRE THAT A SERVICE DISCONNECT SWITCH (UL LISTED) BE PROVIDED BY THE INSTALLER AND BE CONNECTED BETWEEN THE POWER SOURCE AND THE ALPHA POWER SUPPLY.
6. INSTALLATION 6.5 Connecting the SPI (Service Power Inserter) Procedure: (Refer to SPI drawing located at the back of the manual) 1. Prepare the incoming coaxial cable. 2. Remove the two screws from the Service Power Inserter and lift off the cover. 3. Loosen the seizure screw on the PCB, (located inside the SPI), to accommodate the center pin of the cable connector. 4. Screw the connector into the output port located on the rear of the PWE or UPE/M (or lower compartment of the PME or UPE) enclosure.
6. INSTALLATION 6.6 Power Module Installation XM Series power modules are placed in the lower-right compartment of PME enclosures; the upper-right compartment of PWE, UPE and UPE/M enclosures. The enclosure's lid lifts and the door(s) can be removed. (Refer to the Module and Battery Placement drawings located at the back of the manual). Procedure: 1. Set the XM Series power module on the enclosure’s shelf. 2. Plug the connector from the SPI (Service Power Inserter) into the module's "AC OUTPUT" connector.
6. INSTALLATION 6.7 Battery Installation and Wiring WHENEVER INSTALLING OR REPLACING BATTERIES, DO NOT ALLOW LIVE BATTERY WIRES TO CONTACT THE ENCLOSURE OR THE POWER MODULE CHASSIS. Insulate any exposed wire ends with electrical tape. Shorting battery wires could result in a fire or possible explosion. Make sure that the power module’s battery circuit is deactivated by switching the battery breaker OFF, or removing the battery fuse. WEAR EYE PROTECTION WHENEVER WORKING WITH BATTERIES.
6. INSTALLATION MONTH: (FEB) 02 YEAR: 1994 BATTERY TYPE: "A" ("FLOAT" Service Battery containing gelled electrolyte acid.) Used for majority of Cable TV applications due to its exceptional service life. A 4 0 2 Typical Battery Date Code Location and Identification Battery Numbering and RTS Placement Number the batteries inside the enclosure, 1 - 3 (left to right), for easy identification. Attach the RTS Battery Temperature Sensor to either side of the center battery using high- strength adhesive tape.
6. INSTALLATION 6.8 Main Circuit Module Removal and Installation The XM Series power module comes with a field-replaceable, main circuit module assembly containing the standard control logic. It is designed to accept APM (Automatic Performance Monitor) and USM (Universal Status Monitor) plug-in logic upgrades to facilitate self-testing and status monitoring. The removable module is located on the left side of the unit.
6. INSTALLATION 6.9 Standard Control Logic The Main Circuit Module assembly comes equipped with circuitry to monitor incoming AC, charge the batteries and control the inverter. The XM Series power module uses a dual-mode (float and equalize) temperature compensated battery charger to maintain the batteries.
6. INSTALLATION 6.9 Standard Control Logic, continued 6.9.2 Float and Equalize Chart Values given for 36V systems calculated at 77oF (25oC) Example: If a particular battery manufacturer calls for a FLOAT of 40.5 volts and EQUALIZE of 41.4 volts, the board's FLOAT jumper is set to FLOAT "2" (40.5 volts). The board's EQUALIZE jumper is set to EQU "1" (0.9 volts). This results in a FLOAT charge of 40.5 volts with an EQUALIZE charge of 41.4 volts (40.5 volts + 0.9 volts = 41.4 volts).
6. INSTALLATION 6.10 APM (Automatic Performance Monitor) The APM is a field-replaceable logic upgrade that allows the XM Series power module to self-test the inverter and batteries at pre-determined intervals and durations. It also allows the battery charger's equalize voltage (interval and duration) to be pre-selected to further optimize battery performance. The APM logic card plugs directly onto the main control board at connector J2 (see illustration on previous page).
6. INSTALLATION 6.11 USM (Universal Status Monitor) The optional, USM status monitoring upgrade plugs directly into the APM logic card. Note: The Main Circuit Module assembly must be completely removed from the power module when installing the USM (see section 6.8). Status monitoring interfaces are listed according to their manufacturer, along with the associated parts. The USM can also accommodate a tamper switch assembly to indicate unauthorized enclosure entries. 1.
6. INSTALLATION 6.11 USM (Universal Status Monitor), continued * ,1 / $ * & * ( ,1 0 6 1 * / 0 0 , 5 $ $ 0 5 7 7 5 $ + 7 / & 7 $ 5 $ / / & / / 6 ( $ 2 $ 2 $ / : $ ,7 6 9 9 $ 6 ( 5 6 / 7 : < < 7 5 * * 7 6 $ 6 7 8 5 % 5 $ 8 8 ( 5 ( 8 ,1 ,1 2 ' ( 7 ( 3 5 ( / / 3 3 7 6 1 & ' 7 7 ' $ $ 1 ; 7 , $ 0 9 2 8 ( 8 ' & & $ 8 7 5 $ 0 $ 6 6 % 2 7 * 2 $ 6 7 + & ,7 3 860 7 7(;6&$1 9,7$/ 6,*16 860 $0 // $0 &20081,&$7,216 /$1JXDUG -(552/' /LIHOLQH 860 & & &25 48,&.
6. INSTALLATION 6.11 USM (Universal Status Monitor), continued 6.11.1 Parallel Configurations USM-T (Texscan Vital Signs "TDM-1A" and "RTDM-1A") Designed for systems utilizing Texscan TDM-1A transponders. Transponders are internally mounted in Alpha power supply enclosures.
6. INSTALLATION 6.11 USM (Universal Status Monitor), continued USM-J (Jerrold "RSM") Designed for systems utilizing Jerrold model “RSM” transponders. Transponders are internally mounted in Alpha power supply enclosures.
6. INSTALLATION 6.11 USM (Universal Status Monitor), continued 6.11.2 Serial Configuration USM-A The USM, used in conjunction with Alpha's status monitoring software, allows the cable operator to remotely manipulate power supply functions, maintain precise data for fault logs and direct service personnel to the exact nature of most malfunctions.
7. OPERATION OPERATION 7.1 XM Power Module Start-up and Testing Once connections have been made to the power module, it should be tested for AC LINE and STANDBY operation before placing it into service. Note: The power module should always be started from utility AC (not batteries). This is because high inrush currents, associated with the start-up of ferroresonant transformers, could place unnecessary stress on the batteries. 7.1.1 AC Line Operation (LINE POWER) 1.
7. OPERATION 7.2 Identifying Modes of Operation In order to fully understand the power supply functions, it is important to recognize the modes of operation indicated by the LEDs in the front panel SYSTEM STATUS, CHARGER STATUS, and optional APM blocks. 7.2.1 System Status Block The SYSTEM STATUS block indicates the utility and battery input status, plus verifies the output of the power supply. The green AC OUTPUT LED should remain ON at all times. 7.2.1.
7. OPERATION 7.2 Identifying Modes of Operation, continued 7.2.2 Charger Status Block The CHARGER STATUS block indicates the battery charging modes: FLOAT, EQUALIZE or RECHARGE. During AC LINE operation, the green "FLOAT" LED remains ON. 7.2.2.1 FLOAT Mode FLOAT LED (green) ON Indicates that the batteries are being FLOAT charged. 7.2.2.2 EQUALIZE Mode EQUALIZE LED (yellow) ON Indicates that the batteries are receiving an EQUALIZE charge.
7. OPERATION 7.2 Identifying Modes of Operation, continued 7.2.3 APM (Automatic Performance Monitor) Status Block On units equipped with an APM logic upgrade, the power module automatically selftests the batteries and inverter at pre-selected intervals. If a failure is detected, either the red "CHECK BATTERIES" or red "CHECK INVERTER" LED in the APM status block will flash to indicate the circuit (AC or DC) that has failed. 7.2.3.
7. OPERATION 7.3 Power Module Shutdown When a power module needs to be removed from service, an Alpha APP60-S Service Power Supply is recommended as an alternate non-standby power source to prevent interruption to the cable plant. Note: When powering down a module, always switch the battery breaker OFF before removing AC, otherwise the module will transfer into inverter operation. Procedure 1. Plug the APP60-S "Jones" connector into the SPI (Service Power Inserter). 2.
8. MAINTENANCE By automating data retrieval, log entry and consistent data formatting, overall maintenance time can be significantly reduced. Data, such as Input Line Voltage, Output Current, Battery Voltage, Battery Charge Voltage (float and equalize), Battery Charge Current, Inverter Events, Accumulated Inverter Run Time, Technician ID Number, Power Supply Address, Test Date and Time, can be retrieved and stored in the DataLogger.
8. MAINTENANCE MAINTENANCE Maintenance should be performed every three to six months. If the power module fails to perform a specific function, refer to the troubleshooting chart. By establishing a routine maintenance program and following the guidelines contained in this manual, the XP Series power supply will continue to provide years of trouble-free operation. Care of the batteries should be the first step in any power supply maintenance program.
8. MAINTENANCE 8.3 Check Battery Voltage Under Load This is the most accurate method to determine the condition of the batteries. CAUTION: Weak or severely discharged batteries can explode when put under load. As an added safety precaution, place the enclosure's door between the technician and batteries before attempting inverter operation. If the batteries appear functional, reconnect the battery connector to the power module and switch the battery breaker ON.
8. MAINTENANCE 8.8 APM Manual Self-test On units equipped with the APM (Automatic Performance Monitor) logic upgrade, selftest can be manually activated to trouble-shoot the batteries and inverter. Press the "TEST/RESET" switch once. The yellow "TEST IN PROGRESS" LED will come ON to indicate test mode. If a failure occurs, either the red "CHECK BATTERIES" or "CHECK INVERTER" LED will flash to indicate the circuit that has failed.
9. TROUBLE-SHOOTING AND REPAIR TROUBLE-SHOOTING AND REPAIR The trouble-shooting guide is designed to display typical symptoms, causes and solutions, starting with the most obvious and working systematically through the unit. Alpha Technologies recommends that the power supply’s maintenance log accompany units brought in for bench service to aid the technician in trouble-shooting the problem. 9.
9. TROUBLE-SHOOTING AND REPAIR 9.
9. TROUBLE-SHOOTING AND REPAIR 9.4 TROUBLE-SHOOTING GUIDE SYMPTOM No output to cable; No AC line power; Green “AC OUTPUT” LED off; Green “LINE POWER” LED off; SYMPTOM No output to cable; AC line power available; Green “AC OUTPUT” LED off; Green “LINE POWER” LED on: SYMPTOM No output to cable; No AC line power; Green “AC OUTPUT” LED off;. Red “STANDBY” LED on: SYMPTOM Incorrect output voltage. PROBABLE CAUSE Utility power outage. REMEDY Use voltmeter to verify input voltage at receptacle.
9. TROUBLE-SHOOTING AND REPAIR 9.4 TROUBLE-SHOOTING GUIDE, continued SYMPTOM Low output voltage when unit is in STANDBY mode. PROBABLE CAUSE Defective inverter transistors. REMEDY Replace power board assembly. SYMPTOM No output voltage when attempting to transfer from LINE to STANDBY; “Clicking” sound from contactor. PROBABLE CAUSE Battery breaker off. REMEDY Switch battery breaker on. Battery voltage below recharge acceptance level.
9. TROUBLE-SHOOTING AND REPAIR 9.4 TROUBLE-SHOOTING GUIDE, continued SYMPTOM Incorrect, or no float or equalize charge voltages: PROBABLE CAUSE Battery breaker off. REMEDY Switch battery breaker on. Jumpers at JP1 incorrectly set on main circuit module. Check jumpers. (See section 6.9) Charger fuse F301 open (on main circuit module). Replace 10 Amp fuse. Faulty logic. Replace main circuit module. Charger transistors damaged. Replace power board. PROBABLE CAUSE Inverter transistors damaged.
10. WARRANTY WARRANTY. Alpha Technologies, Inc., provides a LIMITED WARRANTY covering the performance of its Broadband products. The terms and conditions of the LIMITED WARRANTY STATEMENT are contained in a separate written LIMITED WARRANTY STATEMENT included with the Operator’s manual provided with this product. If there are any warranty claims, the purchaser (or purchaser’s representative) must follow the LIMITED WARRANTY guidelines, described in the applicable LIMITED WARRANTY STATEMENT.
USA & LATIN AMERICA Alpha Technologies 3767 Alpha Way Bellingham, WA 98226 Tel: (360) 647-2360 Fax: (360) 671-4936 CANADA & ASIA PACIFIC Alpha Technologies 7033 Antrim Avenue Burnaby, B.C. V5J 4M5 Tel: (604) 430-1476 Fax: (604) 430-8908 UNITED KINGDOM Alpha Technologies Cartel Business Estate Edinburgh Way Harlow, Essex CM20 2DU Tel: +44-1279-422110 Fax: +44-1279-423355 GERMANY Alpha Technologies Hansastrasse 8 D-91126 Schwabach Tel: +49-9122-997303 Fax: +49-9122-997321 MIDDLE EAST Alphatec P.O.