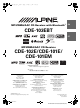
01CT00CDE101E.book Page 0 Monday, November 3, 2008 9:58 AM R MP3/WMA/AAC CD Receiver with Bluetooth® EN CDE-103EBT CT MP3/WMA/AAC CD Receiver CDE-102E/CDE-101E/ CDE-101EM • OWNER’S MANUAL Please read before using this equipment. • 用戶手冊 請在使用本設備之前先閱讀用戶手冊。 ALPINE ELECTRONICS MARKETING, INC. 1-1-8 Nishi Gotanda, Shinagawa-ku, Tokyo 141-0031, Japan Phone 03-5496-8231 ALPINE ELECTRONICS OF AMERICA, INC. 19145 Gramercy Place, Torrance, California 90501, U.S.A.
01GB00CDE101E.book Page 1 Monday, November 3, 2008 10:12 AM ENGLISH Contents Operating Instructions Sound Setting Adjusting Subwoofer Level/Bass Level/Treble Level/Balance (Between Left and Right)/Fader (Between Front and Rear)/Defeat ............... 12 Setting the Bass Control ................................. 12 WARNING Setting the Treble Control ............................... 13 WARNING ................................................. 3 Adjusting the High Pass Filter ........................
01GB00CDE101E.book Page 2 Monday, November 3, 2008 10:12 AM BLUETOOTH (CDE-103EBT only) iPhone/iPod (Optional) Setup Before Using ......................................... 18 About Bluetooth .......................................... 18 Before Using Hands-Free Function ............ 18 How to connect to a Bluetooth compatible device (Pairing) ........................................ 18 Bluetooth SETUP ........................................... 18 Bluetooth Setup Operation ..........................
01GB00CDE101E.book Page 3 Monday, November 3, 2008 10:12 AM Operating Instructions WARNING DO NOT PLACE HANDS, FINGERS OR FOREIGN OBJECTS IN INSERTION SLOTS OR GAPS. Doing so may result in personal injury or damage to the product. WARNING This symbol means important instructions. Failure to heed them can result in serious injury or death. DO NOT OPERATE ANY FUNCTION THAT TAKES YOUR ATTENTION AWAY FROM SAFELY DRIVING YOUR VEHICLE.
01GB00CDE101E.book Page 4 Monday, November 3, 2008 10:12 AM Never Attempt the Following Installation Location Do not grip or pull out the disc while it is being pulled back into the player by the automatic reloading mechanism. Do not attempt to insert a disc into the unit when the unit power is off.
01GB00CDE101E.book Page 5 Monday, November 3, 2008 10:12 AM On handling Compact Discs (CD/CD-R/CD-RW) • • • • • • Do not touch the surface. Do not expose the disc to direct sunlight. Do not affix stickers or labels. Clean the disc when it is dusty. Make sure that there are no bumps around the disc. Do not use commercially available disc accessories. Do not leave the disc in the car or the unit for a long time. Never expose the disc to direct sunlight.
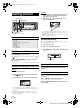
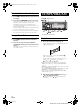
01GB00CDE101E.book Page 6 Monday, November 3, 2008 10:12 AM Attaching Getting Started 1 2 Rotary encoder SOUND/SETUP SOURCE/ (Release) /MUTE / /ENT Push the left side of the front panel until it locks firmly into the main unit. • Before attaching the front panel, make sure that there is no dirt or dust on the connector terminals and no foreign object between the front panel and the main unit.
01GB00CDE101E.book Page 7 Monday, November 3, 2008 10:12 AM Setting Time 1 2 Radio Press and hold SOUND/SETUP for at least 2 seconds to activate the SETUP mode. Turn the Rotary encoder to select the CLOCK ADJ mode, and then press / /ENT. SOURCE/ BAND The time indication will blink. 3 4 5 6 Turn the Rotary encoder to adjust the hours while the time indication is blinking. When the hour has been adjusted, press / /ENT. TUNE/A.
01GB00CDE101E.book Page 8 Monday, November 3, 2008 10:12 AM Presetting Stations Automatically 1 2 Press BAND repeatedly until the desired radio band is displayed. CD/MP3/WMA/AAC SOURCE/ Rotary encoder Press and hold TUNE/A.ME for at least 2 seconds. The frequency on the display continues to change while the automatic memory is in progress. The tuner will automatically seek and store 6 strong stations in the selected band. They will be stored into preset buttons 1 to 6 in order of signal strength.
01GB00CDE101E.book Page 9 Monday, November 3, 2008 10:12 AM 3 Press or to select the desired track (file). CD mode : Returning to the beginning of the current track (file): Press . Fast backward: Press and hold . Advancing to the beginning of the next track (file): Press . Fast forward: Press and hold 4 5 MP3/WMA/AAC mode : : Only a file is repeatedly played back. . / To pause playback, press Pressing : Only a track is repeatedly played back. /ENT.
01GB00CDE101E.book Page 10 Monday, November 3, 2008 10:12 AM Searching for CD Text Quick Search On discs utilizing CD Text, songs can be searched and played by using their recorded titles. For discs without CD Text, searches are made using the track numbers associated with each song. You can search for tracks (files). 1 /ESC during play. Press This will set the search mode, and the “ up. 2 ” indicator lights Turn the Rotary encoder to select the desired track, and then press / /ENT.
01GB00CDE101E.book Page 11 Monday, November 3, 2008 10:12 AM Supported playback sampling rates and bit rates Order of files Files are played back in the order that the writing software writes them to the disc. Therefore, the playback order may not be what is expected. Verify the writing order in the software’s documentation. The playback order of the folders and files is as follows. MP3 Sampling rates: 48 kHz, 44.1 kHz, 32 kHz, 24 kHz, 22.05 kHz, 16 kHz, 12 kHz, 11.
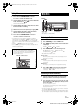
01GB00CDE101E.book Page 12 Monday, November 3, 2008 10:12 AM Sound Setting Rotary encoder (AUDIO/LOUD) SOURCE/ BAND Setting the Bass Control You can change the Bass Frequency emphasis to create your own tonal preference. 1 Press SOUND/SETUP repeatedly to select the BASS mode. BASS TREBLE HPF BASS Setting the Bass Centre Frequency 2-1 Press BAND to select the desired bass centre frequency. /ESC SOUND/SETUP 80 Hz * This illustrator is CDE-103EBT.
01GB00CDE101E.book Page 13 Monday, November 3, 2008 10:12 AM Setting the Treble Control Turning Loudness On/Off You can change the Treble Frequency emphasis to create your own tonal preference. Loudness introduces a special low- and high-frequency emphasis at low listening levels. This compensates for the ear’s decreased sensitivity to bass and treble sound. 1 Press SOUND/SETUP repeatedly to select the TREBLE mode.
01GB00CDE101E.book Page 14 Monday, November 3, 2008 10:12 AM About the indication display Other Functions When displaying Text, the following indicators are lit according to the mode. Indicator/ Mode SOURCE/ CD Mode MP3/WMA/AAC/ iPhone/iPod/BT USB AUDIO AUDIO*4 Mode Mode –– Folder Name*2 being displayed –– Artist Name*1 Artist Name*1 being displayed being displayed –– VIEW * This illustrator is CDE-103EBT.
01GB00CDE101E.book Page 15 Monday, November 3, 2008 10:12 AM Using the Front AUX Input Terminal (CDE-103EBT/CDE-102E only) Connect a portable music player, etc. by simply connecting it to the input on the front panel. An optional adapter cable is required (standard RCA to 3.5ø mini-phono plug or 3.5ø to 3.5ø mini phono plug). Press SOURCE/ , and select the AUX mode to listen to the portable device.
01GB00CDE101E.book Page 16 Monday, November 3, 2008 10:12 AM Bluetooth Setting Setting the Bluetooth Connection (BT IN) BT ADAPTER / BT OFF (Initial setting) With Bluetooth technology, you can place a hands-free call by a Bluetooth-equipped mobile phone. CDE-102E/CDE-101E/CDE-101EM: If an optional Buletooth INTERFACE (KCE-400BT) is connected, make this setting when the Bluetooth function is used. For details, refer to the Owner’s Manual of the optional Bluetooth INTERFACE (KCE-400BT).
01GB00CDE101E.book Page 17 Monday, November 3, 2008 10:12 AM Connecting to an External Amplifier (POWER IC) When an external amplifier is connected, sound quality can be improved by stopping the power supply of the built-in amplifier. POW OFF: Setting the AUX+ SETUP Mode AUX+ ON / AUX+ OFF (Initial setting) POW ON (Initial setting) / POW OFF Use this mode when the line output of this unit is used to drive an external amplifier.
01GB00CDE101E.book Page 18 Monday, November 3, 2008 10:12 AM BLUETOOTH (CDE-103EBT only) How to connect to a Bluetooth compatible device (Pairing) For details on the control from a Bluetooth compatible device, refer to the Owner’s Manual of the Bluetooth compatible device. 1 Rotary encoder /VOICE DIAL SOUND/SETUP 2 Set a Bluetooth connection from a Bluetooth compatible device. The PIN code (“0000”) is displayed on the connected unit. • The PIN code is fixed as “0000.
01GB00CDE101E.book Page 19 Monday, November 3, 2008 10:12 AM Setting the Bluetooth Device Displaying the phone service provider name Select one of 5 connected Bluetooth compatible devices that you previously registered (the fifth registered by guest mode*). Setting item : SEV NAME Setting item: PAIRED DEV Turn the Rotary encoder to select a Bluetooth compatible device you want to use (you want to change connection) and then press / /ENT.
01GB00CDE101E.book Page 20 Monday, November 3, 2008 10:12 AM Hands-Free Phone Control About the Hands-Free Phone Hands-free calls are possible when using a HSP (Head Set Profile) and HFP (Hands-Free Profile) compatible mobile phone with this unit. • Avoid answering a hands-free call in heavy traffic or on narrow or winding streets. • Close the windows while calling to reduce background noise.
01GB00CDE101E.book Page 21 Monday, November 3, 2008 10:12 AM Dialing a Number In The Phone Book Up to 1,000 telephone numbers are downloadable from a mobile phone. Dial a call by selecting a person from the phone book list. USB memory (Optional) Setting item: PHONE BOOK • If a name cannot be obtained via the phonebook, “ ” is displayed. • The order of the list display depends on the design of the mobile phone.
01GB04CDE101E.fm Page 22 Thursday, November 6, 2008 1:22 PM USB Memory Connection (Optional) iPhone/iPod (Optional) Connect USB memory 1 2 SOURCE/ Open the cover of the USB connection terminal. Rotary encoder 1 2 45 6 Connect the USB memory directly to the USB connection terminal, or via the USB cable.
01GB 00CD E101E.book Page 23 M onday, N ovember 3, 2008 10:12 A M 1 Playback 1 The “ Press SOURCE/ TUNER DISC BT AUDIO*3 to switch to the iPod mode. Press or to select the desired song. Fast backward through current song: Press and hold . Advance to the beginning of the next song: Press . Fast forward through current song: Press and hold . To pause playback, press Pressing / / /ESC to activate the search selection mode. ” indicator lights up.
01GB00CDE101E.book Page 24 Monday, November 3, 2008 10:12 AM Direct Search Function Random Play Shuffle (M.I.X.) The unit’s direct search function can be used to search for an album, song, etc., more efficiently. In PLAYLIST/ARTIST/ALBUM/SONG/ PODCAST/GENRE/COMPOSER/AUDIOBOOK mode, you can quickly target any song. The Shuffle function of the iPhone/iPod is displayed as unit.
01GB00CDE101E.book Page 25 Monday, November 3, 2008 10:12 AM Repeat Play Only Repeat One is available for the iPhone/iPod. Repeat One: A single song is repeatedly played back. 1 Press 4. The song is played back repeatedly. (off) (Repeat One) 2 To cancel repeat play, select (off) with the above procedure. • During repeat playback, no other songs are selectable by pressing or . Displaying the Text You can display the tag information of a song in the iPhone/iPod. Press VIEW.
01GB00CDE101E.book Page 26 Monday, November 3, 2008 10:12 AM Information In Case of Difficulty If you encounter a problem, please turn the power off, then on again. If the unit is still not functioning normally, please review the items in the following checklist. This guide will help you isolate the problem if the unit is at fault. Otherwise, make sure the rest of your system is properly connected or consult your authorized Alpine dealer. Basic No function or display. • Vehicle’s ignition is off.
01GB00CDE101E.book Page 27 Monday, November 3, 2008 10:12 AM Audio The sound is not output from the speakers. • Unit has no output signal of the internal amplifier. - POWER IC is switched to “POW ON” (page 17). iPod iPod does not play and no sound is output. • The iPod has not been recognised. - Reset this unit and the iPod. Refer to “Initial System Start-Up” (page 6). To reset the iPod, refer to the Owner’s Manual of the iPod. Indication for CD Player • No CD is inserted. - Insert a CD.
01GB00CDE101E.book Page 28 Monday, November 3, 2008 10:12 AM Indication for iPod Mode • The iPhone/iPod is not connected. - Make sure the iPhone/iPod is correctly connected (refer to “Connections”). Make sure the cable is not bent excessively. • There are no songs in the iPhone/iPod. - Download songs to the iPhone/iPod and connect to this unit. • Communication error. - Turn the ignition key off, and then set to ON again. - Reset the iPod.
01GB00CDE101E.book Page 29 Monday, November 3, 2008 10:12 AM GENERAL Specifications Power Requirement FM TUNER SECTION Tuning Range Mono Usable Sensitivity 50 dB Quieting Sensitivity Alternate Channel Selectivity Signal-to-Noise Ratio Stereo Separation Capture Ratio 87.5-108.0 MHz 9.3 dBf (0.8 µV/75 ohms) 13.5 dBf (1.3 µV/75 ohms) 80 dB 65 dB 35 dB 2.0 dB AM TUNER SECTION Tuning Range Sensitivity (IEC Standard) 531-1,602 kHz 22.
01GB00CDE101E.book Page 30 Monday, November 3, 2008 10:12 AM Installation and Connections Before installing or connecting the unit, please read the following and pages 3 to 5 of this manual thoroughly for proper use. Caution HAVE THE WIRING AND INSTALLATION DONE BY EXPERTS. Warning MAKE THE CORRECT CONNECTIONS. The wiring and installation of this unit requires special technical skill and experience. To ensure safety, always contact the dealer where you purchased this product to have the work done.
01GB00CDE101E.book Page 31 Monday, November 3, 2008 10:12 AM Reinforce the head unit with the metal mounting strap (not supplied). Secure the ground lead of the unit to a clean metal spot using a screw (*1) already attached to the vehicle’s chassis. Installation • For the screw marked “*2”, use an appropriate screw for the chosen mounting location. Connect each input lead coming from an amplifier to the corresponding output lead coming from the left rear of the CDE-103EBT/CDE-102E/CDE-101E/ CDE-101EM.
01GB00CDE101E.
01GB00CDE101E.book Page 33 Monday, November 3, 2008 10:12 AM Antenna Receptacle Left Rear (+) Speaker Output Lead (Green) Power Antenna Lead (Blue) Left Rear (–) Speaker Output Lead (Green/Black) Connect this lead to the +B terminal of your power antenna, if applicable. Left Front (–) Speaker Output Lead (White/Black) • This lead should be used only for controlling the vehicle’s power antenna. Do not use this lead to turn on an amplifier or a signal processor, etc.