R EN Mobile Multimedia Station IVA-D900 FR ES DIGITAL VIDEO • OWNER'S MANUAL Please read before using this equipment. ES • MODE D'EMPLOI Veuillez lire avant d'utiliser cet appareil. • MANUAL DE OPERACIÓN Léalo antes de utilizar este equipo. IT ALPINE ELECTRONICS MARKETING, INC. 1-1-8 Nishi Gotanda, Shinagawa-ku, Tokyo 141-0031, Japan Phone 03-5496-8231 ALPINE ELECTRONICS OF AMERICA, INC. 19145 Gramercy Place, Torrance, California 90501, U.S.A.
CHA-S634 CHA-1214 • CD changer for IVA-D900. • Changeur CD pour IVA-D900. • Cambiador de CD para IVA-D900. • CD changer for IVA-D900. • Changeur CD pour IVA-D900. • Cambiador de CD para IVA-D900. CHM-S630 Alpine CD Changers Give You More! More musical selections, more versatility, more convenience. The CHA-S634 is a high-performance 6-disc changer with a new M DAC, CD-R/RW PLAY BACK, MP3 PLAY BACK and CD TEXT.
ENGLISH Contents Operating Instructions WARNING WARNING .................................................. 4 CAUTION ................................................... 4 PRECAUTIONS ......................................... 5 Discs playable on this unit ...................... 6 Getting Started Basic Operation ................................................. 8 Turning Power On or Off .................................. 9 Detaching and Attaching the Front Panel ......... 9 Initial System Start-Up .........
Setup DVD Setup DVD Setup Operation ..................................... 28 Changing the language setting ........................ 28 Setting of the Menu Language ........................ 28 Setting of the Audio Language ....................... 28 Setting of the Subtitle Language ..................... 29 Changing the Country Code Setting ............... 29 Setting the Rating Level (Parental Lock) ........ 29 Changing the Digital Output Setting .............. 30 Setting the Digital Output ..................
External Audio Processor (Optional) Adjustment Procedure for Dolby Surround .... 44 Setting the Speakers ........................................ 45 Set MX Mode of the External Audio Processor .... 45 X-OVER Adjustment ...................................... 46 Performing Time Correction Manually (TCR)/ Swithing the Phase .................................... 46 Graphic Equalizer Adjustments ...................... 47 Parametric Equalizer Adjustments .................. 47 BASS COMP. Setting ...................
Operating Instructions WARNING USE THE CORRECT AMPERE RATING WHEN REPLACING FUSES. Failure to do so may result in fire or electric shock. WARNING This symbol means important instructions. Failure to heed them can result in serious injury or death. INSTALL THE PRODUCT CORRECTLY SO THAT THE DRIVER CANNOT WATCH TV/VIDEO UNLESS THE VEHICLE IS STOPPED AND THE EMERGENCY BRAKE IS APPLIED. It is dangerous (and illegal in many states) for the driver to watch TV/Video while driving a vehicle.
Irregular Shaped Discs PRECAUTIONS Temperature Be sure the temperature inside the vehicle is between +45°C (+113°F) and 0°C (+32°F) before turning your unit on. Be sure to use round shaped discs only for this unit and never use any special shaped discs. Use of special shaped discs may cause damage to the mechanism. Moisture Condensation You may notice the disc playback sound wavering due to condensation.
Discs playable on this unit Disc Accessories There are various accessories available on the market for protecting the disc surface and improving sound quality. However, most of them will influence the thickness and/or diameter of the disc. Using such accessories can cause operational problems. We recommend not using these accessories on discs played in Alpine DVD players. Transparent Sheet Playable Discs The discs listed below can be played on this unit. Mark (logo) Recorded content Disc size Max.
If you use unspecified compact discs, correct performance cannot be guaranteed. You can play CD-Rs (CD-Recordable)/CD-RWs (CDReWritable) which have been recorded only on audio devices. You can also play CD-Rs/CD-RWs containing MP3 formatted audio files. • Some of the following Discs may not play on this unit: Flawed Discs, Discs with fingerprints, Discs exposed to extreme temperatures or sunlight (e.g.
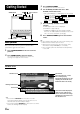
3 Getting Started TILT OPEN/CLOSE FLAT/SLIDE , 4 Action indicator MUTE Press SOURCE/POWER. The display shows the main menu screen. Turn the Rotary encoder and select "DVD PLAYER" from the main menu. • If an optional DVD player or DVD Changer is connected and its power is on, the display shows " EXT.DVD or DVD CHG , AUX2 " instead of " AUX1 AUX2 ." • If both the optional DVD player and DVD Changer are connected, the display shows " EXT.DVD " instead of " AUX1 ", and " DVD CHG " instead of " AUX2 ".
Compatibility with Factory Steering Wheel Radio Controls If your vehicle has steering wheel controls for the radio, an optional steering wheel control interface may be available to connect to your Alpine radio. For details, contact your Alpine dealer. Attaching 1 2 Insert the left side of the front panel into the main unit. Align the groove on the front panel with the projections on the main unit. Push the right side of the front panel until it locks firmly into the main unit.
Selecting the Monitor Opening Angle The monitor opening angle can be set in 2 positions. Press and hold FLAT/SLIDE for at least 2 seconds while the monitor is being raised. Each press changes the monitor angle back or forth. Adjusting the Volume/Balance (Between Left and Right)/Fader (Between Front and Rear)/ Defeat 1 Press the Rotary encoder repeatedly until the mode you wish to adjust is obtained.
Manual Storing of Station Presets Radio 1 2 3 Tune in a desired radio station you wish to store in the preset memory by manual or automatic seek tuning. Press 7 (PAGE 1/2). 3 5 Press and hold any one of the Function buttons 1 (P.SET1) through 6 (P.SET6) for at least 2 seconds. 2 6 The selected station is stored. 1 7 4 4 Repeat the procedure to store up to 5 other stations onto the same band. To use this procedure for other bands, simply select the band desired and repeat the procedure.
3 CD/MP3 Press 1 ( g) or 3 ( f) to select the desired track (file). Returning to the beginning of the current track (file): Press 1 ( g). Fast backward : Press and hold 1 ( g). Advancing to the beginning of the next track (file) : Press 3 ( f). 4 3 5 Fast forward : Press and hold 3 ( f). 2 1 7 To pause playback Press 2 ( -/J). Pressing 2 ( -/J) again will resume playback. To eject the disc Rotary encoder SOURCE/POWER c Playback 1 2 Press SOURCE/POWER to display the main menu screen.
M.I.X. (Random Play) Press 5 (M.I.X.) in the play or pause mode. The tracks (files) on the disc will be played back in a random sequence. To cancel M.I.X. play, press 5 (M.I.X.) again. CD: M.I.X. → MP3: *1 *2 ∗2 About MP3 CAUTION Except for personal enjoyment, duplicating audio data (including MP3 data) or distributing, transferring, or copying it, whether for free or for a fee, without the permission of the copyright holder is strictly prohibited by the Copyright Act and by international treaty. ∗1 M.
Formats supported This device supports CD-ROM XA, Mixed Mode CD, Enhanced CD (CD-Extra) and Multi-Session. This device cannot correctly play back discs recorded with Track At Once or packet writing. Order of tracks The unit plays the files in the order that the writing software writes them. Therefore, the playing order may not be the same as the order you input. The playback order of the folders and files is as follows. However, the folder and file playback order differs from the folder no. and file no.
To display the DVD mode screen To watch a video source, your vehicle must be parked with the ignition key in the ACC or ON position. To do this, follow the procedure below. 1. Push the foot brake to bring your vehicle to a complete stop at a safe location. Engage the parking brake. 2. Keep pushing the foot brake and release the parking brake once then engage it again. 3. While the parking brake is being engaged the second time, release the foot brake.
If a menu screen appears On DVDs and Video CDs with playback control (PBC), menu screens may appear automatically. If this happens, perform the operation described below to start playback. DVD menu 1 Press 7(PAGE 1/3) twice. The Function Guide is switched. 2 Use 1('), 2(.), 3(/) or 4(;) to select the desired item, then press 5(ENTER). To check the disc working status during play 1 Press V.SEL when your vehicle stops. Each pressing switches the visual source. The menu screen of the DVD mode is displayed.
Fast-forwarding/Fast-reversing Slow Motion Playback 1 1 When 3 ( f ) is pressed and held in while in the pause mode, the 1/8th speed slow motion playback mode is set. When held in for 5 more seconds, the slow motion speed switches to 1/2 the normal speed. 2 Release 3 ( f ) to pause, and press 2 ( :/J ) to playback. During playback, press and hold 1 ( g ) (fastreverse) or 3 ( f ) (fast-forward). When pressed for more than 1 second, the disc is forwarded/reversed at double speed.
Searching by Title Number (DVD only) Use this function to easily find positions on the DVD using the DVD’s titles. 1 When the playback stops, input the number of the title you want to play using the number buttons (“0” to “9”) on the supplied remote control. • This function cannot be used on discs on which no title numbers are recorded. • Press DEL. to delete the last digit in the title number. Press and hold DEL. for at least 2 seconds to clear all title numbers.
Switching the Subtitles (Subtitle Language) (DVD only) With DVDs on which multiple subtitle languages are recorded, the subtitle language can be switched during playback; moreover, subtitles can be hidden. 1 2 During playback, 7 (PAGE 1/3). Displaying the Disc Status for DVD Use the procedure described below to display the status (title number, chapter number, etc.) of the currently playing DVD on the monitor screen. 1 The Function Guide is displayed. Press 3 (SUB.T).
4 Sound Setting 5 After pressing 2 (ON), press 3 (SETUP). MX list screen is displayed. Turn the Rotary encoder to select your desired MX mode. The screen shows the *Function Guide. *Displays the function assigned for each button. 6 4 3 5 2 6 1 7 MX MP3 (OFF, MP3 1 to 3)/MX XM (OFF, XM1 to 3) /MX MD (OFF, MD1 to 3) This corrects information that was omitted at the time of compression. This reproduces a well-balanced sound close to the original.
Setting the Bass Engine The following steps 1 to 7 are common operations to each “Setting item” of bass engine Setup. Refer to each section for details. 1 Press SOURCE/POWER. The main menu screen is displayed. 2 Press 4 (A.PROC). A.PROC (Audio processor) list screen is displayed. 3 4 Turn the Rotary encoder to select “bass engine.” Press 1 (SETUP) . The bass engine list screen is displayed. 5 Turn the Rotary encoder to select your desired sound setting. The screen shows the *Function Guide.
Example 2. Listening Position: All Seats About the Time Correction The distance between the listener and the speakers in a car vary widely due to the special conditions of the mobile environment. This difference in the distances from the speakers to the listener creates a shift in the sounds image and frequency characteristics. This is caused by the time delay between the sound reaching the listener’s right versus left ear.
Example of Bass Focus Setting 1 After entering corrections for the front (left and right) speakers in STEP 15, the time difference is 1.5 ms for both front-left and front-right speakers. Time Correction Setting item: TIME CORRECTION Setting contents: TIME DN/UP/FRONT-LEFT/FRONT-RIGHT/ REAR-LEFT/REAR-RIGHT Before performing the following procedures, refer to “About the Time Correction” (page 22). Selecting the speaker: 1.5ms 1.5ms Select the speaker among 3 (FRONT-LEFT) through 6 (REAR-RIGHT).
Other Useful Features 3 Turn the Rotary encoder and select the desired character for the first position. To change between upper case, lower case, numeral and symbol, press 3 (A/1). Each press changes the bottom menu. 4 The first character has been memorized at the first position. See "notes at the right" on this page. 4 3 5 2 6 1 7 When the character for the first position has been selected, press the Rotary encoder. 5 Repeat steps 3 and 4 to enter the rest of characters.
3 Press the Rotary encoder. The selected title starts to play, and the screen returns to the Radio mode. To display the folder list or the file list of MP3 disc 1 Press 6 (NEXT :) while the disc title list is displayed. The folder title list of the selected disc is displayed. 2 Turn the Rotary encoder to select the desired folder. 3 Press 6 (NEXT :) to display the file (track) list of the selected folder. To return to the previous screen, press 5 (; BACK).
MUTE/DISP. OFF DEMO Switching Display Modes After carrying out the steps 1 to 3 of "To display the DVD mode Screen" explained on page 28, perform the operation described below. Press and hold WIDE/DISP for at least 2 seconds in the visual source. Each press changes the display modes as follows: 2 MODE 1 → MODE 2 → MODE 3 → MODE 1 (WIDE) (NORMAL) (CINEMA) (WIDE) MODE1 SPE.ANA. Rotary encoder WIDE/DISP.
Displaying the Spectrum Analyzer Depending on the external audio processor connected to the unit, this function may not work properly. 1 2 When one of the sources except for the video source is selected, press SPE.ANA. to turn on the spectrum analyzer mode. Each time you press SPE.ANA, the spectrum analyzer modes change. Switching the Visual Source Only (Simul Function) You can watch the video portion of another source while listening to the current source.
4 Setup Turn the Rotary encoder to select your desired setting item. The screen shows the ∗Function Guide. * Displays the function assigned for each button (the Function buttons). DVD Setup Setting items: MENU LANGUAGE ↔ AUDIO LANGUAGE ↔ SUB T. LANGUAGE ↔ COUNTRY CODE ↔ PARENTAL ↔ DIGITAL OUT MODE ↔ OPT.
Setting of the Subtitle Language Setting item: SUB T. LANGUAGE Setting contents: AUTO / ENGLISH / GERMAN / FRENCH / JAPAN / CODE Set the language of the subtitles displayed on the screen. • When “AUTO” is selected, the primary subtitle language among the recorded ones is played. To play in a language other than those displayed 1 Press 6 (CODE) of the Function buttons. Number input box is displayed. 2 Turn the Rotary encoder to input the first digit of the language number.
Changing the Digital Output Setting Use the following procedure to set the digital audio signal output from the IVA-D900. Setting item: DIGITAL OUT MODE Setting contents: AUTO / LPCM AUTO: The digital output is switched automatically according to the type of audio signals being played. Be sure to select “AUTO” when you want to connect a digital audio processor and play Dolby Digital audio. “AUTO” is the factory setting.
Setting the Digital Output To connect an audio processor using the optical digital output, set to “ON” by the following procedure. GENERAL Setup Setting item: OPT.OUT Setting contents: OFF / ON • Afterwards, set ACC to OFF once, then turn it ON again. The setting of Digital Output is decided. 4 5 3 Setting the TV Screen Setting 6 2 Use the procedure described below to set the output screen according to the type of TV monitor (rear monitor) being used.
4 Turn the Rotary encoder to select your desired setting item. The screen shows the ∗Function Guide. * Displays the function assigned for each button (the Function buttons). Setting items: MONITOR OPEN/CLOSE ↔ V.SEL KEY ↔ MULTI SESSION PLAY ↔ BEEP ↔ CLOCK ↔ CLOCK ADJUST ↔ DAYLIGHT SAVING TIME ↔ ∗PHONE RECEIVE * Displayed only when Mobile Hub (CXA-B200NK) is connected. 5 6 Press the Function buttons to switch the setting. Press 7 (RETURN). The screen returns to the previous one.
System Setup Operation To display the System mode screen: To watch a video source, your vehicle must be parked with the ignition key in the ACC or ON position. To do this, follow the procedure below. 1. Brake to bring your vehicle to a complete stop at a safe location. Engage the parking brake. 2. Keep pushing the foot brake and release the parking brake once then engage it again. 3. When the parking brake is engaged for the second time, release the foot brake.
Name External Equipment to be Displayed When more than one external device is connected, you can name each (up to 3) as you like. Setting items: AUX IN 1 to 3 MODE Setting contents: AUX / VCR / GAME 1,2 / TV • The selected source name is displayed instead of AUX source name. When a source is selected, the Function Guide of AUX mode appears. • Only AUX IN 3 MODE can be named “TV.” When AUX mode is selected, “TV” is displayed as the source name and the Function Guide of TV mode appears.
Display Setup Operation To display the Display mode screen: To watch a video source, your vehicle must be parked with the ignition key in the ACC or ON position. To do this, follow the procedure below. 1. Bring your vehicle to a complete stop at a safe location. Engage the parking brake. 2. Keep pushing the foot brake and release the parking brake once then engage it again. 3. When the parking brake is engaged for the second time, release the foot brake.
Navigation System (Optional) Rotary encoder V.SEL SOURCE/POWER Auxiliary Device (Optional) Rotary encoder SOURCE/POWER Controlling the Navigation System (Optional) Operating Auxiliary Devices (Optional) If an optional Alpine Navigation System is connected to the IVAD900, some of its functions can be controlled from the IVA-D900. To operate your devices connected to the AUX terminals on the rear panel of IVA-D900, follow the procedure described below. 1 2 Press SOURCE/POWER.
Changer (Optional) To activate your auxiliary devices: To watch a video source, your vehicle must be parked with the ignition key in the ACC or ON position. To do this, follow the procedure below. 1. Bring your vehicle to a complete stop at a safe location. Engage the parking brake. 2. Keep pushing the foot brake and release the parking brake once then engage it again. 3. When the parking brake is engaged for the second time, release the foot brake.
When a 12-Disc CD Changer is connected; You can select the disc numbers 1 to 6 in the same manner as for 6-disc Changer. Press 7 (PAGE 1/3) twice to select the disc numbers 7 to 12. The Function Guide display changes and now the Function buttons 1-6 represent disc numbers 7-12. XM Radio (Optional) • After selecting the desired setting, you can operate in the same way as for the CD player. For details, see the CD/MP3 section • Press BAND to switch the Disc mode in the CD/DVD/Changer mode.
Tuning in to Categorized Programs Checking the XM Radio ID Number You can listen to programs categorized to the same group one after another. You need to provide XM with the unique XM Radio ID number for your XM Radio Receiver in order to subscribe to XM's programming. 1 In XM mode, press 4 (CAT). 2 Press 2(CH/CAT) to select the category tuning. 3 While the category name is displayed, press 1 (;CAT DN) or 3 (CAT UP :) to select a desired category. The category of the current program is displayed.
Displaying the Category/Channel Name Title List 1 2 3 In XM mode, press LIST/INPUT. MobileHub™ Link (Optional) The category title list is displayed. Turn the Rotary encoder to move the cursor to the desired category. Press the Rotary encoder. The lowest channel in the selected category is tuned. To display the channel name list 1 While the title List is displayed in step 2 above, press 6 (NEXT :). The channel name in the selected category is switched to the list display.
• With a junction box connected outgoing, incoming, and sending history will also be recorded in the portable telephone. • While telephoning, Time Correction is set to normal (0.0ms) and DEFEAT is also set to ON. When the call has finished, the unit returns to the setting which you previously set. • The telephone volume can be adjusted from the IVA-D900. The volume you set during the call is memorized, and is automatically applied again on the next call.
Calling by the address book From your vehicle, call from the address book registered in the portable telephone. 1 Press and hold the Rotary encoder for more than 2 seconds. The Speed Dial display appears. 2 Press 7 (RETURN). 3 Press 2 (PHONE BOOK). 4 The Telephone menu display appears. The Phone Book display appears. Turn the Rotary encoder to select a receiver, then press the Rotary encoder . The Select display appears.
Sending a standardized sentence You can select a standardized sentence when you send a mail. 1 Press and hold the Rotary encoder for more than 2 seconds. The Speed Dial display appears. 2 Press 7 (RETURN). 3 Pres the 6 (SMS WRITE). 4 5 6 The Telephone menu display appears. The Standardized sentences are displayed. Turn the Rotary encoder to select your desired sentence. Press the Rotary encoder. The Send menu display appears.
External Audio Processor (Optional) Adjustment Procedure for Dolby Surround Make the adjustments described below in order to reproduce Dolby Digital and DTS sound with greater accuracy. Adjustment procedure When an external audio processor is connected to this unit, you can operate it from this unit. Some audio processors may not be operated. When PXA-H510 or PXA-H900 is connected, some of the operations may not be performed from this unit. In this case, operate them in the connected product.
Set MX Mode of the External Audio Processor 4 Before performing the operations below, set MX (Media Xpander ) mode of the external audio processor to “AUTO.” 3 2 1 7 1 2 3 4 Rotary encoder SOURCE/POWER Setting the Speakers 1 2 3 4 Check that defeat mode is off. Press SOURCE/POWER. 6 5 6 7 The main menu is displayed. Press 4 (A.PROC). Press 4 (A.PROC). The A.PROC (Audio processor) list display appears. Turn the Rotary encoder to select “Media Xpander.” Press 2 (ON), then press 3 (SETUP).
Performing Time Correction Manually (TCR)/ Swithing the Phase 4 5 3 2 6 1 7 Because of the particular conditions inside the vehicle, there can be major differences in the distances between the various speakers and the listening position. It is possible to calculate the optimum correction values and eliminate the time error at the listening position yourself using this function. You can also use this function to switch the phase. 1 2 Rotary encoder SOURCE/POWER 3 Check that Defeat mode is off.
5 Press SOURCE/POWER. 6 Press 4 (A.PROC). 7 Turn the Rotary encoder to select "TCR/PHASE". 8 Press 1 (SETUP L/R) or 2 (SETUP L+R). 9 The main menu is displayed. A.PROC (Audio processor) list display appears. The Function Guide changes. TCR/PHASE adjustment display appears. L/R: Different adjustment values can be set for the left and right channels. L+R: Sets the same adjustment values for the left and right channels. Turn the Rotary encoder to select a speaker to be set.
Bass Focus The time difference between the front-rear/left-right speakers, can be adjusted a pair at a time. Audible time correction can be made from 0.10 ms to 20.00 ms in 201 steps (0 to 200). 4 3 5 2 6 1 1 2 3 4 SOURCE/POWER 5 6 BASS COMP. Setting 4 Check that the Defeat mode is off. Press SOURCE/POWER. The main menu is displayed. Press 4 (A.PROC). The A.PROC (Audio processor) list display appears. Turn the Rotary encoder to select “BASS SOUND CONT.”. The Function Guide changes.
• Subwoofer can be set to “ON” or “OFF” only. • It is not possible to set the front speakers to “OFF.” • If the front speakers are set to “SMALL,” the rear and center speakers cannot be set to “LARGE.” • If the center speaker is turned “OFF,” the center channel's audio signals are added to the audio signals output from the front speakers. • If you set the speaker response to “OFF,” also set the speaker setting to “OFF.” (page 45.
Adjusting the DVD Level The volume (signal level) for Dolby Digital, Dolby PL II, DTS and PCM modes can be set. 4 3 5 2 6 1 • Avoid stopping, pausing, switching the disc, cueing, fastforwarding or switching the audio channel of this unit while making this adjustment. The setting is canceled if the Decode mode is switched. 1 2 3 Rotary encoder SOURCE/POWER 4 5 6 Adjusting the speaker levels The test tones help to make the volume adjustments of the different speakers.
Using the ProLogic II Mode Pro Logic processing can be conducted on the music signals recorded on two channels to achieve Dolby Pro Logic II surround sound. For two-channel Dolby Digital and DTS signals, there is also a “REAR FILL” function for outputting the signals of the front channel to the rear channel. 1 2 Check that Defeat mode is off. Press SOURCE/POWER. The main menu is displayed. 3 Press 4 (A.PROC). 4 Turn the Rotary encoder to select “DOLBY PL II.” 5 Press 1 (SETUP).
1 AUDIO/NAV./EXT DVD Transmission Indicator Remote Control When the mode selector switch is switched, the transmission indicators for the various modes light for several seconds. 2 A.PROC Button Operating for the IVA-D900 Press the button to call the audio processor list. Set the mode selector switch to “AUDIO” to perform operations on the IVA-D900. 3 , Button Radio mode: Selects, in ascending order, stations programmed into the radio's presets.
$ MENU/SETUP Button : DVD mode: Shows the menu display. Video CD mode: Turns PBC ON or OFF. (for Video CD with PBC functions) By pressing it more than 2 seconds, Setup list display appears. % Numeric Keypad The functions displayed in the Function Guide of the main menu are assigned to 1 to 7 buttons. & AUDIO Button DVD mode:Switches audio. ( SUB T. Button DVD mode:Switches the subtitle. ) ANGLE Button DVD mode:Switches the angle of the picture.
Operating the DVD player/DVD changer (sold separately) 7 V.SEL Button Switches the screen of TV or DVD video. 8 LIGHT Button Lights the indicator. Set the mode selector switch to the “EXT DVD” side to operate a separately sold DVD player or DVD changer. 9 VOLUME / Button Adjusts the volume of the IVA-D900. ! Joystick 1 Selects the item displayed on the screen. " ENTER Button Decides the selected item. 2 3 4 5 6 7 8 = < ; : / .
< 1 NAV. transmission indicator Button Performs playback. Press and hold for at least 2 seconds for slow motion playback. = BAND Button The transmission indicator lights for a few seconds when the mode selector switch is set to “NAV.”. 2 DTR (DETOUR) Button Automatically recalculates route if a road block or traffic congestion is encountered. Switches the band of Audio or Disc mode. > MODE Change Switch 3 LIST Button When operating the connected DVD player/DVD changer, switch to the EXT DVD side.
Battery Replacement Notes on Using the Remote Control Applicable battery: Use two “AAA” sized dry batteries or equivalent. 1 Opening the battery cover. Point the remote control transmitter at the remote control sensor. Push on the cover and slide it as indicated by the arrows then the cover will be removed. Remote control sensor 2 Replacing the battery. Put the batteries in the case observing the polarity, as illustrated. − + + − 3 Closing the cover.
In addition, DVDs offer a variety of functions. Information • Multiple audio* (page 18) Movies can be recorded in up to eight languages. The desired language can be selected from the remote control unit. About DVDs • Subtitles function* (page 19) Music CDs and DVDs have grooves (tracks) in which the digital data is recorded. The data is represented as microscopic pits recorded into the track – these pits are read by a laser beam to play the disc.
Terminology Dolby Digital Dolby Digital is a digital audio compression technology developed by Dolby Laboratories that allows large quantities of audio data to be efficiently recorded on discs. It is compatible with audio signals from mono (1 channel) all the way up to 5.1-channel surround sound. The signals for the different channels are completely independent, and since the sound is high quality digital there is no loss of sound quality.
List of Language Codes (For details, see page 29.
List of Country Codes (For details, see page 29.
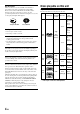
Abbreviation PE PF PG PH PK PL PM PN PR PT PW PY QA RE RO RU RW SA SB SC SD SE SG SH SI Code 8069 8070 8071 8072 8075 8076 8077 8078 8082 8084 8087 8089 8165 8269 8279 8285 8287 8365 8366 8367 8368 8369 8371 8372 8373 Country Abbreviation Peru SJ French Polynesia SK Papua New Guinea SL Philippines SM Pakistan SN Poland SO Saint Pierre and Miquelon SR Pitcairn ST Puerto Rico SV Portugal SY Palau SZ Paraguay TC Qatar TD Reunion TF Romania TG Russian Federation TH Rwanda TJ Saudi Arabia TK Solomon Islands TM
In Case of Difficulty If you encounter a problem, please turn the power off, then on again. If the unit is still not functioning normally, please review the items in the following checklist. This guide will help you isolate the problem if the unit is at fault. Otherwise, make sure the rest of your system is properly connected, or then consult your authorized Alpine dealer. Basic No function or display. • Vehicle's ignition is off.
Error displays • Mechanical error - Press c. After the error indication disappears, insert the disc again. If the above-mentioned solution does not solve the problem, consult your nearest ALPINE dealer. MP3 is not played back. • Writing error occurred. The CD format is not compatible. - Make sure the CD has been written in a supported format. Refer to "About MP3" (pages 13 and 14), then rewrite in the format supported by this device. Unit does operate. • Monitor’s power is not turned on.
Indication for DVD/Video CD NO DISC (Displayed only in IVA-D900 (front monitor)) • No disc is inserted. - Insert a disc. • Although a disc is inserted, “NO DISC” is displayed and the unit does not start to play or eject the disc. - Remove the disc by following these steps: Press c for at least 3 seconds. • Remote control operation is not possible. - For some discs or playing modes, certain operations are not possible. This is not a malfunction.
Indication for CD changer HI-TEMP • Protective circuit is activated due to high temperature. - The indicator will disappear when the temperature returns to within operation range. ERROR - 01 • Malfunction in the CD Changer. - Consult your Alpine dealer. Press the magazine eject button and pull out the magazine. Check the indication. Insert the magazine again. If the magazine cannot be pulled out, consult your Alpine dealer. • Magazine ejection not possible. - Press the magazine eject button.
GENERAL Specifications Power Requirement MONITOR SECTION Operating temperature Screen Size LCD Type Operation System 7.0" Transparent type TN LCD Low-Temperature p-si TFT active matrix Number of Picture Elements 1,152,000 pcs. (2,400 × 480) Effective Number of Picture Elements 99.99% or more Illumination System Cold cathode fluorescent tube Maximum Power Output Output Voltage Maximum Pre-Output Voltage Bass Treble Weight FM TUNER SECTION Tuning Range 87.7 – 107.9 MHz Mono Usable Sensitivity 9.
Installation and Connections Before installing or connecting the unit, please read the following and pages 4 to 6 of this manual thoroughly for proper use. Warning MAKE THE CORRECT CONNECTIONS Caution HAVE THE WIRING AND INSTALLATION DONE BY EXPERTS. The wiring and installation of this unit requires special technical skill and experience. To ensure safety, always contact the dealer where you purchased this product to have the work done.
Reinforce the monitor unit with a metal mounting strap (not supplied). Secure the ground lead of the unit to a clean metal spot using a screw (}) already attached to the vehicle's chassis. Installation Installing the Monitor • For the screw marked }}, use an appropriate screw for the chosen mounting location. Installation Location Before deciding on the mounting location, check that opening and closing the display will not hamper gear shifting in that position.
2 Installing the Tuner Box Caution Do not block the unit’s fan or heat sink, thus preventing air circulation. If blocked, heat will accumulate inside the unit and may cause a fire. Install the tuner on the floor with the supplied flange-head tapping screws (M4 x 14). Flange-head tapping screws (M4 x 14) (Included) Air ventilation hole Tuner Box When mounting with Velcro fasteners When mounting the tuner with the Velcro fasteners, be sure to choose a flat location.
Parking Brake Lead Connection If necessary, use a pinch connector to connect the foot brake lead, parking brake lead, etc.
Connections (IVA-D900 Wiring Diagram) Antenna 3 5 1 IVA-D900 2 To remote control interface box 4 7 6 BATTERY (Yellow) 8 GND Battery (Black) REMOTE OUT AUX1 \ 9 (White/Brown) REMOTE OUT AUX2 9 To remote input lead. (White/Brown) REMOTE OUT AUX3 IVA-D900 Tuner BOX REMOTE IN AUX1 PREOUT REAR POWER SUPPLY R L FRONT REMOTE IN AUX2 $ L AUX OUT NAVIGATION IN " REVERSE % VIDEO To remote output lead.
1 Antenna Extension Cable 2 Digital Output Terminal (Optical) Use when combining fiber digital input compatible products. 3 Remote Control Interface Connector Connect to the remote control interface box. 4 Power Supply Connector 5 DC/DC Converter • Do not install the converter at a location subjected to water such as under the floor mat or air conditioner. This may cause a malfunction. • Do not bundle the DC/DC converter cable with other audio cables. Doing so may induce noise into your system.
System Example When connecting the Ai-NET compatible audio processor (Fiber digital compatible), Navigation system, DVD player and changer IVA-D900 Monitor NVE-N852A/NVE-N871A 1 Navigation system (Sold Separately) Audio Processor (Ai-NET) (Fiber Digital compatible) (Sold Separately) SUB W.
1 RGB Cable (Included with NVE-N852, not included with NVE-N871A) 2 Remote IN/OUT Terminal 3 RGB Input Terminal Connect this to the RGB output terminal of the Navigation System. 4 System Switch When connecting an equalizer or divider using Ai-NET feature, place this switch in the EQ/DIV position. When no device is connected, leave the switch in the NORM position. • Be sure to turn the power off to the unit before changing the switch position.
When Connecting External Equipment To Audio Input terminal EQ/DIV IVA-D900 Tuner BOX 8 PREOUT REAR FRONT L 2 Rear monitor 1 (Sold Separately) To Video Input terminal SUB W.
LIMITED WARRANTY ALPINE ELECTRONICS OF AMERICA, INC. AND ALPINE OF CANADA INC. ("Alpine"), are dedicated to quality craftsmanship and are pleased to offer this Warranty. We suggest that you read it thoroughly. Should you have any questions, please contact your Dealer or Alpine at one of the telephone numbers listed below. [ PRODUCTS COV ERED: This Warranty covers Car Audio/Visual Products and Related Accessories ("the product"). Products purchased in the Canada are covered only in the Canada.