R EN FM/AM CD Receiver CDA-9827/CDA-9826 FR FM/AM CD Receiver CDA-9825 ES ES • OWNER'S MANUAL Please read before using this equipment. • MODE D'EMPLOI Veuillez lire avant d'utiliser cet appareil. • MANUAL DE OPERACIÓN Léalo antes de utilizar este equipo. ALPINE ELECTRONICS MARKETING, INC. 1-1-8 Nishi Gotanda, Shinagawa-ku, Tokyo 141-0031, Japan Phone 03-5496-8231 ALPINE ELECTRONICS OF AMERICA, INC. 19145 Gramercy Place, Torrance, California 90501, U.S.A.
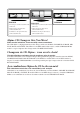
CHA-S634 CHA-1214 • CD changer for CDA-9827/CDA-9826/ CDA-9825. • Changeur CD pour CDA-9827/ CDA-9826/CDA-9825. • Cambiador de CD para CDA-9827/ CDA-9826/CDA-9825. • CD changer for CDA-9827/CDA-9826/ CDA-9825. • Changeur CD pour CDA-9827/ CDA-9826/CDA-9825. • Cambiador de CD para CDA-9827/ CDA-9826/CDA-9825. CHM-S630 Alpine CD Changers Give You More! More musical selections, more versatility, more convenience.
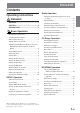
ENGLISH Contents Operating Instructions WARNING WARNING .................................................. 3 CAUTION ................................................... 3 PRECAUTIONS ......................................... 3 Basic Operation Detaching the Front Panel ................................. 5 Attaching the Front Panel ................................. 5 Initial System Start-Up ..................................... 5 Turning Power On and Off ...............................
XM Radio Operation (Optional) Receiving XM Channels with the XM Receiver (Optional) .................................................... 22 Checking the XM Radio ID Number .............. 22 Storing XM Channel Presets ........................... 22 Receiving Stored XM Channels ...................... 22 Channel/Category Search Function ................ 23 Quick Search Function .................................... 23 Changing the Display ...................................... 23 Setting the tuning method .....
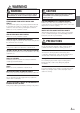
WARNING WARNING This symbol means important instructions. Failure to heed them can result in serious injury or death. DO NOT OPERATE ANY FUNCTION THAT TAKES YOUR ATTENTION AWAY FROM SAFELY DRIVING YOUR VEHICLE. Any function that requires your prolonged attention should only be performed after coming to a complete stop. Always stop the vehicle in a safe location before performing these functions. Failure to do so may result in an accident.
WARNING Correct Handling PRECAUTIONS Do not drop the disc while handling. Hold the disc so you will not leave fingerprints on the surface. Do not affix tape, paper, or gummed labels to the disc. Do not write on the disc. Never Attempt the Following Do not grip or pull out the disc while it is being pulled back into the player by the automatic reloading mechanism. Do not attempt to insert a disc into the unit when the unit power is off.
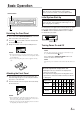
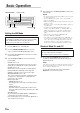
Basic Operation Remote Controllable (CDA-9826 only) This unit can be controlled with an optional Alpine remote control. For details, consult your Alpine dealer. SOURCE/POWER Initial System Start-Up Be sure to press the RESET switch when using the unit for the first time, after installing the CD changer, etc., or after changing the car battery. Detaching the Front Panel 1 2 3 To do this, first, remove the detachable front panel.
Basic Operation Displaying Time BAND/TEL. 1 MODE/Rotary encoder Press the DISP/TITLE time is displayed.
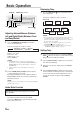
Setting the Bass Control You can change the Bass Frequency emphasis to create your own tonal preference. 1 Press the CENTER f button to select the BASS (bass Center frequency) control mode. Setting the Treble Control You can change the Treble Frequency emphasis to create your own tonal preference. 1 → BASS → TREBLE → normal mode 2-1 *Setting the Bass Center Frequency: 2-1Setting the treble Center frequency: Press g or f button to select the desired treble Center frequency.
Basic Operation 5 SOURCE/POWER Rotary encoder After setting, press the Rotary encoder to return to the normal mode. NOTES MX B. OUT • By "Setting the External Input Defeat Mode" (page 12) to ON, operation is bypassed. • To cancel MX mode for all music sources, press the MX button to turn MX off. • MX mode is automatically canceled if no buttons are pressed within 15 seconds. • Each music source, such as radio, CD, and MP3 can have its own MX setting.
Displaying the Title/Text ∗1 Displayed during playback of a disc with CD Text. It is possible to display the CD/Station title if the title has been previously inputted. For details, see “Titling Disc/ Stations” (page 10). Text information, such as the disc name and the track name, will be displayed if playing a CD text compatible disc. It is also possible to display the folder name, the file name, and the tag, etc. while playing MP3/WMA files. 1 ∗2 ∗3 ∗4 Press the DISP/TITLE button.
Basic Operation 6 :/J It is possible to title your favorite CD's or radio stations. You cannot input titles on MP3/WMA discs. 2 3 4 5 Press the DISP/TITLE button and select the title display mode. For details, see “Displaying the Title/Text” (page 9). Press and hold the DISP/TITLE button for at least 3 seconds. The first character will blink. Turn the Rotary encoder to select the desired letter/ numeral/symbol available for naming. Press the Rotary encoder to store the first character.
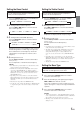
SETUP Operation Scroll Setting BAND/TEL. Rotary encoder This CD player can scroll the disc and track names recorded on CD-TEXT discs, as well as the text information of MP3/WMA files, folder names, and tags. (This function can be used for CDA-9825 model if the changer compatible with CD-Text is connected). 1 g f F/SETUP Subwoofer On and Off 1 2 3 4 5 2 3 Press the f or g button to select “SCR”(SCROLL). Press the BAND/TEL. button to toggle the mode between SCR AUTO and MANU.
SETUP Operation SOURCE/POWER BAND/TEL. Setting the Tone Defeat for External Devices When inputting external devices to this unit, turning DEFEAT ON will bypass BASS,TREBLE and MX, i.e., sound for external devices is output at the default setting. 1 g f F/SETUP Turning Mute Mode On/Off If a device having the interrupt feature is connected, audio will be automatically muted whenever the interrupt signal is received from the device.
Connecting to an External Amplifier PWR ON: The speakers are driven by the built-in amplifier. Speakers When an external amplifier is connected and the built-in amplifier is not used, removing power from the built-in amplifier will improve the sound quality. The power to the internal amplifier is turned OFF by the following procedure. 1 2 3 SPEAKER RIGHT FRONT SPEAKER RIGHT REAR Press and hold the F/SETUP button for at least 3 seconds. SPEAKER LEFT REAR Press the f or g button to select "PWR.
Radio Operation SOURCE/ POWER TUNE/A.ME BAND/TEL. Rotary encoder 4 Press the g or f button to move downward or upward one step respectively until the desired station frequency is displayed. NOTE The ST indicator appears on the display when a Stereo FM station is tuned in. Automatic Seek Tuning 1 g f SEARCH F/SETUP Preset buttons (1 through 6) Changing the Radio Frequencies for each Country For customers not living in North America, change the radio frequencies as follows.
Automatic Memory of Station Presets 1 2 Press the BAND/TEL. button repeatedly until the desired radio band is displayed. Press and hold the TUNE/A.ME button for at least 2 seconds. The frequency on the display continues to change while the automatic memory is in progress. The tuner will automatically seek and store 6 strong stations in the selected band. They will be stored into buttons 1 to 6 in order of signal strength.
CD Player Operation SOURCE/ POWER -/J c About media that can be played with the CDA-9827/CDA-9826 model. Use only compact discs with the label side showing the CD logo marks below. g f 4 5 Inserting/Ejecting Disc 1 Insert a CD half way into the slot with the label side facing up. The player automatically draws the disc into the disc compartment. • Some of the following CDs may not play on this unit: Flawed CDs, CDs with fingerprints, CDs exposed to extreme temperatures or sunlight (e.g.
On handling Compact Discs (CD/CD-R/ CD-RW) • Do not touch the surface. • Do not expose the disc to direct sunlight. • Do not affix stickers or labels and do not write on the surface. • Clean the disc when it is dusty. • Make sure that there are no bumps around the disc. • Do not use commercially available disc accessories. Repeat Play 1 Press the 4 ( ) button to play back repeatedly the track being played. The track will be played repeatedly.
CD Player Operation Quick Search Function You can search for tracks. SOURCE/POWER BAND/TEL. Rotary encoder 1 2 Press and hold the SEARCH button for at least 2 seconds in the CD/Changer mode to activate Quick Search mode. Select a desired track by turning the Rotary encoder within 10 seconds. The selected track is played back. NOTE SEARCH Select buttons (1 through 6) 6( Controlling CD Changer (Optional) Scanning Programs 1 Press the 6 ( ) button to activate the Scan mode.
2 Press the Disc Select buttons (1 through 6) corresponding to one of the discs loaded in the CD Changer. The selected disc number appears in the display and CD playback starts. 3 The CD Changer Selection mode remains active for 8 seconds after step 2 is performed. Press the BAND/ TEL. button until the desired CD Changer indicator appears on the display. NOTES NOTE • After selecting the desired disc, you can operate in the same way as for the CDA-9827/CDA-9826/CDA-9825 CD player.
MP3/WMA Operation 8 SOURCE/ POWER -/J BAND/ TEL. Rotary encoder c Playing MP3 Files with the CD Changer (Optional) If you connect a changer compatible with MP3, you can play CD-ROMs, CD-Rs, and CD-RWs containing MP3 files on the CDA-9827/CDA-9826/CDA-9825. 1 SEARCH g f 9 4( ) F/SETUP Select buttons 5 ( (1 through 6) 6( ) ) DISP/ TITLE Playing MP3/WMA Files 2 3 (CDA-9827/CDA-9826 only) The CDA-9827/CDA-9826 model includes a built-in MP3/WMA decoder.
* When an MP3 compatible CD changer with Repeat All function is connected Folder Search mode: (You can search for your desired folder in the disc.) NOTE 2 If an MP3 compatible CD changer is connected: In CD changer mode, press the “F/SETUP” button to illuminate the underlined portion of the FUNC indicator, and go to step 1 within 5 seconds. 3 ) button again to ↓ M.I.X.: Only files in a folder are played back in random sequence. ↓ M.I.X.: Files are played back in random sequence.
XM Radio Operation (Optional) SOURCE/ POWER 8 BAND/ Rotary encoder TEL. Checking the XM Radio ID Number You need to provide XM with the unique XM Radio ID number for your XM Radio Receiver in order to subscribe to XM's programming. 9 g f SEARCH Preset buttons F/SETUP (1 through 6) DISP/ TITLE This number is an 8 character alphanumeric number that is printed on a label directly on the XM Receiver. It can also be displayed on the screen of the CDA-9827/ CDA-9826/CDA-9825 in the following way.
*2 When ADF is turned OFF, this information is not displayed (see "Setting the Auxiliary Data Field Display" section on page 23). Channel/Category Search Function You can search for programs by Channel No. or Category. 1 NOTES • When the "Scroll Setting" (refer to page 11) is set to "SCR AUTO", the display scrolls continuously. When the Scroll Setting is set to "SCR MANU", the display scrolls only once after any function is performed (PRESET, BAND, SEARCH, etc.).
MobileHub™ Link Operation (Optional) SOURCE/ POWER g f -/J 9 • An outgoing call from a portable telephone is also possible. However, you cannot perform different operations at the same time from a portable telephone and CDA-9827/CDA-9826/ CDA-9825 as malfunction can result. • With a Junction BOX connected outgoing, incoming, and sending history will also be recorded in the portable telephone. • While telephoning, DEFEAT is also set to ON.
Calling 3 Calling by the address book You can call up the address book registered in the portable telephone to call from. 1 2 (Retrieving an addressee by Alphabetic Sort List to place a call) 3 4 When displaying the Alphabetic Sort List, select the addressee by turning the Rotary encoder or pressing the g or f button, then place a call by pressing the :/J button or Rotary encoder. Press the BAND/TEL. button to end the call. The telephone mode will end and return to the original source mode.
Remote Control Operation 1 2 3 4 Controls on Remote Control (CDA-9827 only) 1 Power Button Press the button to turn the power on/off. 2 Source Button Press to select the audio source. 3 -/J Button Press the button to switch between the Play and Pause modes for CD. 4 TILT 89 Buttons Not used. 5 Band/Program Button Radio mode: BAND Button Press the button and the band will change. CD/Changer mode: To switch the disc mode.
Battery Replacement (CDA-9827 only) Applicable battery: Use two “AAA” sized dry batteries or equivalent. 1 2 3 Point the optional remote control transmitter at the remote control sensor. Remote control sensor Opening the battery cover Slide out the battery cover while firmly pressing the direction of arrow. Replacing the battery Put the batteries in the case observing the polarities as illustrated. Closing the cover Push the cover as illustrated until a click is heard.
Information About MP3/WMA CAUTION Except for personal enjoyment, duplicating audio data (including MP3/WMA data) or distributing, transferring, or copying it, whether for free or for a fee, without the permission of the copyright holder is strictly prohibited by the Copyright Act and by international treaty.
• Order of tracks The unit plays the files in the order that the writing software writes them. Therefore, the playing order may not be the same as the order you input. The playback order of the folders and files is as follows. However, the folder and file playback order differs from the folder no. and file no. indicated on the display. 1 1 2 3 2 3 4 4 5 5 6 Folder MP3/WMA File Terminology Bit rate This is the “sound” compression rate specified for encoding.
Information In Case of Difficulty If you encounter a problem, please turn the power off, then on again. If the unit is still not functioning normally, please review the items in the following checklist. This guide will help you isolate the problem if the unit is at fault. Otherwise, make sure the rest of your system is properly connected or consult your authorized Alpine dealer. Basic No function or display. • Vehicle's ignition is off.
Indication for CD Player HI TEMP Indication for CD Changer HI TEMP • Protective circuit is activated due to high temperature. - The indicator will disappear when the temperature returns to within operation range. • Protective circuit is activated due to high temperature. - The indicator will disappear when the temperature returns to within operation range. ERROR - 01 NO DISC • No CD is inserted. - Insert a CD. ERROR • Mechanism error. 1) Press the c button and eject the CD.
Information Indication for XM Radio Mode ANTENNA • The XM antenna is not connected to the XM radio module. - Check whether the XM antenna cable is attached securely to the XM radio module. UPDATING • Radio is being updated with latest encryption code. - Wait until encryption code is being updated. Channels 0 and 1 should function normally. NO SIGNL • XM signal is too weak at the current location. - Wait until the car reaches a location with a stronger signal.
Specifications GENERAL Power Requirement FM TUNER SECTION Tuning Range Mono Usable Sensitivity 50 dB Quieting Sensitivity Alternate Channel Selectivity Signal-to-Noise Ratio Stereo Separation Capture Ratio 87.7 – 107.9 MHz 9.3 dBf (0.8 µV/75 ohms) 13.5 dBf (1.3 µV/75 ohms) 80 dB 65 dB 35 dB 2.0 dB AM TUNER SECTION Tuning Range Sensitivity (IEC Standard) 530 – 1,710 kHz 22.
Installation and Connections Before installing or connecting the unit, please read the following and pages 3 and 4 of this manual thoroughly for proper use. Caution HAVE THE WIRING AND INSTALLATION DONE BY EXPERTS. MAKE THE CORRECT CONNECTIONS. The wiring and installation of this unit requires special technical skill and experience. To ensure safety, always contact the dealer where you purchased this product to have the work done.
Installation Caution Do not block the unit’s fan or heat sink, thus preventing air circulation. If blocked, heat will accumulate inside the unit and may cause a fire. Air ventilation hole Connect each input lead coming from an amplifier or equalizer to the corresponding output lead coming from the left rear of the CDA-9827/CDA-9826/CDA-9825. Connect all other leads of the CDA-9827/CDA-9826/CDA-9825 according to details described in the CONNECTlONS section.
Installation and Connections Connections 1 POWER ANT 2 Blue/White REMOTE TURN-ON 3 Pink/Black AUDIO INTERRUPT IN 4 Blue Antenna To power antenna To amplifier or equalizer To vehicle phone ILLUMINATION 5 Red IGNITION 6 Yellow BATTERY 7 Black GND 8 Orange To the instrument cluster illumination lead (CDA-9827 only) Ignition Key 9 , + / Ai-NET ! NORM EQ/DIV .
1 Antenna Receptacle & Left Rear (+) Speaker Output Lead (Green) 2 Power Antenna Lead (Blue) Connect this lead to the +B terminal of your power antenna, if applicable. ( Left Rear (–) Speaker Output Lead (Green/Black) NOTE This lead should be used only for controlling the vehicle's power antenna. Do not use this lead to turn on an amplifier or a signal processor, etc. 3 Remote Turn-On Lead (Blue/White) Connect this lead to the remote turn-on lead of your amplifier or signal processor.
LIMITED WARRANTY ALPINE ELECTRONICS OF AMERICA, INC. AND ALPINE OF CANADA INC. ("Alpine"), are dedicated to quality craftsmanship and are pleased to offer this Warranty. We suggest that you read it thoroughly. Should you have any questions, please contact your Dealer or Alpine at one of the telephone numbers listed below. This Warranty covers Car Audio/Visual Products and Related Accessories ("the product"). Products purchased in the Canada are covered only in the Canada. Products purchased in the U.S.A.