R EN CDA-7977 FM/AM CD Player CDA-7876 CDA-7875 CDA-7873 FR ES FM/AM CD Receiver • OWNER'S MANUAL Please read before using this equipment. • MODE D'EMPLOI Veuillez lire avant d'utiliser cet appareil. ES • MANUAL DE OPERACIÓN Léalo antes de utilizar este equipo. IT ALPINE ELECTRONICS, INC. Tokyo office: 1-1-8 Nishi Gotanda, Shinagawa-ku, Tokyo 141-8501, Japan Tel.: (03) 3494-1101 ALPINE ELECTRONICS OF AMERICA, INC. 19145 Gramercy Place, Torrance, California 90501, U.S.A. Tel.
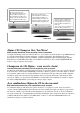
CD changer for CDA-7977/ CDA-7876/CDA-7875/CDA-7873 Changeur CD pour CDA-7977/ CDA-7876/CDA-7875/CDA-7873 Cambiador de CD para CDA-7977/ CDA-7876/CDA-7875/CDA-7873 CD changer for CDA-7977/ CDA-7876/CDA-7875/CDA-7873 Changeur CD pour CDA-7977/ CDA-7876/CDA-7875/CDA-7873 Cambiador de CD para CDA-7977/ CDA-7876/CDA-7875/CDA-7873 You cannot connect to CDA-7977/ CDA-7876/CDA-7875/CDA-7873. Il est impossible de se raccorder au CDA-7977/CDA-7876/CDA-7875/ CDA-7873.
ENGLISH Contents Operating Instructions WARNING WARNING .................................................. 2 CAUTION ................................................... 2 PRECAUTIONS ......................................... 2 Basic Operation Detaching the Front Panel ................................. 4 Attaching the Front Panel ................................. 4 Initial System Start-Up ..................................... 4 Turning Power On and Off ...............................
WARNING WARNING This symbol means important instructions. Failure to heed them can result in serious injury or death. DO NOT OPERATE ANY FUNCTION THAT TAKES YOUR ATTENTION AWAY FROM SAFELY DRIVING YOUR VEHICLE. Any function that requires your prolonged attention should only be performed after coming to a complete stop. Always stop the vehicle in a safe location before performing these functions. Failure to do so may result in an accident.
Never Attempt the Following Installation Location Do not grip or pull out the disc while it is being pulled back into the player by the automatic reloading mechanism. Do not attempt to insert a disc into the unit when the unit power is off. Make sure the CDA-7977/CDA-7876/CDA-7875/CDA7873 will not be installed in a location subjected to: • • • • Direct sun and heat High humidity and water Excessive dust Excessive vibrations Correct Handling Do not drop the disc while handling.
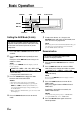
Basic Operation POWER MODE/BBE/ Audio Control RESET 2 3 ANGLE 8 9 CLK Detaching the Front Panel 1 MUTE Press and hold the POWER button for more than 3 seconds to turn off the power. Press the (Release) button at upper left side until the front panel pops out. • Controllable with Remote Control (CDA-7873 only) This unit can be controlled with an optional Alpine remote control. For details, consult your Alpine dealer. Point the optional remote control transmitter at the remote control sensor.
Display Angle Adjustment Movable display The movable display may be adjusted to 3 different angles depending upon user preference. 1 CAUTION Keep hands (or any other object) away from the display while it is opening or closing to avoid damage or injury. The back of the movable display will get very warm under normal operating conditions. This is not a malfunction. Do not touch.
Basic Operation TUNE g DN MODE/Audio Control f UP CLK Setting Time 1 2 3 4 SETUP Dimmer Control In the Clock priority mode, press and hold the CLK (clock) button for at least 3 seconds while the time is displayed. The time indication will blink. Rotate the MODE (Audio Control) knob to adjust the hours while the time indication is blinking. When the hours has been adjusted, press the MODE (Audio Control) knob.
3 4 5 Press the TUNE button to toggle mode between SUB-W ON and SUBW OFF. 2 Press the SETUP button after setting the SUB-W ON. Press the MODE button repeatedly to select the SUB-W mode. → SUB-W VOLUME ← → BALANCE FADER ← Press the g DN or f UP button after selecting the SUB-W mode, and the subwoofer output phase is toggled SUBW NOR (0°) or SUBW REV (180°). 6 Rotate Audio Control knob until the desired 3 4 Press the f UP button to select the MUTE mode.
Basic Operation SOURCE TUNE BAND Audio Control g DN f UP CENTER f X-OVER Setting the AUX Mode (V-Link) SETUP 5 You can input TV/video sound by connecting an optional Ai-NET/RCA Interface cable (KCA-121B) or Versatile Link Terminal (KCA-410C) to this component. 1 2 Press and hold the SETUP button for at least 3 seconds. Press the f UP button repeatedly to select “AUX.
Setting the Bass Control You can change the Bass Frequency emphasis to create your own tonal preference. 1 Press the CENTER f button to select the BASS (bass Center frequency) control mode. → BASS → TREBLE → OFF 2-1 Setting the treble Center frequency: Press g DN or f UP button to select the desired treble Center frequency. → 10kHz ↔ 12.5kHz ↔ 15kHz ↔ 17.5kHz ← Emphasizes the displayed Treble frequency ranges.
Basic Operation DISP/B.OUT BAND g DN f UP B-FWD/DEFEAT SETUP Setting Bass Forward The Bass Forward function shifts the low frequency's energy component to the front. This moves the high energy, dynamic bass sound to the front sound stage. 1 2 Switching the Tuner Mode The CDA-7977/CDA-7876/CDA-7875/CDA-7873 incorporates the MAX TUNE SQ for the highest quality tuner audio. Moreover, you can choose between two settings to suit your own personal sound preferences and usage.
Blackout Mode On and Off CDA-7977 only When the Blackout mode is turned on, the display will turn off to reduce power consumption. This additional power enhances the sound quality. 1 Press and hold the B.OUT button for at least 3 seconds to start the blackout mode. By doing so the display will turn off. NOTE If any button on the unit is pressed during the blackout mode, the function will be displayed for 5 seconds to show the operation before returning to Blackout mode.
Basic Operation :/J T.S.M. g DN f UP Audio Control TITLE Displaying the Title/Text CD/Changer mode: ↓ ELAPSED TIME DISPLAY ↓ CLOCK DISPLAY ↓ TEXT DISPLAY (DISC NAME)∗1 ↓ TEXT DISPLAY (TRACK NAME)∗1 ↓ TITLE DISPLAY∗2 It is possible to display the CD/Station title if the title has been previously inputted. For details, see Titling Disc/Stations (page 13). Text information, such as the disc name and the track name, will be displayed if playing a CD text compatible disc. 1 Press the TITLE button.
Titling Discs/Stations It is possible to title your favorite CD's or radio stations. 1 2 3 4 5 6 Press the TITLE button and select the title display mode. For details, see Displaying the Title/Text (page 12). Press and hold the TITLE button for at least 3 seconds. The first character will blink. Rotate the Audio Control knob to select the desired letter/numeral/symbol available for naming. (“A” for example).
Radio Operation SOURCE g DN TUNE/A.ME BAND Preset buttons (1 throgh 6) f UP Manual Tuning Automatic Seek Tuning 1 1 2 Press the SOURCE button until a radio frequency appears in the display. Press the BAND button repeatedly until the desired radio band is displayed. Each press changes the band: 2 → FM1 → FM2 → AM 3 Press the TUNE button repeatedly until “DX SEEK” and “SEEK” disappear from the display.
Manual Storing of Station Presets Tuning to Preset Stations 1 1 2 3 4 Select the radio band and tune in a desired radio station you wish to store in the preset memory. Press and hold any one of the Preset buttons (1 through 6) for at least 2 seconds until the station frequency on the display blinks. Press the Preset button into which you wish to store the station while the frequency display is blinking (within 5 seconds). The display stops blinking once the station has been memorized.
CD Player Operation SOURCE -/J g DN f UP M.I.X. Opening and Closing the Movable display 1 REPEAT SCAN c Playback 1 Press the c button. The movable display will open. Press the c button. The movable display will open. Insert a disc with the label side facing up. To close the movable display, press the c button again. The movable display will close. 2 NOTES • Do not apply shock to the movable display when it is open as it may result in malfunction of the unit.
Music Sensor (Skip) M.I.X. (Random Play) 1 1 Momentarily press the g DN button once during CD play to return to the beginning of the current track. If you wish to access the beginning of a track further back, repeatedly press until you reach the desired track. Press the f UP button once to advance to the beginning of the next track. If you wish to access the beginning of a track further ahead, press repeatedly until the desired track is reached. To cancel M.I.X. play, press the M.I.X.
CD Player Operation SOURCE BAND Select buttons (1 through 6) F Controlling CD Changer (Optional) An optional 6-disc or 12-disc CD Changer may be connected to the CDA-7977/CDA-7876/CDA7875/CDA-7873 if it is Ai-NET compatible. With a CD Changer connected to the Ai-NET input of the CDA-7977/CDA-7876/CDA-7875/CDA-7873, the CD Changer will be controllable from the CDA7977/CDA-7876/CDA-7875/CDA-7873.
Multi-Changer Selection Alpine's Ai-NET system will support up to 6 CD Changers. When operating two or more changers, the KCA-400C (Multi-Changer Switching device) must be used. If you use 1 Switching device, you can connect up to 4 CD Changers. If you use 2 Switching devices, you can connect up to 6 CD Changers. When using KCA-410C (Versatile Link Terminal), you can connect two changers and two external outputs (AUX).
XM Radio Operation SOURCE TUNE g DN f UP BAND SETUP Receiving XM Channels with the XM Receiver (Optional) XM Satellite Radio* is the next generation of audio entertainment, with up to 100 brand-new digital channels. For a small monthly fee, subscribers can hear crystal-clear music, sports, news and talk, coast-to-coast via satellite. For more information, visit XM’s website at www.xmradio.com or call 1-877-XMRADIO.
Checking the XM Radio ID Number You need to provide XM with the unique XM Radio ID number for your XM Radio Receiver in order to subscribe to XM's programming. This number is an 8 character alphanumeric number that is printed on a label directly on the XM Receiver. It can also be displayed on the screen of the CDA7977/CDA-7876/CDA-7875/CDA-7873 in the following way. 1 2 3 Storing XM Channel Presets 1 2 3 While receiving XM1/XM2, press the g DN or f UP button to select channel “0.
XM Radio Operation CAT g DN f UP TITLE Category Search Category Search functionality allows you to search for a specific channel by the category of programming it offers, or to surf within a given category. 1 2 3 In XM mode, press the CAT button to display the category of the channel that is currently selected for 5 seconds. Changing the Display Text information, such as the channel name, artist name/feature, and song/program title, is available with each XM channel.
Remote Control Operation 1 2 3 4 Controls on Remote Control CDA-7977/CDA-7876/CDA-7875 only NOTE Although the remote control is not supplied with the CDA-7873, you can use it, if purchased separately. 1 Power Button Press the button to turn the power on/off. 2 Source Button Press to select the audio source. 3 -/J Button Press the button to switch between the Play and Pause modes for CD. 4 ANGLE 89 Buttons Press the button to adjust the angle of the movable display.
Battery Replacement CDA-7977/CDA-7876/CDA-7875 only Applicable battery: Use two “AAA” sized dry batteries or equivalent. 1 2 3 Opening the battery cover Slide out the battery cover while firmly pressing the direction of arrow. Replacing the battery Put the batteries in the case observing the polarities as illustrated. Closing the cover Push the cover as illustrated until a click is heard.
Information In Case of Difficulty If you encounter a problem, please review the items in the following checklist. This guide will help you isolate the problem if the unit is at fault. Otherwise, make sure the rest of your system is properly connected or consult your authorized Alpine dealer. Basic No function or display. • Vehicle's ignition is off. - If connected following instructions, the unit will not operate with the vehicle's ignition off. • Improper power lead connections.
Indication for CD Player HI TEMP • Protective circuit is activated due to high temperature. - The indicator will disappear when the temperature returns to within operation range. T– – – – – • No CD is inserted. - Insert a CD. • Although a disc is inserted, “T-- ---” is displayed and the unit does not start to play or eject the disc. - Remove the disc by following these steps: 1) Press the c button. The movable display will open.
Indication for XM Radio Mode ANTENNA • The XM antenna is not connected to the XM radio module. - Check whether the XM antenna cable is attached securely to the XM radio module. Specifications FM TUNER SECTION Tuning Range Mono Usable Sensitivity 50 dB Quieting Sensitivity Alternate Channel Selectivity Signal-to-Noise Ratio Stereo Separation Capture Ratio 87.7 – 107.9 MHz 9.3 dBf (0.8 µV/75 ohms) 13.5 dBf (1.3 µV/75 ohms) 80 dB 80 dB 45 dB 2.
Installation and Connections Before installing or connecting the unit, please read the following and pages 2 and 3 of this manual thoroughly for proper use. Warning MAKE THE CORRECT CONNECTIONS. Failure to make the proper connections may result in fire or product damage. USE ONLY IN CARS WITH A 12 VOLT NEGATIVE GROUND. (Check with your dealer if you are not sure.) Failure to do so may result in fire, etc. BEFORE WIRING, DISCONNECT THE CABLE FROM THE NEGATIVE BATTERY TERMINAL.
Installation Metal plate Detachable Front panel Connect each input lead coming from an amplifier or equalizer to the corresponding output lead coming from the left rear of the CDA-7977/CDA-7876/CDA7875/CDA-7873. Connect all other leads of the CDA7977/CDA-7876/CDA-7875/CDA-7873 according to details described in the CONNECTlONS section. 3 Caution When you install this unit in your car, do not remove the Detachable Front Panel.
Installation and Connections Connections 1 POWER ANT 2 Blue/White REMOTE TURN-ON 3 Pink/Black AUDIO INTERRUPT IN 4 ILLUMINATION 5 IGNITION 6 BATTERY 7 GND 8 Blue Orange Antenna To power antenna To amplifier or equalizer Red Choke coil Yellow To vehicle phone To the instrument cluster illumination lead Ignition Key 9 Black (CDA-7876/CDA-7875/ CDA-7873 only) SPEAKER RIGHT FRONT SPEAKER RIGHT REAR < Ai-NET NORM EQ/DIV ! SPEAKER LEFT REAR " Gray/ Black # Violet/ Black $ Viol
1 Antenna Receptacle 2 Power Antenna Lead (Blue) Connect this lead to the +B terminal of your power antenna, if applicable. NOTE This lead should be used only for controlling the vehicle's power antenna. Do not use this lead to turn on an amplifier or a signal processor, etc. 3 Remote Turn-On Lead (Blue/White) Connect this lead to the remote turn-on lead of your amplifier or signal processor.
32-EN
GARANTIE LIMITÉE Fidèles à leur engagement de ne fournir que des produits de qualité, ALPINE ELECTRONIQUE DE L'AMERIQUE INC. et ALPINE ELECTRONIQUE DU CANADA INC. (Alpine) sont heureuses de vous offrir cette garantie. Nous vous suggérons de le lire attentivement et en entier. Si vous avez la moindre question, veuillez contacter l'un de nos concessionnaires ou appeler directement Alpine au numéros Liste ci-dessous.
LIMITED WARRANTY ALPINE ELECTRONICS OF AMERICA, INC. AND ALPINE OF CANADA INC. ("Alpine"), are dedicated to quality craftsmanship and are pleased to offer this Warranty. We suggest that you read it thoroughly. Should you have any questions, please contact your Dealer or Alpine at one of the telephone numbers listed below. This Warranty covers Car Audio/Visual Products and Related Accessories ("the product"). Products purchased in the Canada are covered only in the Canada. Products purchased in the U.S.A.