R EN FM/AM CD Player FM/AM CD Receiver CDA-7995/CDA-7894 FR FM/AM CD Receiver CDA-7893/CDA-7892 ES ES • OWNER'S MANUAL Please read before using this equipment. • MODE D'EMPLOI Veuillez lire avant d'utiliser cet appareil. • MANUAL DE OPERACIÓN Léalo antes de utilizar este equipo. ALPINE ELECTRONICS, INC. Tokyo office: 1-1-8 Nishi Gotanda, Shinagawa-ku, Tokyo 141-8501, Japan Tel.: (03) 3494-1101 ALPINE ELECTRONICS OF AMERICA, INC. 19145 Gramercy Place, Torrance, California 90501, U.S.A. Tel.
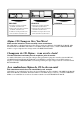
CHA-S634 CHA-1214 • CD changer for CDA-7995/CDA7894/CDA-7893/CDA-7892. • Changeur CD pour CDA-7995/CDA7894/CDA-7893/CDA-7892. • Cambiador de CD para CDA-7995/ CDA-7894/CDA-7893/CDA-7892. • CD changer for CDA-7995/CDA7894/CDA-7893/CDA-7892. • Changeur CD pour CDA-7995/CDA7894/CDA-7893/CDA-7892. • Cambiador de CD para CDA-7995/ CDA-7894/CDA-7893/CDA-7892. CHM-S630 Alpine CD Changers Give You More! More musical selections, more versatility, more convenience.
ENGLISH Contents Operating Instructions WARNING WARNING .................................................. 3 CAUTION ................................................... 3 PRECAUTIONS ......................................... 3 Basic Operation Detaching the Front Panel ................................. 5 Attaching the Front Panel ................................. 5 Initial System Start-Up ..................................... 5 Turning Power On and Off ...............................
MP3 Operation Playing MP3 Files (CDA-7995/ CDA-7894 only) .......................................... 24 Playing MP3 Files with the CD Changer (Optional) .................................................... 24 Music Sensor (Skip) ........................................ 24 Fast Forward and Backward ........................... 25 Selecting Folders ............................................. 25 File Search ...................................................... 25 Repeat Play .................................
WARNING WARNING This symbol means important instructions. Failure to heed them can result in serious injury or death. DO NOT OPERATE ANY FUNCTION THAT TAKES YOUR ATTENTION AWAY FROM SAFELY DRIVING YOUR VEHICLE. Any function that requires your prolonged attention should only be performed after coming to a complete stop. Always stop the vehicle in a safe location before performing these functions. Failure to do so may result in an accident.
WARNING Correct Handling PRECAUTIONS Do not drop the disc while handling. Hold the disc so you will not leave fingerprints on the surface. Do not affix tape, paper, or gummed labels to the disc. Do not write on the disc. Never Attempt the Following Do not grip or pull out the disc while it is being pulled back into the player by the automatic reloading mechanism. Do not attempt to insert a disc into the unit when the unit power is off.
Basic Operation Initial System Start-Up POWER Be sure to press the RESET switch when using the unit for the first time, after installing the CD changer, etc., or after changing the car battery. RESET 1 2 ANGLE 89 Make sure that the power of the unit is off. If the power is on, press and hold the POWER button for at least 3 seconds to turn off the unit. Press the RESET switch with a ballpoint pen, or any other pointed object.
Basic Operation Displaying Time g DN BAND MODE (Rotary encoder) 1 Press the CLK (clock) button repeatedly until the time is displayed.
Setting the Bass Control 2-2 Setting the treble Level: Turn the Rotary encoder to select the desired Treble Level (–7~+7). You can emphasize the treble frequency. You can change the Bass Frequency emphasis to create your own tonal preference. 1 NOTES • If no buttons are pressed within 5 seconds, the Treble control setting will be turned off automatically. • The settings of the Treble Level will be individually memorized for each source (FM, AM, XM, CD, etc.) until the setting is changed.
Basic Operation Here we calculate the time correction value for the front left speaker in the diagram at the left. BAND Conditions: Farthest Speaker – listening position : 2.25 m (88-9/16") Front left speaker – listening position : 0.5 m (19-11/16") Calculation: L = 2.25 m – 0.5 m = 1.75 m (68-7/8") Time correction = 1.75 ÷ 343* × 1000 = 5.1 (ms) *Speed of sound: 343 m/s (765 mph) at 20˚C Rotary encoder In other words, giving the front left speaker a time correction value of 5.
Bass Focus The time difference between the front-rear/left-right speakers, can be adjusted at the same time. With an initial delay of 0.3 ms for each of the 0 to 39 steps, audible time correction can be done. For finer adjustment, use the procedure in the previous section "Time Correction," for which the delay steps are 0.1 ms. 1 Example of Steps 2 and 3 Setting (1) After entering corrections for the front (left and right) speakers in STEP 5, the time difference is 1.
Basic Operation Setting the MX Mode MX (Media Xpander) makes vocals or instruments sound distinct regardless of the music source. The radio, CD, and MP3, will be able to reproduce the music clearly even in cars with a lot of road noise. SOURCE BAND DISP/B. OUT Rotary encoder/Q. S. 1 2 T.CORR MX 3 4 Time Difference Table Number of Steps Time Difference (ms) Number of Steps Time Difference (ms) Number of Steps Time Difference (ms) 0 0.0 14 4.2 28 8.4 1 0.3 15 4.5 29 8.7 2 0.6 16 4.
Quick Searching Function You can easily select tracks and files. 1 2 3 Press the SOURCE button to set the desired source mode. ( CD mode is explained here as an example) When setting the CD mode, press and hold the Q.S. button for at least 2 seconds. The mode changes to the Q.S. (Quick Search) setting. Select a desired track by turning the Rotary encoder to the right or left. • CD/Changer mode: Track can be selected. • XM mode: Channel can be selected.
Basic Operation -/J BAND Rotary encoder MP3 mode: (MP3 files can be played back with the CDA-7893/CDA-7892 models if an MP3 compatible changer is connected.) ↓ g DN f UP ELAPSED TIME DISPLAY ↓ CLOCK DISPLAY ↓ FOLDER NAME DISPLAY ↓ FILE NAME DISPLAY ↓ ID3 TAG DISPLAY∗2 ↓ FRAME DISPLAY∗3 TITLE ∗1 Displayed during playback of a disc with CD Text. Displaying the Title/Text It is possible to display the CD/Station title if the title has been previously inputted.
Titling Discs/Stations It is possible to title your favorite CD's or radio stations. You cannot input titles on MP3 discs (Except when a changer is connected). 1 2 Press the TITLE button and select the title display mode. For details, see “Displaying the Title/Text” (page 12). Press and hold the TITLE button for at least 3 seconds. The first character will blink. CDA-7995 only: Press the BAND button to select the characters/ symbols.
SETUP Operation Dimmer Control SOURCE BAND MODE/Rotary encoder (CDA-7995/CDA-7894/CDA-7893 only) Set the DIMMER control to AUTO to decrease the illumination brightness of the unit with the head lights of the vehicle ON. This mode is useful if you feel the unit's backlighting is too bright at night. 1 g DN f UP SETUP 2 Switching the Tuner Mode The CDA-7995/CDA-7894/CDA-7893/CDA-7892 incorporates the MAX TUNE SQ for the highest quality tuner audio.
Sound (Beep) Guide Function 3 This function will give audible feedback with varying tones depending upon the button pressed. 1 2 3 • SCR AUTO: the CD text information, the text information of folder and file names, and the ID3 tags are scrolled automatically. • SCR MANUAL: the display is scrolled only when a disc is loaded or when a track is changed, etc. Press and hold the SETUP button for at least 3 seconds. Press the f UP or g DN button to select “BEEP.
SETUP Operation PWR-IC ON (CDA-7892: PWR ON): The speakers are driven by the built-in amplifier. BAND Rotary encoder Speakers SPEAKER RIGHT FRONT SPEAKER RIGHT REAR g DN f UP Connecting to an External Amplifier SPEAKER LEFT FRONT (CDA-7894/CDA-7893/CDA-7892 only) When an external amplifier is connected, sound quality can be improved by stopping the power supply of the buit-in amplifier. The power output is set to OFF by the following procedure.
Demonstration Adjusting Display Contrast (CDA-7995 only) This unit has a Demonstration feature which simulates the display functions. 1 2 3 Press and hold the SETUP button for at least 3 seconds. Press the f UP or g DN button to select the DEMO mode. Press the BAND button to turn on or off the DEMO mode. Each press toggles between DEMO ON and DEMO OFF. If no button is pressed for 30 seconds, the DEMO mode activates. You can adjust the display contrast for better visibility.
Radio Operation 3 SOURCE TUNE/A.ME BAND 4 g DN f UP Preset buttons (1 through 6) Press the TUNE button to illuminate the DX and SEEK indicators in the display. With the DX (Distance) mode activated, both strong and weak stations will be tuned in the Auto-Seek operation. Press again to return to the local mode. The DX indicator will turn off and the SEEK indicator will remain illuminated. Now, only strong stations will be tuned.
Automatic Memory of Station Presets Tuning to Preset Stations 1 2 1 2 3 Press the SOURCE button to select the radio mode. Press the BAND button repeatedly until the desired radio band is displayed. Press and hold the A. ME button for at least 2 seconds. The frequency on the display continues to change while the automatic memory is in progress. The tuner will automatically seek and store 6 strong stations in the selected band. They will be stored into buttons 1 to 6 in order of signal strength.
CD Player Operation 2 -/J SOURCE Insert a disc with the label side facing up. The disc will be pulled into the unit automatically. The movable display will close and playback will begin. When a disc is already inserted, press the SOURCE button to switch to the CD mode. The mode will change every time the button is pressed. → TUNER → CD → CD CHANGER∗ (∗ Only when the CD changer is connected) g DN f UP REPEAT c Opening and Closing the Movable display 1 Press the c button.
About discs that can be used with the CDA-7893/CDA-7892 models. We recommend using only compact discs containing the marks shown below. You can play CD-Rs (CD-Recordable)/CD-RWs (CDReWritable) for audio use on this unit. You can not play CD-Rs/CD-RWs containing MP3 formatted audio files. Music Sensor (Skip) 1 Momentarily press the g DN button once during CD play to return to the beginning of the current track.
CD Player Operation Controlling CD Changer (Optional) SOURCE BAND Select buttons (1 through 6) M.I.X. SCAN M.I.X. (Random Play) 1 An optional 6-disc or 12-disc CD Changer may be connected to the CDA-7995/CDA-7894/CDA-7893/CDA7892 if it is Ai-NET compatible. With a CD Changer connected to the Ai-NET input of the CDA-7995/CDA7894/CDA-7893/CDA-7892, the CD Changer will be controllable from the CDA-7995/CDA-7894/CDA-7893/ CDA-7892.
Multi-Changer Selection 3 Alpine's Ai-NET system will support up to 6 CD Changers. When operating two or more changers, the KCA-400C (Multi-Changer Switching device) must be used. If you use 1 Switching device, you can connect up to 4 CD Changers. If you use 2 Switching devices, you can connect up to 6 CD Changers. When using KCA410C (Versatile Link Terminal), you can connect two changers and two external outputs (AUX).
MP3 Operation Select buttons (1 through 6) -/J SOURCE Rotary encoder c SCAN Playing MP3 Files with the CD Changer (Optional) If you connect a changer compatible with MP3, you can play CD-ROMs, CD-Rs, and CD-RWs containing MP3 files on the CDA-7995/CDA-7894/CDA-7893/CDA-7892. 1 g DN f UP FOLDER DN FILE SEARCH FOLDER UP M. I. X. REPEAT Playing MP3 Files (CDA-7995/CDA-7894 only) The CDA-7995/CDA-7894 models include a built-in MP3 unit.
Fast Forward and Backward M.I.X. (Random Play) 1 1 Press and hold the g DN or f UP button to quickly move backward or forward until you reach the desired section of the file. NOTE Press the M.I.X. button in the play or pause mode. The files on the disc will be played back in a random sequence. To cancel M.I.X. play, press the M.I.X. button again to turn off the M.I.X. There is no audio output during fast forward/backward for MP3 files. NOTES • If an MP3 compatible CD changer with the ALL M.I.X.
MP3 Operation 2 BAND 3 Press the f UP or g DN button to select "CDDA/MP3." Press the BAND button to toggle the mode between CD-DA and CD-DA/MP3 (CD/MP3 is displayed on the CDA-7892 model). • CD-DA: Only CD data can be played back. • CD-DA/MP3: Both CD data and MP3 file tracks can be played back. (For the CDA-7892 model, CD/MP3 are displayed) g DN f UP SETUP 4 Press the SETUP button to return to normal mode.
• Supported playback sampling rates and bit rates Sampling rates: 8 kHz - 44.1 kHz, bit rates: 8 - 320 kbps Note that for sampling rates such as 11,025 kHz, this device’s frame display (Page 12) may not display correctly. • ID3 tags This device supports ID3 tag v1. If ID3 tag data is in an MP3 file, this device can display the title (track title), artist name, and album name ID3 tag data. This device can only display single-byte alphanumeric characters and the underscore.
XM Radio Operation 3 SOURCE CAT BAND Preset buttons (1 through 6) Press the g DN or f UP button to select the desired channel. Holding the g DN or f UP buttons will change channels continuously. Checking the XM Radio ID Number You need to provide XM with the unique XM Radio ID number for your XM Radio Receiver in order to subscribe to XM's programming.
Storing XM Channel Presets 1 2 3 Press the BAND button to select the desired band (XM1 or XM2) you want to store. After tuning in the desired channel, press and hold any one of the Preset buttons (1 through 6) that you want to store the station on for at least 2 seconds. The selected station is stored. Repeat the procedure to store up to 5 other channels onto the same band. To use this procedure for other bands, simply select the band desired and repeat the procedure.
Remote Control Operation 1 2 3 4 Controls on Remote Control 1 Power Button Press the button to turn the power on/off. 2 Source Button Press to select the audio source. 3 -/J Button Press the button to switch between the Play and Pause modes for CD. 4 ANGLE 89 Buttons Press the button to adjust the angle of the movable display. 5 Band/Program Button Radio mode: BAND Button Press the button and the band will change as shown below.
Battery Replacement Applicable battery: Use two “AAA” sized dry batteries or equivalent. 1 2 3 Opening the battery cover Slide out the battery cover while firmly pressing the direction of arrow. Point the remote control transmitter at the remote control sensor. Remote control sensor Replacing the battery Put the batteries in the case observing the polarities as illustrated. Closing the cover Push the cover as illustrated until a click is heard.
Information In Case of Difficulty If you encounter a problem, please turn the power off, then on again. If the unit is still not functioning normally, please review the items in the following checklist. This guide will help you isolate the problem if the unit is at fault. Otherwise, make sure the rest of your system is properly connected or consult your authorized Alpine dealer. Basic No function or display. • Vehicle's ignition is off.
Indication for CD Player HI TEMP • Protective circuit is activated due to high temperature. - The indicator will disappear when the temperature returns to within operation range. NO DISC • No CD is inserted. - Insert a CD. • Although a disc is inserted, “NO DISC” is displayed and the unit does not start to play or eject the disc. - Remove the disc by following these steps: 1) Press the c button. The movable display will open.
Information Indication for XM Radio Mode OFF AIR ANTENNA • The XM antenna is not connected to the XM radio module. - Check whether the XM antenna cable is attached securely to the XM radio module. • The channel currently selected has stopped broadcasting. - Select another channel. ––––– (CDA-7995-CDA-7894/CDA-7893 only) UPDATING • Radio is being updated with latest encryption code. - Wait until encryption code is being updated. Channels 0 and 1 should function normally.
Specifications FM TUNER SECTION Tuning Range Mono Usable Sensitivity 50 dB Quieting Sensitivity Alternate Channel Selectivity Signal-to-Noise Ratio Stereo Separation Capture Ratio GENERAL 87.7 – 107.9 MHz 9.3 dBf (0.8 µV/75 ohms) 13.5 dBf (1.3 µV/75 ohms) 80 dB 80 dB 45 dB 2.0 dB Power Requirement Maximum Power Output Maximum Pre-Output Voltage AM TUNER SECTION Tuning Range Sensitivity (IEC Standard) 530 – 1,710 kHz 22.
Installation and Connections Before installing or connecting the unit, please read the following and pages 3 and 4 of this manual thoroughly for proper use. Caution HAVE THE WIRING AND INSTALLATION DONE BY EXPERTS. MAKE THE CORRECT CONNECTIONS. The wiring and installation of this unit requires special technical skill and experience. To ensure safety, always contact the dealer where you purchased this product to have the work done.
Installation Metal plate Detachable Front panel Connect each input lead coming from an amplifier or equalizer to the corresponding output lead coming from the left rear of the CDA-7995/CDA-7894/CDA-7893/CDA-7892. Connect all other leads of the CDA-7995/CDA-7894/CDA7893/CDA-7892 according to details described in the CONNECTlONS section. 3 Caution When you install this unit in your car, do not remove the Detachable Front Panel.
Installation and Connections Connections 1 POWER ANT 2 Blue/White REMOTE TURN-ON 3 Pink/Black AUDIO INTERRUPT IN 4 Orange ILLUMINATION 5 Blue Antenna To power antenna To amplifier or equalizer To vehicle phone To the instrument cluster illumination lead (CDA-7995/CDA-7894/ CDA-7893 only) Choke coil Red IGNITION 6 Yellow BATTERY 7 Black GND 8 Ignition Key 9 (CDA-7894/CDA-7893/ CDA-7892 only) Gray " SPEAKER RIGHT FRONT SPEAKER RIGHT REAR < Ai-NET NORM EQ/DIV ! SPEAKER LEFT R
1 Antenna Receptacle 2 Power Antenna Lead (Blue) Connect this lead to the +B terminal of your power antenna, if applicable. NOTE This lead should be used only for controlling the vehicle's power antenna. Do not use this lead to turn on an amplifier or a signal processor, etc. 3 Remote Turn-On Lead (Blue/White) Connect this lead to the remote turn-on lead of your amplifier or signal processor.
40-EN
LIMITED WARRANTY ALPINE ELECTRONICS OF AMERICA, INC. AND ALPINE OF CANADA INC. ("Alpine"), are dedicated to quality craftsmanship and are pleased to offer this Warranty. We suggest that you read it thoroughly. Should you have any questions, please contact your Dealer or Alpine at one of the telephone numbers listed below. This Warranty covers Car Audio/Visual Products and Related Accessories ("the product"). Products purchased in the Canada are covered only in the Canada. Products purchased in the U.S.A.