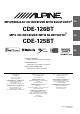
R MP3/WMA/AAC CD RECEIVER WITH BLUETOOTH® EN CDE-126BT MP3 CD RECEIVER WITH BLUETOOTH® FR CDE-125BT ES • OWNER’S MANUAL Please read before using this equipment. • MODE D’EMPLOI Veuillez lire avant d’utiliser cet appareil. • MANUAL DE OPERACIÓN Léalo antes de utilizar este equipo. ALPINE ELECTRONICS MARKETING, INC. 1-1-8 Nishi Gotanda, Shinagawa-ku, Tokyo 141-0031, Japan Phone 03-5496-8231 ALPINE ELECTRONICS OF AMERICA, INC. 19145 Gramercy Place, Torrance, California 90501, U.S.A.
ENGLISH Contents Operating Instructions Sound Setting Adjusting Subwoofer Level/Bass Level/Treble Level/Balance (Between Left and Right)/Fader (Between Front and Rear)/Defeat ............... 14 Setting the Bass Control ................................. 14 WARNING Setting the Treble Control ............................... 14 WARNING ................................................. 5 Adjusting the High Pass Filter ........................ 15 CAUTION ..................................................
BT Hands-Free Calling iPod/iPhone (Optional) Setup Before Using ......................................... 19 About BLUETOOTH .................................. 19 Before Using Hands-Free Function ............ 19 How to connect to a BLUETOOTH compatible device (Pairing) ..................... 20 BLUETOOTH SETUP ................................... 20 BLUETOOTH Setup Operation .................. 20 Playback ..........................................................25 Setting the BLUETOOTH Device ...........
Operating Instructions WARNING DO NOT PLACE HANDS, FINGERS OR FOREIGN OBJECTS IN INSERTION SLOTS OR GAPS. Doing so may result in personal injury or damage to the product. WARNING This symbol means important instructions. Failure to heed them can result in serious injury or death. DO NOT OPERATE ANY FUNCTION THAT TAKES YOUR ATTENTION AWAY FROM SAFELY DRIVING YOUR VEHICLE. Any function that requires your prolonged attention should only be performed after coming to a complete stop.
Never Attempt the Following Installation Location Do not grip or pull out the disc while it is being pulled back into the player by the automatic reloading mechanism. Do not attempt to insert a disc into the unit when the unit power is off. Make sure this unit will not be installed in a location subjected to: • • • • Direct sun and heat High humidity and water Excessive dust Excessive vibrations Correct Handling Do not drop the disc while handling.
• Artist/song name, etc., can be displayed, however characters may not be correctly displayed. On handling Compact Discs (CD/CD-R/CD-RW) • • • • • • Do not touch the surface. Do not expose the disc to direct sunlight. Do not affix stickers or labels. Clean the disc when it is dusty. Make sure that there are no bumps around the disc. Do not use commercially available disc accessories. CAUTION Alpine accepts no responsibility for lost data, etc., even if data, etc. is lost while using this product.
Attaching Getting Started 1 2 Rotary encoder SOUND/SETUP SOURCE/ (Release) /MUTE / /ENT Push the left side of the front panel until it locks firmly into the main unit. • Before attaching the front panel, make sure that there is no dirt or dust on the connector terminals and no foreign object between the front panel and the main unit. • Attach the front panel carefully, holding the sides of the front panel to avoid pushing buttons by mistake.
Setting Time 1 2 Radio Press and hold SOUND/SETUP for at least 2 seconds to activate the SETUP mode. Turn the Rotary encoder to select the CLOCK ADJ mode, and then press / /ENT. SOURCE/ BAND The time indication will blink. 3 4 5 6 Turn the Rotary encoder to adjust the hours while the time indication is blinking. When the hour has been adjusted, press / /ENT. Press and hold SOUND/SETUP for at least 2 seconds to return to normal mode.
Presetting Stations Automatically 1 2 Press BAND repeatedly until the desired radio band is displayed. CD/MP3/WMA/AAC SOURCE/ Rotary encoder Press and hold TUNE/A.ME for at least 2 seconds. The frequency on the display continues to change while the automatic memory is in progress. The tuner will automatically seek and store 6 strong stations in the selected band. They will be stored into preset buttons 1 to 6 in order of signal strength.
3 Press or to select the desired track (file). CD mode : Returning to the beginning of the current track (file): Press . Fast backward: Press and hold . Advancing to the beginning of the next track (file): Press . Fast forward: Press and hold 4 5 MP3/WMA/AAC mode : : Only a file is repeatedly played back. . / To pause playback, press Pressing : Only a track is repeatedly played back. /ENT. : Only files in a folder are repeatedly played back. /ENT again will resume playback.
Searching for CD Text Quick Search On discs utilizing CD Text, songs can be searched and played by using their recorded titles. For discs without CD Text, searches are made using the track numbers associated with each song. You can search for tracks (files). 1 /ESC during play. Press This will set the search mode, and the “ up. 2 ” indicator lights Turn the Rotary encoder to select the desired track, and then press / /ENT. This will play the selected track.
Supported playback sampling rates and bit rates Order of files Files are played back in the order that the writing software writes them to the disc. Therefore, the playback order may not be what is expected. Verify the writing order in the software’s documentation. The playback order of the folders and files is as follows. MP3 Sampling rates: 48 kHz, 44.1 kHz, 32 kHz, 24 kHz, 22.05 kHz, 16 kHz, 12 kHz, 11.025 kHz, 8 kHz Bit rates: 8 - 320 kbps WMA Sampling rates: 48 kHz, 44.
Sound Setting Setting the Bass Center Frequency 2-1 Press BAND to select the desired bass center frequency. Rotary encoder (AUDIO/LOUD) SOURCE/ BAND 80 Hz 100 Hz 200 Hz 60 Hz 80 Hz Emphasizes the displayed bass frequency ranges. Setting the Bass Bandwidth 2-2 Press SOURCE/ to select the desired bass bandwidth.
Setting the Treble Level 2-2* Turn the Rotary encoder to select the desired 2 Other Functions treble level (–7~+7). You can emphasize the treble level. 3 SOURCE/ Press and hold /ESC for at least 2 seconds to return to normal mode. • If no operation is performed for 15 seconds, the unit will return to normal mode automatically. • The treble level settings will be individually memorized for each source (FM, AM, CD, etc.) until the setting is changed.
About the indication display Using the Front AUX Input Terminal When displaying Text, the following indicators are lit according to the mode.
BLUETOOTH Setting SETUP Setting the BLUETOOTH Connection (BT IN) You can flexibly customize the unit to suit your own preferences and usage. From the SETUP menu, Sound Customizing, Visual Customizing, etc., can be modified. SOURCE/ Rotary encoder (AUDIO) SOUND/SETUP BT ADAPTER (Initial setting) / BT OFF With BLUETOOTH technology, you can place a hands-free call by a BLUETOOTH-equipped mobile phone. Set ADAPTER when the BLUETOOTH function is used.
Scroll Type Setting SCR TYPE1 / SCR TYPE2 (Initial setting) Choose from two scrolling methods. Select the type you prefer. SCR TYPE1: The characters scroll from right to left, a single character at a time. SCR TYPE2: Words are built up from left to right, a single character at a time. When the display is filled, it is cleared and the remaining words are displayed the same way until all words of the title have been shown.
Setting the AUX+ SETUP Mode AUX+ ON / AUX+ OFF (Initial setting) An external device (such as a portable music player) can be connected to the Full Speed connector of this unit. A conversion cable (KCE-237B) for building up the AUX IN (optional) is required. A portable music device and an iPod/iPhone cannot be connected to the Full Speed connector at the same time. BT Hands-Free Calling Rotary encoder /VOICE DIAL AUX+ ON: Set to ON when a portable device is connected.
How to connect to a BLUETOOTH compatible device (Pairing) For details on the control from a BLUETOOTH compatible device, refer to the Owner’s Manual of the BLUETOOTH compatible device. 1 2 Set a BLUETOOTH connection from a BLUETOOTH compatible device. The PIN code (“0000”) is displayed on the connected unit. • The PIN code is fixed as “0000.” 3 4 Input the PIN code (“0000”) in a BLUETOOTH compatible device.
Displaying the phone service provider name Setting item : SEV NAME The service provider name of the connected BLUETOOTH compatible device will be displayed. If a BLUETOOTH compatible device is not connected, “ID UNSENT” will also be displayed. • Depending on the character type some phone service provider name cannot be displayed. “ID UNSENT” will also be displayed. Adjusting the volume for the microphone input You can emphasize or weaken the microphone input volume level.
Dialing a Number In The Phone Book Calling Call History is recorded for the last dialed/received/missed calls. There are various ways of making calls based on the “Calling.” The following steps 1 to 5 are common to the various ways of making these calls. For details, refer to each individual category for making calls. 1 Press . The outgoing method list is displayed. 2 Turn the Rotary encoder to select the outgoing mode.
Adjusting the volume when receiving a Call USB memory (Optional) While calling, you can adjust the volume. Turn the Rotary encoder to adjust the volume. • You may need to increase volume from your regular audio listening source level. However, increasing the volume excessively may result in feedback. If feedback is noticed as feedback is directly related to the volume, turn down the volume as low as acceptable to eliminate it. Positioning the microphone in a direction away from the main car speakers (e.
USB Memory Connection (Optional) iPod/iPhone (Optional) Connect USB memory 1 2 SOURCE/ Open the cover of the USB connection terminal. Rotary encoder 1 2 45 6 Connect the USB memory directly to the USB connection terminal, or via the USB cable.
1 Playback 1 The “ Press SOURCE/ to switch to the iPod mode. 2 iPod*1/AUX+*2 TUNER DISC USB AUDIO AUX*3 TUNER 3 2 5 Press or to select the desired song. Return to the beginning of the current song: Press . Fast backward through current song: Press and hold . Advance to the beginning of the next song: Press . Fast forward through current song: Press and hold . To pause playback, press Pressing / / /ESC to activate the search selection mode. ” indicator lights up.
Direct Search Function Random Play Shuffle (M.I.X.) The unit’s direct search function can be used to search for an album, song, etc., more efficiently. In PLAYLIST/ARTIST/ALBUM/SONG/ PODCAST/GENRE/COMPOSER/AUDIOBOOK mode, you can quickly target any song. The Shuffle function of the iPod/iPhone is displayed as unit. In the search mode, press any one of the preset buttons (1 through 6) to quickly skip over a designated percent of your song content.
Repeat Play Information Only Repeat One is available for the iPod/iPhone. Repeat One: A single song is repeatedly played back. 1 Press 4. The song is played back repeatedly. (off) (Repeat One) 2 To cancel repeat play, select (off) with the above procedure. • During repeat playback, no other songs are selectable by pressing or . Displaying the Text You can display the tag information of a song in the iPod/iPhone. Press VIEW. Each press changes the display.
CD CD Player not functioning. • Out of operating temperature range +50°C (+120°F) for CD. - Allow the vehicle’s interior (or trunk) temperature to cool. CD playback sound is wavering. • Moisture condensation in the CD Module. - Allow enough time for the condensation to evaporate (about 1 hour). CD insertion not possible. • A CD is already in the CD player. - Eject the CD and remove it. • The CD is being improperly inserted.
Indication for USB memory • Abnormal current is run to the USB connector device (an error message may be displayed if the USB device that is not compatible with the unit is connected). USB memory is a malfunction or it is shorted. - Connect another USB memory. UNIT ERROR • A USB device that is not supported by the unit is connected. - Connect a USB device that is supported by the unit. Indication for iPod Mode • The iPod/iPhone is not connected.
GENERAL Specifications Power Requirement FM TUNER SECTION Tuning Range Mono Usable Sensitivity 50 dB Quieting Sensitivity Alternate Channel Selectivity Signal-to-Noise Ratio Stereo Separation Capture Ratio 87.7-107.9 MHz 9.3 dBf (0.8 µV/75 ohms) 13.5 dBf (1.3 µV/75 ohms) 80 dB 65 dB 35 dB 2.0 dB AM TUNER SECTION Tuning Range Sensitivity (IEC Standard) CHASSIS SIZE 530-1,710 kHz 22.
Installation and Connections Before installing or connecting the unit, please read the following and pages 5 to 7 of this manual thoroughly for proper use. Warning MAKE THE CORRECT CONNECTIONS. Failure to make the proper connections may result in fire or product damage. USE ONLY IN CARS WITH A 12 VOLT NEGATIVE GROUND. (Check with your dealer if you are not sure.) Failure to do so may result in fire, etc. BEFORE WIRING, DISCONNECT THE CABLE FROM THE NEGATIVE BATTERY TERMINAL.
Reinforce the head unit with the metal mounting strap (not supplied). Secure the ground lead of the unit to a clean metal spot using a screw (*1) already attached to the vehicle’s chassis. Installation • For the screw marked “*2”, use an appropriate screw for the chosen mounting location. Connect each input lead coming from an amplifier to the corresponding output lead coming from the left rear of the CDE-126BT/CDE-125BT.
Connections To iPod/iPhone Antenna (Blue) (Blue/White) (Pink/Black) (Orange) (Red) (Yellow) (Black) POWER ANT REMOTE TURN-ON AUDIO INTERRUPT IN ILLUMINATION To power antenna To amplifier Not used To the instrument cluster illumination lead IGNITION BATTERY Ignition Key GND (Gray) SPEAKER RIGHT FRONT Battery Speakers Front Right (Gray/Black) (Violet/Black) SPEAKER RIGHT REAR Rear Right (Violet) (Green) SPEAKER LEFT REAR Rear Left (Green/Black) (White/Black) SPEAKER LEFT FRONT Front Lef
Antenna Receptacle Left Rear (+) Speaker Output Lead (Green) Power Antenna Lead (Blue) Left Rear (–) Speaker Output Lead (Green/Black) Connect this lead to the +B terminal of your power antenna, if applicable. Left Front (–) Speaker Output Lead (White/Black) • This lead should be used only for controlling the vehicle’s power antenna. Do not use this lead to turn on an amplifier or a signal processor, etc.
LIMITED WARRANTY ALPINE ELECTRONICS OF AMERICA, INC. AND ALPINE OF CANADA INC. (“Alpine”), are dedicated to quality craftsmanship and are pleased to offer this Warranty. We suggest that you read it thoroughly. Should you have any questions, please contact your Dealer or contact Alpine at one of the telephone numbers listed below. PRODUCTS COVERED: This Warranty covers Car Audio Products and Related Accessories (“the product”). Products purchased in the Canada are covered only in the Canada.
About the Rules of Bluetooth Electromagnetic Radiation Regulation USA/Canada Brasil México This device complies with Part 15 of the FCC Rules and RSS-Gen of IC Rules. Operation is subject to the following two conditions: (1) this device may not cause interference, and (2) this device must accept any interference, including interference that may cause undesired operation of this device.