
User's Manual


12
Altai Technologies Ltd. All rights reserved
Quick Setup Guide
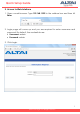
5. Click Submit at the page bottom and then click Save & Apply at the top
right corner to have all changes take effect.
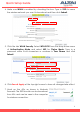
6. Hook up the A2c as shown in Network Scenario and connect a laptop to
the broadcast SSID. The laptop will get an IP address 192.168.98.x with x
between 2 and 254 and should be ready for Internet access.
7. To verify the A2c connection status, you can access the A2c Web
Interface by entering 192.168.98.1 in the browser address bar. Log in to it
and Status Overview page (Status > Overview) is shown up.
8. WAN Interface (Ethernet Port, denoted by eth0) should show established
status with valid IP address, Subnet Mask, Default Gateway and DNS
Server IP address.
9. LAN Interface (2.4G and 5G radios, denoted by radio0_x and radio1_y
respectively where x and y are the WLAN ID) should show correct IP
address (192.168.98.1) with DHCP server and NAT enabled.
Static Connection:
DHCP Conection:
PPPoE Conection: