
User`s manual


USER’S MANUAL
6 | Kaleido-ALTO/QUAD
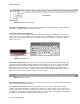
Note: you can see at a glance which channel is assigned to which monitor by clicking the Tab key on the
SIP keyboard (you can do this also with the Kaleido-RCP – more on that in section 5).
Making a monitor display full screen
The next parameter in the Monitor Configuration menu is Full Screen, which makes the window fill up the
screen. When a monitor has been enlarged to full screen, right-click on it and you will notice that a check
mark appears next to the Full Screen parameter; select Full Screen again to unselect it, and the
previous layout is restored.
Note: the full screen layout is configurable via K-Edit (see section 7 K-Edit Software ) and can be saved
as default by pressing the Full Screen key on the Kaleido-RCP for more than 7 seconds (see section 5.3
Kaleido-RCP operation in details).
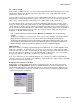
Changing a monitor’s aspect ratio
If the video input signal is of a different aspect ratio than the monitor in which it is displayed, you may
change the monitor’s aspect ratio to display the signal without deformation. The available selections are
4:3, 16:9, and a custom ratio if any, defined with K-Edit (i.e. 14:9).
Figure 3.6 Aspect Ratio Selection
Displaying an underscan video signal
During normal operation, the entire video field of the video input signal in displayed within the monitor;
checking Underscan will display only the visible field.
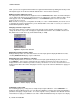
Displaying aspect ratio markers in a monitor
You may display markers in a monitor to show how a 4:3 input signal will display in 16:9 or vice-versa.
Select Markers… in the monitor configuration menu to display the markers menu. Check the box to
display markers in the format that you wish to monitor your monitor. You can also check the two boxes to
display markers all the times when changing the monitor’s aspect ratio. Click the OK button to apply your
selection.
Figure 3.7 Markers Display Selection
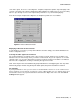
Calibrating a video signal
For monitoring purpose, you may want to modify the input signal calibration. Select Calibration… to
display the Video Calibration menu. You can adjust the Brightness, Contrast, Hue, Color and Sharpness
parameters directly by using the sliders. To reset the signal to “factory” calibration click Default. Click the
Custom button to apply your calibration to the video. A built-in DeInterlacer may also improve the display