INSTALLATION INSTRUCTIONS Tel: 800-643-1514 www.alumaxshowerdoor.com 391 SERIES STIKSTALL SHOWER ENCLOSURE TM Copyright © Alumax Bath Enclosures 1997. All rights reserved.
Three-Year Limited Residential Warranty Alumax Bath Enclosures by Sapa is pleased to warrant to its dealers and residential customers that the products supplied by it shall be free from defects in material and workmanship for three (3) years from purchase of the product, provided they are installed and maintained according to the manufacturer’s recommended practices and installation instructions.1 The Alumax Limited Warranty applies to the original residential owner only, and is not transferable.
!WARNINGS! Alumax Bath Enclosures by Sapa are intended to be installed by experienced installers. If you need assistance with installation, or locating an experienced installer, contact Alumax Consumer Service at 800‐643‐1514. Ensure that the bath enclosure is installed appropriately. Improper installation can lead to breakage, damage or improper performance of the bath enclosure. Wear safety glasses when drilling or cutting to avoid injury to the eyes.
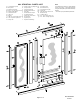
391 STIKSTALL PARTS LIST A. B. C. D. E. F. G. H. J. K. L. 1 Curb (with weep slots) 2 Wall Jambs 6 Plastic Wall Anchors 6 #8 x 1 1/2" Truss Head Screws 2 Plastic Setting Blocks 1 Fixed Glass Panel 1 180° Post 1 Header 12 #8 x 1/4" Truss Head Screws 1 Clear Vinyl Pivot Jamb Seal 1 Pivot Jamb M. N. P. R. S. T. U. V. W. X. Y.
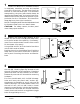
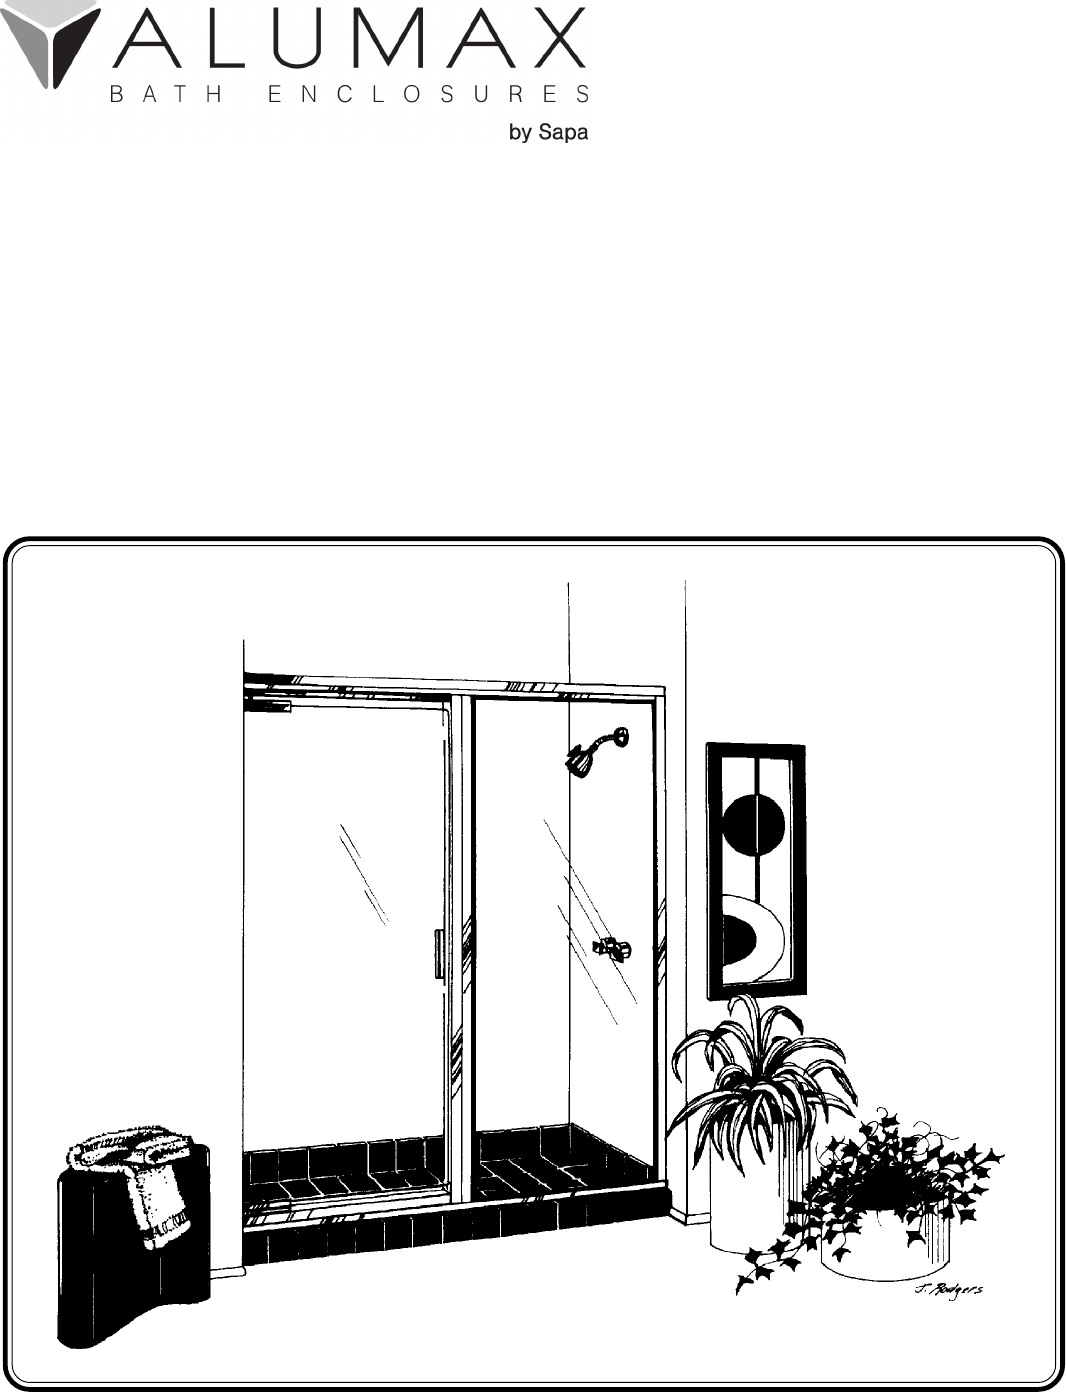
1 The ALUMAX 391 STIKSTALL Shower Enclosure is completely reversible and may be installed pivot-left or pivot-right. The door may pivot from the wall or from the center post. For maximum waterproofing, the pivot jamb should always be opposite the shower head. Using the illustration, determine the correct position for the door in your particular STIKSTALL installation. This instruction sheet depicts a pivot-right installation.
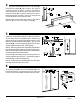
4 Wipe the shower walls and sill, the curb [A] and the wall jambs [B] with a clean, dry cloth to remove any dust or debris. Apply a 1/4" bead of caulk along the inside of both of the pencil lines marked in Step #2. Carefully replace the curb in the exact position marked. Caulk the inside of the curb ends where they meet the wall. Replace both wall jambs and attach to the walls with six #8 x 1 1/2" truss head screws [D]. 5 Place the setting blocks [E] in the curb [A] to support the fixed glass panel [F].
Press the header [H] over the wall jambs [B] and the 180° post [G]. Plumb the post, moving it laterally as required to maintain proper coverage on the fixed glass panel [F]. The minimum horizontal dimension for the door opening is the door panel width (see the illustration in Step #8) plus 1/2", maximum is the door panel width plus 1 3/4". Using the holes in the ends of the header and curb as a guide, drill four 1/8" holes into the wall jambs.
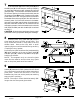
10 Pull the bottom end of the pivot jamb [L] tight to the curb filler [N] and plumb the jamb. Drill two 1/ 8" holes thru the pivot jamb and into the wall jamb [B] 3/8" to 3/4" from the wall and approximately 1/4" from the ends of the jamb. Drill a third hole centered between the first two, then enlarge the three outer holes with a 3/16" drill for clearance on the self-tapping screws. Attach the pivot jamb permanently with three #8 x 1/4" truss head screws [J].
13 Insert the two nylon pivot bushings [Y] into the pivot holes in the head and curb fillers [N]. Lift the door panel [P] and insert the top pivot pin into the pivot bushing in the header filler. Hold the door vertical and insert the bottom pivot pin into the pivot bushing in the curb filler. It may be necessary to remove the header retaining screws and raise the header slightly to install the door.
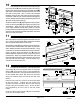
16 Adjust the drip vinyl [U] by sliding it left or right until it just touches the curb. Trim the vinyl (flush with the pivot end and notch 1/2" longer than the drip rail as shown on the strike end). Secure it with one #6 x 3/8" truss head screw [EE] in the pivot end of the drip rail [S]. The drip plug [DD] is supplied with a left and right hand plug together. Break the right and left drip plug apart and insert the appropriate plug into the high (strike) side of the drip rail. Discard the unused drip plug.
19 Inspect the pieces of black glazing vinyl, and note the two different profiles. The smaller shape [HH] is installed vertically and the larger shape [JJ] is installed horizontally. For structural strength and maximum water resistance, these vinyls are designed to fit tightly between the glass and framing. To speed installation, use glass cleaner for lubrication and a small block of wood to press the vinyl into place.
22 Carefully caulk the interior jamb-to-wall and curb-to-base joints. For appearance, you may wish to caulk the exterior joints as well. We recommend you wait twenty-four hours before the first shower to allow the caulking to cure properly. The Care and Cleaning of your new ALUMAX Bath Enclosure. The simplest and preferred method of cleaning your unit is by washing it with clean water and drying with a soft cloth.