
user manual


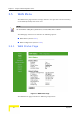


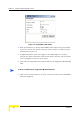
Table Of Contents
- Voice Gateways System Manual
- About This Manual
- Contents
- Chapter 1 - System Description
- Chapter 2 - Installation
- Chapter 3 - Using the Web Configuration Server
- 3.1 Introduction to the Web Configuration Server
- 3.2 Accessing the Web Configuration Server
- 3.3 Using the Web Configuration Server
- 3.4 Home Menu - Product Info Page
- 3.5 WAN Menu
- 3.6 VLAN Tagging Menu
- 3.7 Telephone Menu
- 3.8 BW Reservation - DRAP Configuration Page
- 3.9 System Menu
- 3.10 Upgrade Page
- 3.11 Restart Page
- 3.12 Logout Page
- 3.13 Parameters Summary
- Appendix A - Internal Class 5 Services
- Appendix B - Default Telephony Parameters
- Appendix C - New Features
- Glossary
28 Operation
Chapter 3 - Using the Web Configuration Server
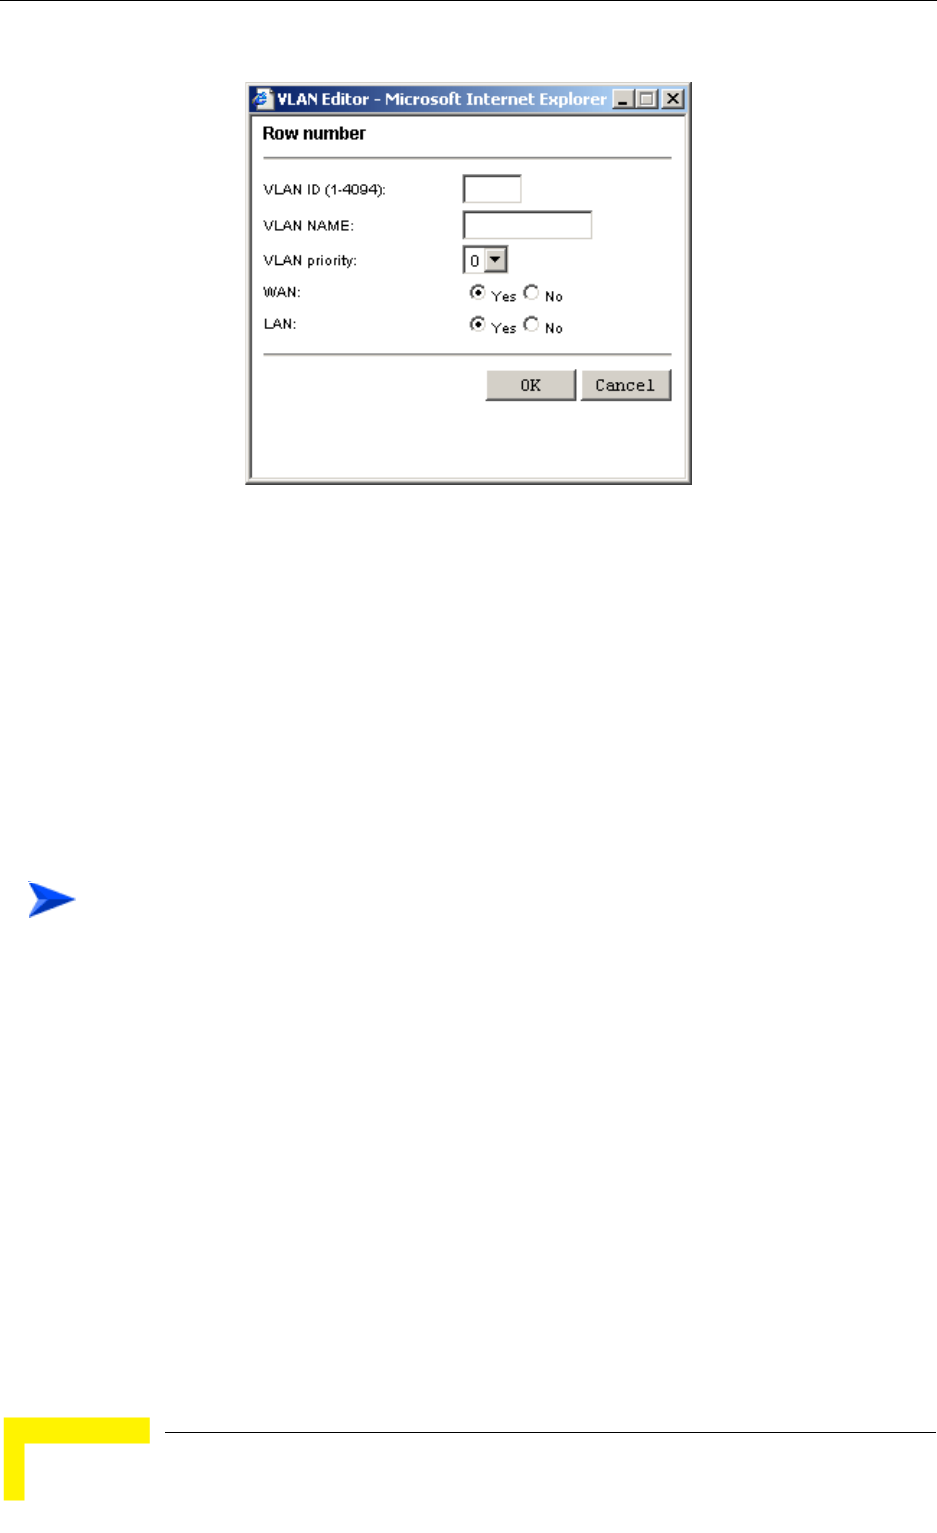
2 Enter the VLAN ID (1 to 4094), VLAN NAME (A descriptive string of printable
characters. Do not use special characters such as space or comma), and the
VLAN priority tag (0 to 7).
3 If applicable packets need to be tagged on the WAN/LAN port, check the
relevant Yes option. Otherwise check the No option. Note that only one VLAN
can be untagged on each port (or on both).
4 Click OK. The newly added entry will be added to the Tagged Port Membership
table.
1 Click on the row ID number of the entry you wish to remove. The VLAN Editor
(Delete) is displayed:
Figure 3-6: VLAN Editor (Add VLAN)
To delete a VLAN from the Tagged Port Membership table: