
Owners Manual


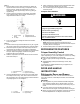


Table Of Contents
- REFRIGERATOR SAFETY
- MAINTENANCE AND CARE
- Cleaning
- Changing the LED Module
- Water Filtration System
- Vacation and Moving Care
- INSTALLATION INSTRUCTIONS
- Unpack the Refrigerator
- Electrical Requirements
- Location Requirements
- Water Supply Requirements
- Connect the Water Supply
- REFRIGERATOR FEATURES
- Crisper Humidity Control
- DOOR AND HANDLE INSTRUCTIONS
- Refrigerator Doors and Drawer
- Remove and Replace Door Handles
- Remove Doors and Hinges
- Reverse Doors (optional)
- Replace Doors and Hinges
- Remove and Replace Freezer Drawer
- PERFORMANCE DATA SHEET
- Performance Data Sheet
- SÉCURITÉ DU RÉFRIGÉRATEUR
- Sécurité du réfrigérateur
- ENTRETIEN ET RÉPARATION
- Nettoyage
- Remplacer le module à DEL
- Système de filtration de l’eau
- Précautions à prendre avant les vacances ou le déménagement
- INSTRUCTIONS D’INSTALLATION
- Déballage du réfrigérateur
- Spécifications électriques
- Exigences d’emplacement
- Spécifications de l’alimentation en eau
- Raccordement à la canalisation d’eau
- CARACTÉRISTIQUES DU RÉFRIGÉRATEUR
- Réglage de l’humidité dans le tiroir à légumes
- INSTRUCTIONS POUR LA PORTE ET LA POIGNÉE
- Portes et tiroir du réfrigérateur
- Consulter la section Retrait et réinstallation des poignées de porte
- Démontage des portes et charnières
- Inversion des portes (facultatif)
- Réinstallation des portes et charnières
- Retrait et réinstallation du tiroir de congélation
- FICHE DE DONNÉES DE PERFORMANCE
- Fiche de données de performance

10
3. Remove the parts for the top hinge as shown below. Lift the
refrigerator door free from the cabinet.
A. Hinge Cover Screw C. 5/16” Hex-Head Hinge Screws
B. Top Hinge Cover D. Top Hinge
4. Remove the parts for the bottom hinge as shown below.
A. Hinge Pin Cover C. Hinge Screws
B. Bottom Hinge
Freezer door models
1. Unplug refrigerator or disconnect power.
2. Keep the freezer door closed until you are ready to lift it free
from the cabinet.
NOTE: Provide additional support for the door while the
hinges are being moved. Do not depend on the door gasket
magnets to hold the door in place while you are working.
3. Remove the parts for the top hinge as shown below. Lift the
refrigerator door free from the cabinet.
A. Hinge Cover Screw C. 5/16” Hex-Head Hinge Screws
B. Top Hinge Cover D. Top Hinge
4. Remove the center hinge pin and remove the hinge screws as
shown below. Lift the freezer door free from the cabinet.
A. Hinge Pin Cover C. Hinge Screws
B. Center Hinge
5. Remove the base grille by grasping the grille firmly with both
hands and pulling it toward you.
6. Remove the parts for the bottom hinge as shown below.
A. Hinge Pin Shim D. Roller Bracket
B. Bottom Hinge E. 3/8” Hex-Head Screws
C. Hinge Plate
WARNING
Electrical Shock Hazard
Disconnect power before removing doors.
Failure to do so could result in death or electrical shock.
FRENCH DOORS
1. Unplug refrigerator or disconnect power.
2. Keep the refrigerator doors closed until you are ready to lift
them free from the cabinet.
NOTE: Provide additional support for the refrigerator door
while the hinges are being removed. Do not depend on the
door gasket magnets to hold the door in place while you are
working