ELECTRIC RANGE Use & Care Guide For questions about features, operation/performance, parts, accessories or service, call: 1-800-843-0304 or visit our website at... www.amana.com Table of Contents .................................................
TABLE OF CONTENTS RANGE SAFETY .............................................................................3 The Anti-Tip Bracket ....................................................................3 COOKTOP USE ..............................................................................5 Cooktop Controls.........................................................................5 Coil Elements and Burner Bowls .................................................5 Home Canning .................................
RANGE SAFETY Your safety and the safety of others are very important. We have provided many important safety messages in this manual and on your appliance. Always read and obey all safety messages. This is the safety alert symbol. This symbol alerts you to potential hazards that can kill or hurt you and others. All safety messages will follow the safety alert symbol and either the word “DANGER” or “WARNING.
IMPORTANT SAFETY INSTRUCTIONS WARNING: To reduce the risk of fire, electrical shock, injury to persons, or damage when using the range, follow basic precautions, including the following: ■ WARNING: TO REDUCE THE RISK OF TIPPING OF THE RANGE, THE RANGE MUST BE SECURED BY PROPERLY INSTALLED ANTI-TIP DEVICES. TO CHECK IF THE DEVICES ARE INSTALLED PROPERLY, SLIDE RANGE FORWARD, LOOK FOR ANTI-TIP BRACKET SECURELY ATTACHED TO FLOOR OR WALL, AND SLIDE RANGE BACK SO REAR RANGE FOOT IS UNDER ANTI-TIP BRACKET.
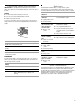
COOKTOP USE This manual covers several different models. The range you have purchased may have some or all of the items listed. The locations and appearances of the features shown here may not match those of your model. C B E D G F H A I A. Oven light (on some models) B. Surface heating indicator light C. Left front control knob D. Left rear control knob E. Right rear control knob F. Right front control knob Cooktop Controls WARNING Fire Hazard G. Oven temperature control knob H.
To Replace: 1. Line up openings in the burner bowl with the coil element receptacle. Cookware material is a factor in how quickly and evenly heat is transferred, which affects cooking results. A nonstick finish has the same characteristics as its base material. For example, aluminum cookware with a nonstick finish will take on the properties of aluminum. Cookware with nonstick surfaces should not be used under the broiler. Use the following chart as a guide for cookware material characteristics. 2.
Positioning Racks and Bakeware Bakeware IMPORTANT: To avoid permanent damage to the porcelain finish, do not place food or bakeware directly on the oven door or bottom. The bakeware material affects cooking results. Follow manufacturer’s recommendations and use the bakeware size recommended in the recipe. Use the following chart as a guide. RACKS BAKEWARE/ RESULTS RECOMMENDATIONS Light colored aluminum ■ Light golden crusts ■ Use temperature and time recommended in recipe.
To Broil: Oven Vent A 1. Position food on grid in the broiler pan then place it in the center of the oven rack. 2. Close the door. 3. Push in and turn oven control knob to BROIL. 4. After broiling, turn the oven control knob to OFF. BROILING CHART A. Oven vent The oven vent releases hot air and moisture from the oven, and should not be blocked or covered. Blocking or covering the oven vent will cause poor air circulation, affecting cooking and cleaning results.
RANGE CARE General Cleaning IMPORTANT: Before cleaning, make sure all controls are off and the oven and cooktop are cool. Always follow label instructions on cleaning products. Soap, water and a soft cloth or sponge are suggested first unless otherwise noted. EXTERIOR PORCELAIN ENAMEL SURFACES Food spills containing acids, such as vinegar and tomato, should be cleaned as soon as the entire range is cool. These spills may affect the finish.
2. Grasp the door on the sides with your fingers on the front of the door and your thumbs on the inside surface. Oven Light The oven light is a standard 40-watt maximum appliance bulb. Before replacing, make sure the oven and cooktop are cool and the control knobs are in the Off position. To Replace Oven Light: 1. Unplug range or disconnect power. 2. Remove screw and clip to release bulb protector in the back of the oven. A 3. Pull door straight up, then toward you.
Excessive heat around cookware on cooktop ■ Is the cookware the proper size? Use cookware about the same size as the surface cooking area, element or surface burner. Cookware should not extend more than ¹⁄₂" (1.3 cm) outside the cooking area. Cooktop cooking results not what expected Results not what expected ■ Was the oven preheated? Wait for oven to preheat before placing food in oven. ■ Are the racks positioned properly? See “Positioning Racks and Bakeware” section.
AMANA® MAJOR APPLIANCE WARRANTY LIMITED WARRANTY For one year from the date of purchase, when this major appliance is operated and maintained according to instructions attached to or furnished with the product, Amana brand of Whirlpool Corporation or Whirlpool Canada LP (hereafter “Amana”) will pay for factory specified parts and repair labor to correct defects in materials or workmanship. Service must be provided by an Amana designated service company.