
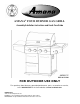
Use & care guide


1. Using a utility knife, cut the tape to open top flaps of
carton.
2. Remove Assembly/Installation Instructions and Use and
Care Guide.
3. Remove the large cardboard panels on the top and each
side of the inside of the carton.
4. Remove the cart base on the top of the inside of the
carton.
5. Remove the cart side panels located in front of the grill
head assembly.
6. Using a utility knife, vertivally cut at the side corner of
the carton, lay the box sides flat.
7. Remove foam packaging and plastic wrap from top of
grill.
8. Remove the hood locking bolts and open hood and re-
move parts carton and interior packaging.
9. Remove warming shelf and set aside.
10. Using 2 or more people, remove grill head assembly
and set aside.
11. Dispose of/recycle all packaging materials.
5
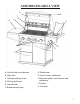
UNPACKING INSTRUCTIONS
A. Bread warming rack
B. Main cooking grates
C. Flavor grids
D. Wheel channel rightr
E. Wheel channel left
F. Drawer slide rail brackets
G. Drip pan
H. Drawer trays
I. Side burner shelf right
J. Side shelf left
K. Drawer front faces
L. Cart door right
M. Grill head assembly
N. Cart side left
O. Cart side right
P. Cart back
Q. Cart middle
R. Cart base
Not Shown but included in the box:
Small components package
Tank securing ring
Middle bracket
A
D
E
F
G
H
I
J
Q
K
L
M
B
C
N
O
P
R
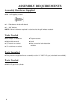
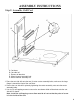
ASSEMBLY REQUIREMENTS