
Installation Instructions


5
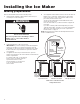
Components
Remove the contents from the shipping carton and set them on
a table where they can be easily identied and located. Check all
of the components in the kit against the following list to help you
become familiar with them. When you identify a component, place
a check mark
( 3) after it. The KEY numbers correspond
to the “Component Illustrations.”
IMPORTANT: When you remove the water valve and exible
tubing from the styrofoam packing insert, do not remove the
tubing from the valve. It has been factory-installed and leak-
tested. Do not disturb the compression nut that connects the
tubing to the valve, or the valve may leak after you connect it to
the water supply.
Do not discard any of the packing material until you account for
all of the components. If you need to order a replacement part for
the Ice Maker, a replacement parts list is provided on page 24.
KEY QTY. DESCRIPTION
1 1 Ice maker
2 1 Ice bucket
3 1 Water valve w/tubing
4 1 Fill tube
5 1 Gasket * (and) ** only
6 1 2
1
⁄
2
" (short) extension tube
7 1 6" (long) extension tube*
8 2 Ice maker clips*
9 2 Tubing clips
10 1 Metal water tube insert
11 1 Water valve tubing clamp
12 4 1⁄2" hex-head sheet-metal screws
13 2 1⁄2" hex-head machine screws
14 2 3⁄4" hex-head sheet-metal screws
15 1 4" extension tube**
16 1 3
3
⁄
8
" extension tube***
17 1 Bracket ll tube***
18 1 Grommet Condenser**
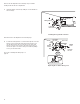
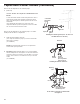
COMPONENT ILLUSTRATIONS
12
13
14
11
15
16
17
18
* For installation in Side-By-Side Models only.
** For installation in 14 to 18 Cubic Foot Top Freezer Models.
*** For installation in 11 Cubic Foot Top Freezer Models only (kit 24ECKMF).