
User Guide


20
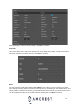
In the Copy to window, you can select individual channels for any cameras you have added to the
DVR or select All. Click OK when finished.
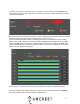
Click Apply in the Record menu to save your recording schedule.
Setting Up Email Alerts
Setting up Email alerts will allow you to receive snapshots of events via your email. These events
can be motion detection, IVS, Face Detection, or other snapshots of events captured by your device.
Each event type must have the “Send Email” option enabled to allow the feature to send
notifications to your email. To setup email alerts, please refer to the information provided below.
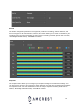
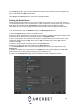
1. On the Main Menu, click on Network located in the Management section.
2. Select the Email option located in the Network menu.
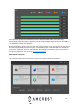
3. Enter the SMTP information for your email. In this example, we will be using Gmail, however other
email services can also be used. If using Gmail, type in “smtp.gmail.com”
4. Enter a port number. This is based on the type of encryption used by your email service. In this
example we will be using port 465, which uses an SSL encryption type. If using TLS, the port
number will be 587.
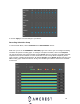
5. Enter the email address you will be using in the Username field.
6. Enter the password for the email address in the Password field.
7. In the Email Address field, enter your email address. Enter that same email address in the
Sender field.
8. Update the subject line for your alerts in the Subject field. The default subject line will be DVR
Alert however this can be changed to anything you would like to use.
9. Make sure the Attachment toggle switch is enabled to enable snapshots to be sent.