FA000-01
INTRO Thank you for purchasing the Novation ReMOTE SL Compact controller keyboard. This guide is designed to help you get started with the keyboard, as well as to provide comprehensive information about the operational features. As such, the content is structured in a way that allows you to read only as far as you need to, without forcing you to delve into later sections unnecessarily.
WHAT’S IN THE BOX? 1. KEYBOARD 2. USB CABLE – use this to connect the keyboard to your computer 3. RESOURCES DVD – contains the SL Compact Installers (Mac and PC), Tutorial movies (separate SL Compact and Automap Universal movies), User Guide pdf and the standard template setup files 4. BUNDLED SOFTWARE AND SAMPLES – e.g. Xcite+ DVD and authorisation cards FRONT PANEL OVERVIEW 1.
6. LCD display – displays up to 8 parameter names and values simultaneously, as well as various menu options 7. Encoder/f1 and button/f2 row select buttons – display the parameter names and values of either the encoders or buttons on the LCD display. Used for other functions in Automap mode 8. Page up and down/next and prev buttons – scroll between any available pages of display or menu options in each mode.
REAR PANEL CONNECTIONS 1. PSU connector – allows a power supply unit (PSU - not supplied) to be connected for providing 9V DC from the mains 2. Power select switch – sets the power supply between DC, off and USB 3. USB connector – allows the supplied USB cable to be connected for linking to a computer. This connection provides power as well as data flow 4. Sustain pedal – allows a sustain pedal (not supplied) to be connected 5. Expression pedal – allows an expression pedal (not supplied) to be connected 6.
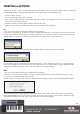
INSTALLATION Separate PC and Mac installers can be found on the Resources DVD. These are universal SL range installers that work with the ReMOTE SL Compact and the original ReMOTE SL.
CONNECTING THE SL COMPACT If simply using the SL Compact to control software in Automap or non-Automap mode, the only connection that needs to be made is to connect the keyboard to the computer using the supplied USB cable. This will also supply power to the keyboard (providing the power select switch on the rear panel is set to USB).
MODES AND MENUS OVERVIEW The vertical column of five buttons to the left of the display are the mode and menu buttons. These allow access to settings that affect individual controls within a template (Edit), general template settings (Template) and also the overall keyboard settings (Global).
Global Menu This menu allows access to the general device settings on the SL Compact eg: memory protect, and wheel/drum pad calibration. Press the GLOBAL button to access the menu and then use the PAGE UP/DOWN buttons to scroll between the seven pages of settings. Write button The WRITE button allows you to save settings and confirm actions on the SL Compact.
Use any assignable button or drumpad – any assignable button or drumpad within any template can be used to select one of the onboard templates. This can be useful for quickly switching to a different template. To set this up, the button must be selected for editing in Edit Mode and then the Control set to ‘template’ and the desired template number set. See the Edit Mode section for details.
To control a plug-in, you must first enable it for Automap control in the Plug-in Manager. Once enabled it will be ‘wrapped’. This means that a new version of the plug-in will be created, which is contained within our Automap software. The new Automap-wrapped plug-in will appear in your sequencer with ‘(Automap)’ after its original name. Load the Automap-wrapped plug-in in your sequencer to allow Automap control over it.
AUTOMAP SERVER & PLUG-IN MANAGER The Automap Server software is the bridge between the SL Compact and the software you are controlling. If it is not already running on your computer then it will open up automatically when you open an Automap-wrapped plug-in or run a sequencer which is set up for Automap Universal control. The Automap Server simply runs in the background, handling communication between the software and SL Compact, however it allows access to certain Automap options too.
Plug-in Manager: This setting opens a separate window, the Plug-in Manager, where you can select which plug-ins you want to wrap for Automap control. The left-hand list shows all plug-ins installed on your system and the right-hand list shows all plug-ins that have been wrapped. To select a plug-in to be wrapped for Automap control, simply drag it from the left-hand list to the right-hand list. Once you have dragged all plug-ins that you want to wrap, click ‘OK’ and then close the Plug-in Manager window.
Learn switch (crosshair): This indicates whether the Learn feature is currently active or not. It will be pink when either Learn Once or Learn is active and white when Learn is turned off. When it is pink you can click it to disable Learn. When it is white you can click it to activate Learn Once. The Learn feature is described in more detail below and on page 16.
ACTIVATING AUTOMAP FUNCTIONS FROM THE SL COMPACT Some of the Automap Functions described in the previous section, and others not available in the Automap border in the plug-in window, are accessible from the Automap Universal template on the SL Compact. BUTTONS GROUP B4 are not assignable in Automap mode and instead have been set aside for accessing Automap functions. To access these functions press the BUTTONS GROUP B4 SWITCH and they will appear on the display.
PLUG-IN PARAMETER LAYOUT When you open an Automap-wrapped plug-in for the first time, the plug-in parameters will be mapped to the SL Compact in the order in which they are presented by the plug-in. It is unlikely that this order will be intuitive and you will probably want to clear some or all controls and re-assign them in a more organised way. You can then use the ‘save as default’ feature so that your mapping is recalled whenever you subsequently open an Automap-wrapped instance of that plug-in.
If you want to completely change how the parameters of a plug-in are mapped to the SL Compact then use Clear All to clear all controls, so that you can start creating a mapping from scratch. Clear All can be activated either by selecting it from the drop-down menu, which appears when you click the Novation logo on the Automap border in the plug-in window, or by using button 6 in group B4 on the SL Compact. To learn a software parameter to a control on the SL Compact, activate Learn Once or Learn.
The Max, Min and Step Size values can be used to determine the sensitivity of the encoder or button, i.e. how many steps or presses it takes to scroll the whole parameter range. When an encoder or button is first assigned, the Max and Min values will probably be set to 1 and 0. This means that it will take one button press or encoder step to move the parameter from minimum to maximum value. Unless the parameter is a switch-type (binary), you will want to edit the Max and Min values.
REASON AUTOMAP To set up Reason Automap, carry out the following steps: 1. Make sure you have Reason 3.0.4 or later. If you need to update then you can download the latest version from http://www.propellerheads.se. 2. Connect the SL Compact to your computer and start Reason 3. 3. Go to the 'Control Surfaces and Keyboards' page of the Reason preferences. 4.
The SL Compact will now automatically switch to the Reason Automap template (template 37) and will do so each time you subsequently open Reason. To select a Reason device to control from the ReMOTE SL Compact, click its 'MIDI In' icon in the Reason sequencer, as shown: When a Reason device is selected for hardware control, the SL Compact controls will automatically be mapped to the device parameters and you will see the parameter names and current values on the SL Compact display.
When you switch to a different page, all controls in all groups will be assigned to different parameters on the same device. To scroll through pages of parameters in Reason Automap mode, repeatedly press any of the GROUP SELECT SWITCHES (except for the ENCODERS GROUP D SWITCH). To check which page you are currently on, press F1/ENCODERS and check the ‘Section’ value. To demonstrate this, press the ENCODERS GROUP B SWITCH whilst controlling Subtractor.
With [Mixer] selected, you can use the SL Compact’s controls as follows: Cycle through available sends Control sends, panning, track faders Control solos, record arming, mutes Bank to other mixer tracks and (with SHIFT held down) switch between the mixer and any active VSTs Sends Panning Track faders Solos Records Mutes Activate Automap Menu If you want to change the way in which the Cubase mixer parameters are mapped to the SL Compact then you can use the Learn, Clear, Add Page, Remove Page and Clea
4. Select 'Scan All Models...' from the 'New' menu. 5. The SL Compact should be automatically detected. A message may appear saying that some models cannot be interrogated - click 'OK' and then click 'Done'. 6. Click on the SL Compact in the Control Surface Setup window to view its settings (on the left-hand side of the window). Ensure the Input and Out Port are set to 'Port 2', then close the Control Surface Setup window.
7. Open the Logic Environment and select the 'Clicks & Ports' page. 8. Ensure that there is no connection between 'SUM', 'Port 2' or 'Port 3' on the Physical Input to the piano keyboard, otherwise Automap data will be routed to the MIDI and instrument tracks and cause unexpected parameter changes.
In Mixer mode, you can use the SL Compact controls as follows: Cycle through available sends Control sends, panning, track faders Control solos, record arming, mutes and track selects Bank to other mixer tracks Switch between Mixer and Instrument modes Sends Panning Track faders Solos Records Mutes Track Selects In Instrument mode, you can use the SL Compact controls as follows: Select different tracks Control instrument parameters (Groups A, B and C only) Scroll through available pages of paramete
ABLETON LIVE AUTOMAP To set up Ableton Automap, carry out the following steps: 1. Make sure you have Ableton Live 5.2 or later. If you need to update Live then you can download the latest version from www.ableton.com. 2. Connect the SL Compact to your computer and open Live. Go to the 'MIDI/Sync’ page of the Live preferences and set the options as shown in the following screenshot: NOTE: The Input AND Output of the SL Compact in the 'Control Surfaces' section should be set to SL Compact Port 2. 3.
Once Automap is set up, you can control Ableton in the following way: Control sends, panning, track faders and devices Control record arming, track on/off and return device parameters to default setting Lock to device when in device mode Bank to other mixer tracks Scroll through device parameters Sends Panning Track faders Free Record Track assign arming on/off Activate insert mode Transport Controls - These are mapped as labelled on the SL Compact.
To lock the SL Compact to the currently selected device, press the F1/ENCODERS button. A message will appear at the bottom of the Ableton window to indicate that the SL Compact is locked to the device in Live. Press the F1/ENCODERS button again with that device selected for control to unlock the Compact, or press the F1/ENCODERS button with another device selected to lock to that one instead.
5. In Pro Tools, select ‘Peripherals’ from the Setup’ menu and then select the ‘MIDI Controllers’ page in the Peripherals window. Set ‘Type’ to HUI and ‘Send To’ and ‘Receive From’ to ‘SL Compact Port 2’, then click ‘OK’: The Pro Tools Automap template (template 34) must be selected on the SL Compact to use it in Pro Tools Automap mode.
The encoders and buttons only control the 8 mixer tracks active on the SL Compact. To bank to other tracks on the mixer, use the PAGE UP/DOWN buttons. When the ENCODERS GROUP D SWITCH is pressed, the SL Compact display shows the function of each of the other group switches, which is useful if you forget how the mixer parameters are assigned to the SL Compact. To control sends, the SL Compact must be put into Flip mode.
In Insert mode, the SL Compact display can show a maximum of 4 insert slots or 8 plug-in parameters at one time. ENCODERS 1-4 and BUTTONS 1-4 correspond to these insert slots/parameters. ENCODER 5 is used to scroll through pages of insert slots or plug-in parameters. ENCODERS 6-8 and BUTTONS 6-8 are not used in Insert mode. In Insert Select mode the SL Compact display shows the insert slots of the currently selected track.
DIGITAL PERFORMER AUTOMAP The set up is different for DP 5 and 4/4.5. Here is a guide to each: Digital Performer 5 1. When you run the SL Compact installer, make sure you select ‘Install Digital Performer HUI Support’, as shown: 2. On the SL Compact, press the GLOBAL button to enter the Global menu, scroll up to the 3rd page by pressing the PAGE UP button twice and set the 'HUI' parameter to 'ON', then press WRITE to save the global settings and PLAY to return to play mode. 3.
6. Select 'Control Surface Setup...' from the 'Setup' menu in Digital Performer. In the setup window, add a control surface by clicking '+' then select 'HUI' from the 'Driver' drop-down menu and 'SL Compact Port 2-1' from the 'MIDI' drop-down menu. Make sure ‘Listen to control surfaces in background’ is enabled, then click ‘OK’. Digital Performer 4/4.5 1. When you run the SL Compact installer, make sure you select ‘Install Digital Performer HUI Support’, as shown: 2.
5. In Audio MIDI Setup, go to the 'MIDI Devices' page and click on 'Add Device' three times to add three new devices. Connect the first of these to input and output ports 1 of the SL Compact object, the second to input and output ports 2 of the SL Compact object and the third to input and output ports 3 of the SL Compact object, as shown in the following screenshot: 6.
The MOTU DP Automap template (template 34) must be selected on the SL Compact when using it in Digital Performer Automap mode. Once you have followed the above set up instructions the SL Compact will automatically switch to the MOTU DP Automap template and will do so each time you subsequently start Digital Performer.
The encoders and buttons only control the 8 mixer tracks active on the SL Compact. To bank to other tracks on the mixer, use the PAGE UP/DOWN buttons. When the encoder BUTTONS GROUP D SWITCH is pressed, the SL Compact display shows the function of each of the other group switches, which is useful if you forget how the mixer parameters are assigned to the SL Compact. It is possible to control plug-ins using the MOTU DP Automap template by pressing the BUTTONS GROUP B4 SWITCH to enter Insert mode.
In Insert Select mode the lines separating each insert slot indicate whether ENCODERS 1-4 can be used for plug-in or preset selection, as follows: Plug-in select: dots on top Dynamics < eVerb Esvclcmp < : : : : : Pan 1. 1. Pan 1. 1. Preset select: dots on bottom Dynamics Esvclcmp < eVerb < : Press BUTTONS/F2 to toggle the function of ENCODERS 1-4 between plug-in and preset selection. Additionally, one of the insert slots will have a pair of arrowheads pointing to it.
SONAR AUTOMAP Sonar uses the Automap Universal template (template 38) for mixer control, however some set up is required in the sequencer before it will work: 1. Make sure you have the latest version of Sonar 6. If you need to update then you can download the latest version from www.cakewalk.com. 2. Connect the SL Compact to your computer, switch it on and launch Sonar. 3. In Sonar select ‘Controllers/Surfaces…’ from the ‘Options’ menu. 4.
If you want to change the way in which the Sonar mixer parameters are mapped to the SL Compact then you can use the Learn, Clear, Add Page, Remove Page and Clear All functions accessed from buttons group B4 (see page 15 for further information on these functions).
GLOBAL MENU The GLOBAL Mode allows access to all the universal SL Compact settings. There are seven pages in the Global Menu, which you can scroll through using the PAGE UP/DOWN buttons. The first page displays the currently loaded OS version and one setting, as follows: ENCSENSV 1 SL Compact 3.1.10 EncSensv (Encoder Sensitivity): This value defines how sensitive the encoder respone is, from 1 (least sensitive) to 4 (most sensitive).
The third page of the Global Menu is as follows: Template Change Chan 16 U1 U2 M1 Sustain Pedal AUTO Midi Clock To U1 M1 BPMPort ON IDPorts U1 HUI ON Template Change: It is possible to use program change messages to remotely change the currently selected template on the SL Compact. The first Template Change setting allows you to define which MIDI Channel the SL Compact will respond to program change messages on.
The fourth page of the Global Menu is for template dumping and operation system control, as follows: Template Dump Current All Send Globals Ports U| 1 M1 Midi O/S Send Receive USB1 O/S Receive Template Dump: The first two options on this page allow you to dump templates in sysex format from the SL Compact to your computer or another MIDI device for backing up or editing in the Template Editor software. The first option allows you to dump a single template.
The sixth page of the Global Menu is the first of two pages for calibrating the drum pads. The eight values across the SL Compact display correspond to drum pads 1-8. The pad hit velocity value is shown on the top line (‘---‘ if the pad has not yet been hit) and the calibration value is shown on the bottom line. This first page is for full velocity (maximum strength hit) calibration: 127 64 --64 --64 --64 --64 --64 --64 --64 Hit a pad at full strength to check the current calibration.
We have pre-programmed the standard templates 1 to 32 on the SL Compact to work with popular software instruments. These templates can be used where it is not possible or desirable to use Automap for controlling software instruments. Note that some of the factory-programmed standard templates require some form of set up within the software instrument before they will work.
Standard templates can be grouped together to allow quick switching between them in Play Mode. This feature is useful where the software or hardware you are controlling has lots of parameters and you need to create more than one template to allow access to all of them. To quickly switch between grouped templates, repeatedly press any GROUP SELECT SWITCH. As an example, there are three factory programmed V-Station templates on the SL Compact.
BPM Status – Press the button above or below ‘BPM Status’ on the SL Compact display to see the current clock status of the SL Compact. The display will look as follows: Internal Tempo 120 BPM Current Tempo 120 BPM Source INTERNAL <> Status RECEIVING The following information is displayed: Internal Tempo – This is the tempo of the SL Compacts internal timing reference Current Tempo – This is the current MIDI clock tempo. Source – This is the MIDI clock source.
EDIT MODE ASSIGNING CONTROLS ON THE SL COMPACT In Edit Mode, you can access the settings for each individual assignable control on the SL Compact (all buttons, encoders, wheels, transport buttons and pedals). These settings define what MIDI message is sent when the control is operated. To access the settings for a particular control, press and hold the EDIT button and then operate the control you want to edit.
CONTROL CHANGE (CC) Control CC DispType 0-127 BtnType STEP Low Val 0 High Val |127 Ports ComnPORT MidiChan ComnCHAN Change Case Numbers etc Name: Upper Lower Punctu CC Num 0 PAGE 1 PAGE 2 « CHAR » DispType (Display Type): This setting allows you to select how the value for the control appears on the SL Compact display. For encoders, it can also be used to change the mode of operation. The options are: 0-127: Control value displayed with range 0 to 127.
APOT: This is a variation of REL2 and is the same system that is used by some other existing popular control surfaces. A message with value 0+n is sent out for every clockwise step (increment) and a message with value 64+n is sent out for every anti-clockwise step (decrement). The value n will equal 1 when you rotate the encoder slowly and increases as you rotate the encoder faster. Additional options for buttons only: ON/OFF: Control value displayed as either ON or OFF.
Ports: This sets the port routing for the control, i.e. where the MIDI messages generated by the control are routed to when it is operated.
STEP – If this option is selected, an extra setting, StepVal (Step Value), will appear next to BtnType. With the STEP option, the value sent each time the button is pressed will step from the Low Value to the High Value in steps of a size determined by the StepVal setting. When the High Value is reached the next button press will cause the Low Val to be sent and the value will step up again on subsequent presses.
REGISTERED PARAMETER NUMBER (RPN) – Control RPN DispType 0-127 BtnType STEP Low Val 0 High Val |127 Ports ComnPORT MidiChan ComnCHAN Change Case Numbers etc Name: Upper Lower Punctu RPN lsb 52 RPN msb 68 PAGE 1 PAGE 2 « CHAR » The DispType, LowVal, HighVal, Ports, MidiChan, BtnType and Name settings are the same as for Control Change (CC) so see that section for information on these settings.
determined by the current control value and limited by the Low Value and High Value settings. The format of the sysex message is fixed such that the second-to-last byte is always the variable byte and the last byte is always the checksum byte (excluding the F7 byte). If an encoder has DispType set to 0-16K then the options for DataType are as follows: NONE – Sysex message does not contain a variable byte and a fixed message is sent every time the control is operated.
DeviceID: This sets the Device ID number transmitted in the MMC command message (range 0-127). NOTE ON/OFF Control NOTE Note C-2 Velocity 127 Ports ComnPORT MidiChan ComnCHAN BtnType STEP Change Case Numbers etc Name: Upper Lower Punctu PAGE 1 PAGE 2 « CHAR » The Ports, MidiChan, and Name settings are the same as for Control Change (CC) so see that section for information on these settings. Note: This sets the MIDI note value (range C-2 to G8).
option for drumpads is not available if Control is set to PROG CHG. BANK CHG (BANK CHANGE) CONTROL BANK CHG BankMode LSB Bank lsb 0 Bank msb |127 PORTS ComnPORT MIDICHAN ComnCHAN Change Case Numbers etc Name: Upper Lower Punctu PAGE 1 PAGE 2 « CHAR » The Ports, MidiChan and Name settings are the same as for Control Change (CC) so see that section for information on these settings. BankMode: This determines the format of the bank change message that is sent.
Auto-Off: This sets the amount of time (in milliseconds) that a note off message is sent after the trigger pad has been hit. It can be set to NONE, in which case a note off message is not sent at all, or from 10ms to 16383ms. Off Sync: This sets the timing reference for the note off message which is sent after the drum pad has been hit.
PITCHBND (PITCH BEND) CONTROL PITCHBND PORTS ComnPORT MIDICHAN ComnCHAN Change Case Numbers etc Name: Upper Lower Punctu PAGE 1 PAGE 2 « CHAR » This option only applies to the pitch wheel. No other controls on the SL Compact can be assigned to send pitch bend messages. There are no options for limiting the control value as this can be done on the instrument you are controlling by altering the pitch bend up/down range (if the option is available).
send messages using the Keyboard Ports. If you change the Keyboard Ports setting then all controls assigned to KeybPORT will follow the change automatically.
Template: This selects the template whose group settings you are currently editing. The template name will appear on the top line of the display to the right of the settings. Position: This sets the position of the template within the group. Size: This sets the size of the group i.e. the number of templates in the group. This must be set to the same value for all templates in a group.
Ports: This sets the port(s) on which MIDI data from the selected keyboard zone (note and aftertouch messages) are sent from the SL Compact.
SAVING AND NAMING TEMPLATES Before you perform a save operation, make sure that Memory Protect is set to OFF in the Global Menu (see page 40). When you save a template, the following data is stored and will be recalled when you next select that template: -All settings for each individual control, as set in Edit Mode.
SPECIFICATIONS KEYBOARD Keys: 25/49 Type: semi-weighted with aftertouch Velocity Curves: 7 - individually assignable for each Template PITCH AND MOD WHEEL MECHANISM Pitch wheel: spring loaded, centre return, front to back motion Mod wheel: free running, front to back motion LCD DISPLAY LCD: 1 x 144-character silver.
PRE-INSTALLED ONBOARD TEMPLATES AND AUTOMAPS SOFTWARE: Novation • V-Station • Bass Station Propellerhead • Reason Automap – All Instruments, Mixer, rack effects (Template 37) Native Instruments • FM7 • Pro 53 • Battery II • Kontakt II • B4 G Media • Oddity • ImpOSCar • Minimonsta Steinberg • Cubase/Nuendo Automap - Mixer/Effects and VSTs (Template 38) • Halion Cakewalk • Sonar Automap – Mixer/instruments and VSTs (Template 38) • Z3ta Korg • Legacy Cell • MS-20 • Polysix reFX • Vanguard Arturia • CS-80V • Ar
Apple • Logic Automap - Mixer and instruments (Template 39) Ableton • Live Automap – Mixer, devices and effects (Template 40) Digidesign • Pro Tools Automap – Mixer and inserts (Template 34) Image-Line • FLStudio MINIMUM COMPUTER SPECS: Pentium 3 – 800 MHz or higher (CPU may be higher for laptops) 256 MB RAM DirectX 9.0b or higher Windows XP (SP2) or more recent (Windows 98, Me, NT, or 2000 not supported) Macintosh G3* 800/G4* 733 MHz or higher (CPU may be higher for laptops) OS X 10.3.
Here is a guide to each standard Template: V-Station Location: Templates 1, 2 and 3 Title : V-Station 1,2 and 3 A group of three standard templates is used for the V-Station. The templates follow the general synth parameter layout but additional arpeggiator parameters are assigned to BUTTONS GROUP B3.
Pro53 Location: Templates 6 and 7 Title: Pro 53 Before using the Pro-53 template, you must import a controllermap file into the plug-in. To do this, click on the ‘NI’ logo on the Pro-53 window and select ‘load controllermap’ from the drop-down menu. Locate the file ‘RemoteSL.txt’ in the Pro-53 resources folder on the SL Compact DVD and click ‘Open’. The SL Compact Pro-53 template will then map correctly to the software, mainly following the general synth parameter layout. You can save the ‘RemoteSL.
Oddity Location: Templates 13 and 14 Title: Oddity 1 and 2 A group of two standard templates that mainly follow the standard synth parameter layout is used for Oddity. Additional osc parameters are assigned to ENCODERS GROUP B and BUTTONS GROUP B2. HPF cutoff is assigned to ENCODER 6 in GROUP B. VCA and VCF velocity amounts are assigned to ENCODERS 7 and 8 in GROUP C.
The SL Compact CS80-V templates will then map correctly to the software. Template 1 should be used to control osc 1 and its HPF and LPF filters. Template 2 should be used to control osc 2 and its HPF and LPF filters. With both templates, the HPF parameters are assigned to ENCODERS 7 and 8 in GROUP A and the LPF parameters are assigned to ENCODERS 7 and 8 in GROUP B. Arp2600V Location: Templates 22 and 23 Title: Arp2600V-1/2 A group of two standard templates is used for the ARP2600V.
Vanguard Location: Templates 30, 31 and 32 Title: Vanguard 1, 2 and 3 A group of three standard templates is used for Vanguard. The templates follow the general synth parameter layout but additional effects parameters are assigned to ENCODERS GROUP B on template 2. Also, the envelope modulation amount parameters are assigned ENCODERS GROUP C in template 3. FLStudio Location: Template 33 Title: FLStudio To set up the SL Compact to work with FL Studio, follow these steps: 1.
Many of the controls in the template are unassigned so that you can learn them to parameters in FL using the ‘Link to controller…’ feature, accessed by right-clicking on a parameter.