
Installation Instructions


P a g e | 4
If installing onto studs:
4-inch intervals along four edges[1]
12-inch intervals into studs[2,3]
If installing onto horizontal furring strips:
4-inch intervals along four edges[1]
16-inch intervals along horizontal furring strips[4,5]
If installing directly onto a wall, be sure that nails hit studs, and space as follows:
4-inch intervals along all four edges[6]
16-inch intervals at each wall stud[7]
Installing Veneered or Laminated Paneling with Adhesive Ref30-2
After cutouts for electrical switch plates, outlets, doors and windows are made, If trim molding is to be installed along the ceiling, leave ¼” gap
[1] between top of panel [2] and ceiling. If not installing molding, place panel against ceiling.
If panels will be fastened with adhesive, the edges of the paneling may sometimes separate from the wall. Separation can occur as a result of
improper application of panel adhesive. So that edges of panels can be attached to wall with nails if adhesive fails at a later time, it is a good
ideas for edges[3] to be located on centers of studs[4] or furring strips.
The first panel must be plumb. Therefore, the wall must be marked with a plumb line for aligning the leading edge[3] of the panel. Edge[5] and
[2] must fit into the corner, and may need to be trimmed if the corner itself is not plumb.
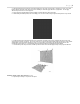
Installing first panel on the wall with adhesive [above]
1 – Trim panel edge[1] so that it fits into the corner well, and that edge[2} aligns with plumb line (on stud if possible)
2 – Drive four 3-penny (1 ¼”) finishing nails[4] partway into panel [3] 1” from the top edge