
Master Switch User Guide AP9210
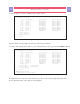

MasterSwitch 100V – User Guide
16 16
Chapter 6:
Using the
Console Program
This chapter describes how to use the console program to configure and control output power from the
MasterSwitch as a unit, or from each outlet individually. The console program is accessed via the serial port
or via telnet.
Functions
The console program allows you to perform all MasterSwitch configuration and control functions except
definition of URL links for the MasterSwitch and its outlets. You can use the console program to define and
control the following values needed for MasterSwitch operation:
n Define the initial network configuration values needed by the MasterSwitch .
Note: When a BOOTP server (Chapter 2) is not being used, the console program must be used
via the serial port to initially define these values. Once these values are defined and
BOOTP is disabled, you can use the console program (including telnet sessions) or the
embedded web control to modify the values.
n Define NMSs that can use SNMP to access the MasterSwitch , the kind of access they will have, and
community names they must use for that access.
n Define NMSs that can receive SNMP traps.
n Control master power by turning on, turning off or rebooting all MasterSwitch outlets.
n Define a master power on delay time value for providing master power to the outlets.
n Define an outlet power on value for each outlet so that you can control the sequence of power on to
the MasterSwitch outlets.
n Turn off, on or reboot any outlet, individually.
n Define a name for the MasterSwitch .
n Define a device name for each outlet.
n Define the amount of time (reboot duration) that power remains off during reboot cycles.
Additionally, the console program allows you:
n View factory preset information (serial number, model number, etc.).
n Use ping to test network communication.
n Set the serial port baud rate.
n Change the password used to log into the console program and web control.
n Cancel outstanding commands, reinitialize the MasterSwitch (without affecting its outlet power),
reset EEPROM values to their default settings.