
Installation Guide


M965366 REV. 1.2 (12/14)
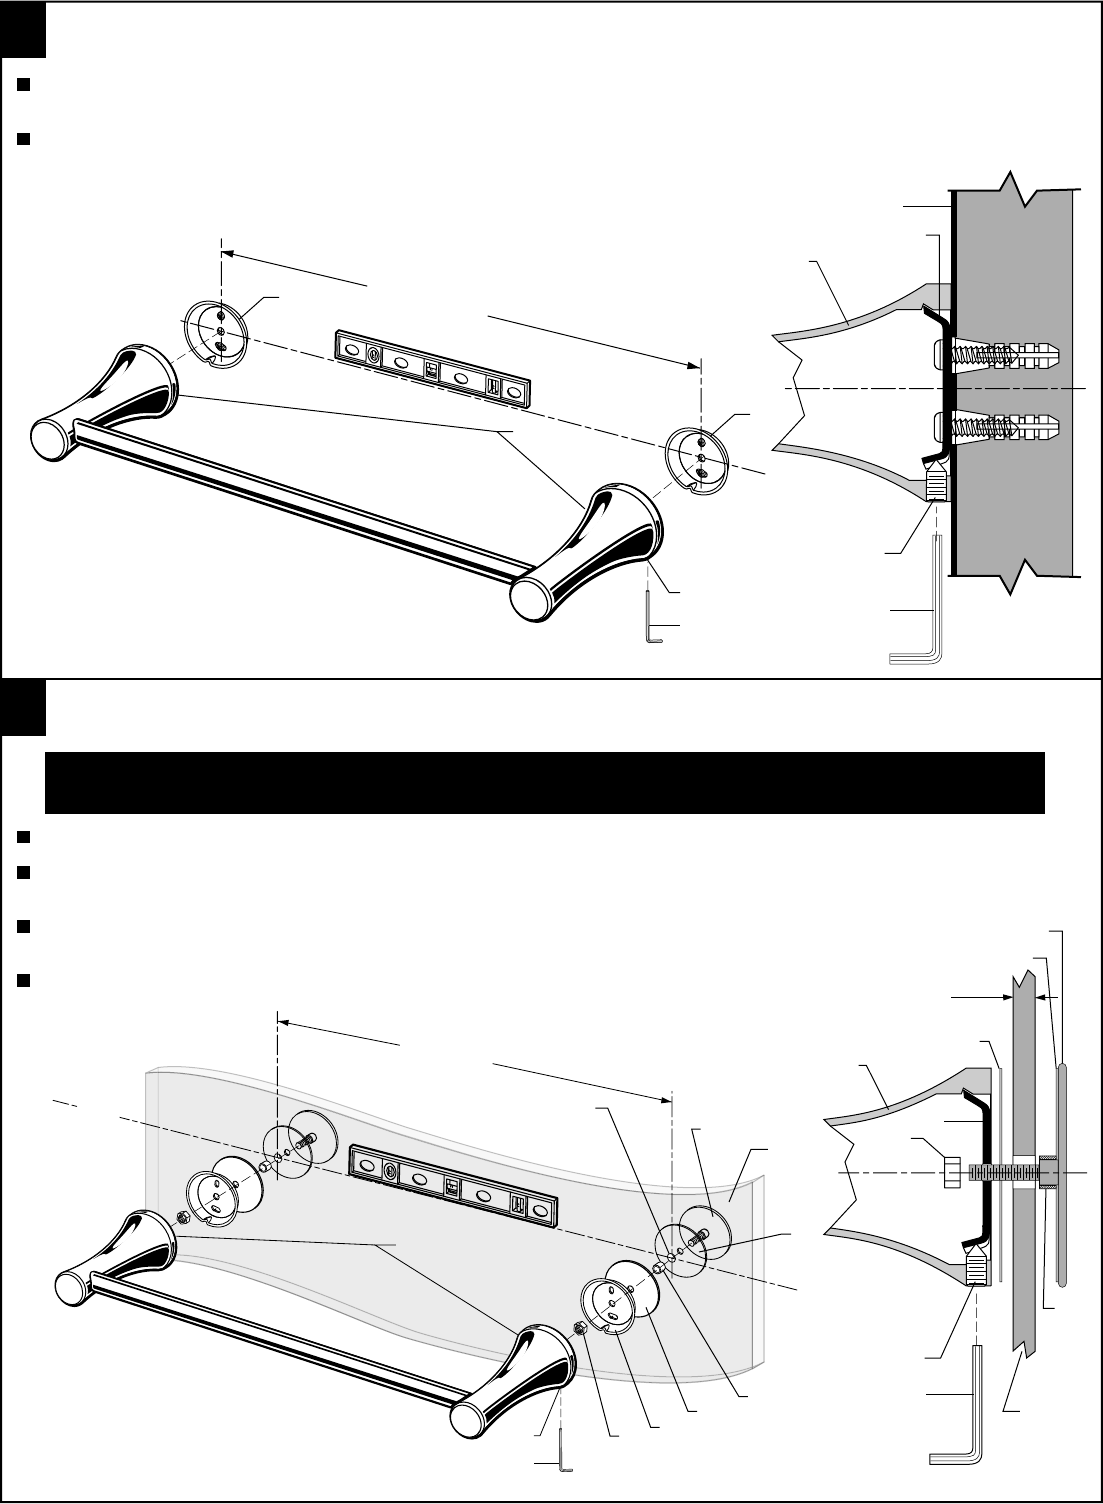
LEVEL
18" and 24" TOWEL BAR INSTALLATION
4
1
1
2
3
4
Refer to Step 1 for installation of MOUNTING BRACKETS (1). NOTE: The center line distance between the two
MOUNTING BRACKETS is 18" (457.2mm) or 24" (906.6mm). Make sure the two MOUNTING BRACKETS (1) are level.
Install the ACCESSORY ESCUTCHEONS (2) on the MOUNTING BRACKETS (1). Secure ACCESSORY ESCUTCHEONS (2) with
SET SCREW (3) using a 4mm HEX WRENCH (4).
18 " (457.2mm)
24 " (609.6mm)
24" SHOWER DOOR HANDLE INSTALLATION
5
7
8
4
SHOWER
DOOR
6
5
1
2
2
3
Determine the desired height and location and mark a horzontial centerline. Make sure the centerline is level.
Drill two 5/16" (8mm) diameter mounting holes through the shower door 24" (609.6mm) apart. Insert BOLTS (1), GASKETS (2)
and INSERTS (3) on the inside of the shower door.
On the outside of the shower door, install GASKETS (2), MOUNTING BRACKETS (4) and HEX NUTS (5). Tighten HEX NUTS (5)
but do not over tighten.
Install SHOWER DOOR HANDLE (6) onto MOUNTING BRACKETS (4). Secure the DOOR HANDLE (6)
with SET SCREWS (7) using a 4mm HEX WRENCH (8).
LEVEL
24 " (609.6mm)
(2) 5/16" (8mm)
DIA. MOUNTING HOLES
C/L
SHOWER
DOOR
1
2
2
4
5
6
8
7
3
FINISHED WALL
3
4
1
2
Note: Professional installation is required for this product. The warranty does
not cover damage to the shower door due to improper installation.
3/16" - 3/8"
(4.8mm - 9.6mm)