CEILINGS BACKSPLASHES WALLS PROJECTS INSTALLATION GUIDE www.AmericanTinCeilings.
Installation videos available online at: www.AmericanTinCeilings.com/videos Ceiling Components: A tin ceiling is comprised of two primary components and two optional components. The primary components are the tin ceiling panels and the crown molding. Optional components are flat molding/rope molding and filler. These components are generally used when the design layout requires it. Backsplashes and Other Applications: Tin panels can be used for more than just beautifying your ceiling.
TABLE OF CONTENTS Snap Lock™ Ceiling Installation 4 Nail-Up Ceiling Installation 5 Drop-In Ceiling Installation 6 Filler Installation for Ceilings 7 Molding Installation for Ceilings 8-9 Backsplash, Wall and Project Installation 10-11 Painting Suggestions 12 Cutting 12 Fixtures & Vents 12 For complete installation instructions please visit: www.AmericanTinCeilings.com We offer free consultations to our customers. Layout and design of your tin ceiling should be planned prior to purchase.
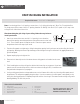
Installation videos available online at: www.AmericanTinCeilings.com/videos SNAP LOCK™ CEILING INSTALLATION Preparing Your Ceiling for SNAP LOCK ™ Installation: 1. 2. 3. 4. 5. Your starting point on the ceiling can be any corner of the room. Measure the width of your tile and add a 1/2” to 3/4” to your measurement. Mark the ceiling with the measurement from Step #2 in the corner of your room. Repeat Steps #1 - #3 on an opposite corner but NOT a diagonal corner to your first measurement.
NAIL-UP CEILING INSTALLATION Required Substrate Material: 3/8” Plywood • 7/16” OSB Board • Furring strips on 12” centers 1. Determine the center point of the ceiling by snapping a chalk line diagonally from corner to corner of the ceiling. The “X” where the chalk lines intersect is the center of your ceiling. 2. Set your first ceiling tile with the edges square to wall in the center of the “X” of your chalk line. Using an 18 gauge brad nail gun or cone head nails, nail your tile to the ceiling.
Installation videos available online at: www.AmericanTinCeilings.com/videos DROP-IN CEILING INSTALLATION Required Substrate: 2’ x 4’ or 2’ x 2’ Ceiling Grid Note: If an existing grid has 2’ x 4’ openings, convert it to a 2’ x 2’ ceiling grid using our 2’ Cross Tee. To install the Cross Tee simply secure in the center of the 2’ x 4’ opening. American Tin Ceilings’ tiles are 23 7/16” sq with a 1/16” step so the ceiling tile will sit flush from side to side.
FILLER INSTALLATION FOR CEILINGS The most common tin ceiling layout uses no filler and merely trims the panel flush wall to wall. However, filler is required for certain applications. Filler is generally used with: • Patterns with a deep profile depth that do not accomodate cropping • For design layouts specifying filler Cut the filler to fit into the coverage area. When finishing a perimeter, cut the filler panels so that the edges will butt flush against the wall.
Installation videos available online at: www.AmericanTinCeilings.com/videos MOLDING INSTALLATION FOR CEILINGS If you are installing Flat Molding with your ceiling, please refer to the Flat Molding installation instructions before completing the Crown Molding installation. Inside Corner and Straight Runs: 1. Starting in the back right corner of the ceiling, install an uncut piece of crown molding. Your final piece of coped molding will overlap this uncut piece.
Installation of Flat Molding: Flat molding is sometimes used between your field panels and your filler panels. 1. Make a 45 degree cut on the end of the flat molding. 2. Starting with the short side of the 45 degree angle, nail it to the point of the field tile on only one side. This will allow you to insert your filler panel under the flat molding and create a finished look as the edge of the flat molding has a decorative nail rail.
Installation videos available online at: www.AmericanTinCeilings.com/videos BACKSPLASH, WALL AND PROJECT INSTALLATION Each kitchen has a unique layout and the possible starting point of your project can vary. In the majority of installations, we suggest beginning from the left side and working to the right. We are available to answer any questions on your specific layout. 1. Starting from the left side, measure 24 1/2” from the farthest left point of your space.
Note: Some installations cover multiple walls at right angles. To achieve a finished look on these corners, you will use our Inside Corner Trim. Before applying a panel to a corner, measure the height of the inside corner. Then, cut the Inside Corner Trim in accordance with that measurement and attach it to the panel. 9. After all the panels are set, attach the switch or outlet plates. 10. Caulk the bottom seam along the countertop with clear silicone or colored caulk.
Installation videos available online at: www.AmericanTinCeilings.com/videos PAINTING Painting: No water-based products can be used directly on the metal tiles or molding; however, you can use an oil-based primer. Once the tiles have been primed, you are able to use a paint of your choice. Sherwin Williams and Benjamin Moore also offer DTM (direct-to-metal) paints. The DTM paints can be painted directly on the metal and will eliminate the need to use a primer.