
Installation & Assembly


Installation Guide
4
Installation videos available online at:
www.AmericanTinCeilings.com/videos
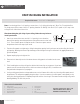
• Ladder or scaffolding
• Tape measure
• Putty knife
• Drill
• 1/2” drill bit
• Aviation shears
• Chalk box
• Fine point Sharpie
• Paint sticks (for shims)
• Straight edge
• Cordless screw gun
• #6 drywall screws
• Hammer
• Safety glasses
• Gloves
If you have any questions, please call:
1-888-231-7500 or visit us online at
www.AmericanTinCeilings.com
SNAP LOCK
™
CEILING INSTALLATION
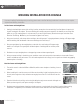
Preparing Your Ceiling for SNAP LOCK ™ Installation:
1. Your starting point on the ceiling can be any corner of the room.
2. Measure the width of your tile and add a 1/2” to 3/4” to your measurement.
3. Mark the ceiling with the measurement from Step #2 in the corner of your room.
4. Repeat Steps #1 - #3 on an opposite corner but NOT a diagonal corner to your first measurement.
5. Snap a chalk line from those two measuring points. This will provide the proper alignment for your panels.
Installing Your SNAP LOCK ™ Tiles:
1. Attach the first ceiling panel to the corner of the ceiling with the male flanges facing the wall, allowing a 1/2” space
from the wall (use #6 drywall screws that are 1 1/4” in length to attach the panel to the ceiling). This insures that the
panels remain straight, even in rooms that are not perfectly square. Install your first panel as squarely as possible. Start
with the male flange facing the wall so that the screw plate on the female flange is always exposed as you progress. In
most cases when installing a 24” pattern, filler panels will be needed because of the deep profile embossment of the
panels. For example, if your room is 11’ x 13’, you would install your field panels in a 10’ x 12’ area in the center of the
room and then install 12” of filler panels around the perimeter. This creates a uniform look and allows your molding to
sit flush with the ceiling, as it is overlapping the filler panels.
2. After installing your first row, snap a chalk line for the second row at 24 1/8”. Slip the male flange into the female
flange on the second row, making sure before attachment to leave no more than a 1/16” gap between the two. You may
find it helpful to have a putty knife handy to open the female flange. Note: If you try to force your panels too tight, the
corners will eventually form a gap and you will have no way to keep your pattern aligned. Continue to work your way
across the ceiling in rows until you reach the end of the room, as well as the opposing wall.
3. If you have light fixtures you will need to lay them out on the back of the ceiling panel as you
reach them. Measure from the edge of your ceiling tile and mark out your ceiling fixture place-
ment. Drill a hole in the center of the layout, then use tin snips to cut away the material. You can
do this by either cutting at 90 degrees to the lay out mark, then cutting the perimeter mark out, or
by cutting a spiral to your layout mark (cutting in a circle). You can now install your beauty rings
for the lights.
4. When approaching the perimeter of your room you will have to cut the female flange off. You will need to shim this
partial panel using a paint stick before screwing it to the ceiling. This will prevent the tile from being pulled too tight to
the ceiling, creating a gap.
5. Now you are ready to install the crown molding (please refer to the molding installation instructions on pages 8-9).
TOOL/SUPPLIES REQUIRED: