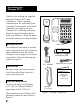
® VCO DIALOGUE VCO The “Read and Talk” Telephone Operating Instructions Hearing Loss Help Company (508) 755 1120 VOICE 530 7069997Fax email: hearingLossHelpCo@Hearing-Loss-Help-Co.com web: www.hearing-Loss-Help-Co.
Important Safety Instructions When using your telephone equipment, always follow basic safety precautions to reduce the risk of fire, electric shock, and injury to persons, including the following: 1. Read and understand all instructions. Observe all warnings and other markings on the product. 2. During thunderstorms, avoid using telephones except cordless models. There may be a slight chance of electric shock from lightning. 3. Do not use a telephone near a gas leak.
Contents Introducing the Dialogue VCO ............................................................................................................2 Warranty Service ..................................................................................................................................2 Sales Receipt ........................................................................................................................................2 Help from Ameriphone .........................................
Introducing the Dialogue VCO Thank you for selecting the amplified telephone Dialogue VCO from Ameriphone. These Operating Instructions and the associated Quick Operating Guide provide you with the information you need to use your Dialogue VCO effectively and safely. Read this manual thoroughly before using your telephone. Keep the manual near the telephone for easy reference. DIALOGUE VCO RELAY POWER REL MGS M1 AUTO ANS M2 SPACE X M3 M4 a. a. a. a. b. b. b. b. a. b.
Features on the Dialogue VCO RINGER volume switch AUDIO OUTPUT jack RINGER DIAL AUDIO Off Lo Hi T OUTPUT P A/C adapter and phone line connection TONE/PULSE switch RELAY button RELAY MESSAGE button AUTO ANSWER button LCD display screen AC Power indicator DIALOGUE VCO RELAY POWER REL MGS M1 AUTO ANS M2 SPACE X M3 M4 a. a. a. a. b. b. b. b. Q Signal indicator light MEMORY button M5 a. b.
Setting up Your Dialogue VCO There are three steps involved in setting up your Dialogue VCO. • Insert four AA rechargeable NiCad batteries for back-up in case of AC power outage. • Decide if you want the phone to sit on a desk or hang on the wall. • Connect the telephone components. To Install New Batteries: 1. Slide open the battery compart-ment cover on the bottom of the telephone (Figure 3). 2. Install four fresh AA rechargeable NiCad batteries.
Setting up Your Dialogue VCO (continued) 3. Lift the handset and listen for a dial tone. The phone is ready to use. Wall Mount: 1. Pull the handset hook out as shown in Figure 5 and reverse its position so that the hook points up and will hold the handset when you hang up. MANUAL AUTO Figure 6 - Phone Base Installation for Wall Mounting 3. Plug in the short phone line cord and mount the phone as shown in Figure 7. Figure 5 - Reversing the Hook 2.
Using Your Dialogue VCO Incoming Voice Volume 1. Press the AMPLIFY button as shown in Figure 8 to turn the incoming voice amplifier on or off. When AMPLIFY is on, the AMPLIFY indicator comes on. * HOLD 0 # P E PROG FLASH REDIAL frequency you need to boost. To identify the sound frequency range that best suits your needs, follow these steps: 1. When you hear a voice on the line, press the AMPLIFY button as shown in Figure 8. 2. Adjust the TONE slide control as in Figure 10 to suit your hearing.
Using Your Dialogue VCO (Continued) Hold Last Number Redial To put the line on hold, press the HOLD button and return the handset to its cradle. In telephone mode, the screen shows “CALL-ON HOLD & MUTE”. In text mode, it shows and transmits the message “PLS HOLD…”. Note: If you pick up an extension phone on the same line when the Dialogue VCO is on HOLD, the Dialogue VCO will disconnect and you can continue your conversation on the extension phone.
Special Features Unanswered Call Indicator * HOLD 0 # P E PROG Programming the Relay Service Number FLASH REDIAL AMPLIFY TONE VOL LO 1. Lift handset and press PROG button. HI * HOLD 0 O P E PROG # FLASH REDIAL AMPLIFY TONE VOL LO HI Figure 15 - Unanswered Call Indicator If an incoming call is not answered by a person after 4 rings, the unanswered call indicator will flash. The light will continue to flash until the handset is lifted or AC power is disconnected.
Special Features (Continued) RELAY POWER REL MGS M1 AUTO ANS M2 a. M3 a. a. Figure 18 - RELAY Button 3. Type your name (up to 30 letters) and press to save. (For number/letter, press key repeatedly until the desired number/letter appears on screen. Wait one second for cursor to advance to the next space. See section on “communicating in text telephone (TTY/TDP) mode” making a TTY call.) Programming Emergency Calling Message/Your Home Phone Number and Long Distance Carrier 4.
Special Features (Continued) M2 M3 M4 a. a. a. b. b. b. a. b. SELECT M A B memory buttons shown in Figure 24. Each button can be programmed (or reprogrammed using the same procedure) for a phone number up to 15 digits long. DIALOGUE VCO Figure 23 - EMERGENCY Button 4. The VCO phone dials the emergency number (if programmed) and transmits this message: "HELP! I AM A VCO USER, PLS RESPOND BY TYPING ON A TTY, AND LISTEN TO ME ON UR PHONE, (your name), (your address), (your number) GA". 5.
Special Features (Continued) 1 4 7 G H I P R S * 2 5 8 0 A B C T U V 3 6 9 O P E # J K L D E F M N O W X Y 3. Press the MEMORY b button and then the desired MEMORY button (Figure 24) to store this number as the second phone number in the same memory location. Figure 26 - Telephone Keypad Making and Answering VCO Calls 3. Press a memory button (Figure 24) to store this number on that button. 4. Immediately hang up the handset.
Special Features (Continued) called Voice-To-Voice Relay or VTV. Contact your local relay service for more information. The relay services vary from state to state, and the procedures using the VCO phone may vary slightly. Follow the steps below to determine which procedure you should use for your local relay service. 3. After the Communications Assistant (CA) answers your call in text, press REL MSG button to request a VCO call. POWER M1 RELAY REL MGS M2 AUTO ANS M3 Making VCO Calls I.
Special Features (Continued) II. If your relay service has a common phone number for both voice and TTY/TDD calls, you can provide calling information by either voice or text: S BACKSPACE SPACE M4 Provide Calling Information by Voice: 1. Dial from keypad or from RELAY memory. POWER RELAY M1 a. REL MGS AUTO ANS M2 a. SIGNAL LED M5 Figure 30 - Signal Indicator 3. When connected, read incoming messages on display and start speaking when "GA" appears.
Special Features (Continued) 2. Dial the number you're calling on the keypad (if you make a mistake, press PROG to go back one space to erase the incorrect number), followed by pressing the * and # keys (this will type"GA".) * HOLD 0 O P E PROG # FLASH REDIAL AMPLIFY TONE VOL LO HI Figure 32 - PROG button 2. Your VCO phone will transmit: "My number is...., My Long Distance Carrier is....GA".
Special Features (Continued) 4. The phone sends and displays this message on the screen; “I AM A VCO USER, PLS CALL (number stored in memory button selected), GA”. You don’t need to voice the phone number. If necessary, press the same memory button to repeat the message. 3. When you see "GA" on the screen, speak to the calling party. If nothing appears on screen, it is not a VCO call, it is a voice call. Say into the phone, “I am a VCO user. Please call me through your state relay operator”.
Special Features (Continued) To type a TTY message, use the keys of the keypad and their corresponding letters (i.e. number 2 is also for letters A, B, and C). On the screen, watch the character above the cursor change as you repeatedly press the same key. When the desired letter is shown, wait one second for the cursor to advance to the next space. Then enter the next character. SPACE is used as the space bar, and BACKSPACE is used for backspace and correction.
Special Features (Continued) To Playback Recorded Messages: 1. The screen will indicate the number of messages you have received. Retrieving Messages Remotely: 1. Call your Dialogue VCO from a text telephone, another Dialogue VCO, or a TTY/ TDD pay phone. 2. When your Dialogue VCO answers, you will see the greeting message. 2. Press 1 to read your messages. Or press 1 again to fast forward to the next message. When finished, press 2 to erase messages. 3.
Special Features (Continued) Direct Audio Output The AUDIO OUTPUT socket allows you to connect the Dialogue VCO to a hearing aid, neck loop, cochlear implant or other assistive listening devices. Plug the stereo end of the plug into the Audio Output socket on the phone. Speak into the handset when using the Cochlear Implant Adapter Cord. DIALOGUE VCO RELAY POWER REL MGS M1 DIAL SPACE X M3 M4 a. a. a. b. b. b. b. SIGNAL M5 a. b. SELECT AUDIO A B C Q P AUTO ANS M2 a.
Special Features (Continued) Connecting to the Q-90 Printer PRINTER 12 VDC SIZE LINE PAPER FEED PRINTON/OFF 500 mA The Dialogue VCO can be used with the Q-90 Printer from Ameriphone. Attach the Q-90 Printer cable to the connector on the back of the Dialogue VCO.
Troubleshooting Chart The chart below will help you solve most problems that may arise during operation of your telephone. Should the difficulty continue, contact Ameriphone or your authorized dealer for assistance. SYMPTOM 20 CAUSE AND CORRECTIVE ACTION Screen remains blank No power. The screen runs on AC power, check that the AC adapter is plugged into the wall, and the receptacle is plugged into the Dialogue VCO. No dial tone 1. Check all phone cord connections. 2.
FCC Statement The DIALOGUE VCO has been registered with the Federal Communications Commission (FCC) and complies with the standards in Part 68 of the FCC Rules. FCC compliant telephone cords and modular plugs are provided with this telephone. Your telephone company is required by the FCC to allow you to connect FCC registered telephone equipment to their telephone lines.
Warranty This warranty applies only to Ameriphone products that are purchased and used in the United States or Canada. Ameriphone warrants the DIALOGUE VCO telephone against any defect in materials or workmanship for the period of one year from the date of purchase. If your Ameriphone product is defective and returned within 30 days of the date of purchase, your DIALOGUE VCO dealer will replace it at no charge.
Specifications Maximum gain High frequency (3 kHz): 30 dB Wide band (300 to 3000 Hz): 20 dB Tone control range Full range: 300 to 3000Hz using one slide control. Dimensions Size: 9 1/ 2" x 7" x 3 1/ 4" Weight: 2.52 lbs.
Index Connecting for Desk or Wall Mount Desktop Use ..........................4 Wall Mount ..........................5 Direct Audio Output ..................18 Features......................................3 Flash ..........................................7 Help from Ameriphone ................2 Hold ..........................................7 Incoming Voice Tone ....................6 Incoming Voice Volume ................6 Installing the Backup Batteries ......4 Last Number Redial......................