
User Manual


Model: AC1000M
Installation, Operation & Maintenance
16
CHAPTER 3.
INSTRUCTION
3-1 INSTRUCTION
Caution: This product is intended for use by
professionals in the performance of mechanical
repairs on powersports vehicles and is to be
considered dangerous if not maintained or if used
improperly. The lift should be placed on a flat
concrete surface to prevent unit from tipping or
rocking during use.
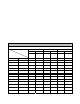
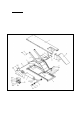
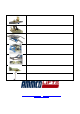
STEP 1. Check product and bill of materials to
make certain all required parts are
accounted for and in good condition.
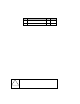
STEP 2. Raise Lift to working height to verify
front and rear drop-out operation.
Slide latches off of retention bolts (See
photo A) while holding the drop-out,
then check to make sure the panel
travels downward freely. Make sure to
hold the drop-out portion and not let it
fall freely.
< Photo A >
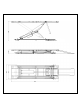
Caution: Never operate lift while drop down
panels are in the down position. Return them to the
level position until the safety lock is set. (See photo
B)
< Photo B >
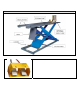
STEP 3. Attach vise rails in the appropriate
holes on the deck of the lift. (See
photo C) Slide vise into rails and make
sure there is space to allow a smooth
sliding motion. Tighten rails to the
deck and recheck sliding of clamp.
Tighten pinch bolts to hold vise to the
deck of the lift.
< Photo C >
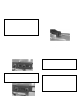
STEP 4. Attach ramp to rear of the lift while in
the down position.
STEP 5. Always use tie-downs to secure
vehicle to the lift while operating.
STEP 6. If applicable, attach side extensions as
needed. No hardware or tools needed
for application
Caution: Do not leave ramp attached to lift while
in operation or in up position. Do not leave ramps
for the extensions attached while in operation or in
the up position.
Notes: Be aware of all marked pinch points.
Lubricate all points at least 3 times a year or more
depending on frequency of use. Make sure all air
lines are securely fastened; be aware of all pinch
points. Lubricate all moving parts at least 3 times a
year. Depending on frequency of use you can need
to do this more often.