
User Manual


Neve 8801 User Manual Page 6 02/04/07
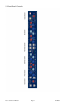
6. On/Off Switch
The Neve Logo Switch on the right hand side of the unit switches the unit on and off.
7. Input Section
On power up, the default input is the Line input
The input selected is shown by the LEDs above the gain knob and is selected by pressing the I/P GAIN knob.
Line Input: The line input is accessible via the combo connector (¼’’ Jack and XLR in parallel) on the rear of the unit. It
accommodates both balanced and unbalanced input signals. The gain is variable from -24dB to +24dB using the I/P GAIN
knob on the front panel.
Mic Input: The Mic input uses the XLR input of the combo connector on the front panel. Gain is variable from +20dB to
+70dB using the I/P GAIN knob. Mic input is also available on the rear panel. Both the front and rear connectors are wired in
parallel.
PAD: The PAD button provides 20dB of attenuation on Mic and DI inputs.
Phantom Power: The +48V button enables phantom power on the Mic input.
DI Input: The DI input uses the ¼’’ jack input of the combo connector on the front panel. The input uses a high impedance
instrumentation amplifier (>750kΩ). It accommodates both balanced and unbalanced inputs. Gain is variable from -24dB to
+24dB using the I/P GAIN knob. When PAD is switched on the input impedance changes to 100kΩ. DI input is also
available on the rear panel. Both the front and rear connectors are wired in parallel.
Genie Input: The Genie input is a CobraNet™ compatible input. It is available via an optional daughter card. The input is
only selectable when the option card is fitted. See section 15.2 for further details.
Phase Button: All inputs can be phase reversed using the PHASE button. PHASE button illuminated indicates a phase
inversion between input and output.