
Instruction manual


Installation and Setup
32
Instruction Manual – Enova DGX 8/16/32 Digital Media Switchers
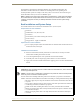
Installation Options
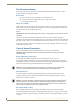
Additional installation tasks may include the following:.
Establishing external serial control (DB-9 port) – see page 53.
Establishing external serial control (USB virtual COM port) – see page 54.
CPU backup with Micro SD memory card – see page 59.
Setting the Control Panel password – see page 126.
Defining local presets – see page 182.
Defining global presets – see page 119.
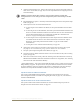
Attaching Cable Management Bars
If the enclosure has Epica DGX SC Optical Input and Output Boards installed, cable management bars
are provided.
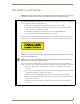
Caution: Do not severely bend or kink the SC fiber cable. Irreversible damage can occur. Refer to
the physical limitations (bend radius) specified for the cable by the manufacturer. The bend radius
for AMX SC terminated fiber cables is 2 inches (5 cm).
To install cable management bars:
1.
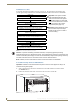
Enova DGX 32 only – Loosen the two captive screws that hold the connector numbering plate at
the top of the connectors. Remove the connector numbering plate and set aside.
2. Align the two screw holes on the end of the cable management bar with the two screw holes on the
end of the board. (Note the position of the long part of the bar in relation to screw holes.)
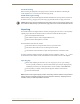
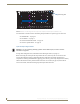
FIG. 15 Connector numbering plate on Enova DGX 32
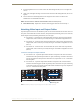
FIG. 16 Installation of cable management bars
Connector numbering plate
Fasten cable management bar
with two screws on one end
and one on the other end
Tie cable to cable management
bar far enough from connector
to allow for manufacturer’s
recommended bend radius
Note: On the Enova DGX 8/16, the orientation of the cable
management bar is reversed from the input to the output board.
Input board
Output board
Enova DGX 32
Enova DGX 8/16
Important: Do not over
tighten installation screws.