
Instruction manual
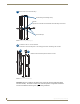


Appendix C – Replacing I/O Boards
74
Optima SD Instruction Manual
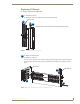
Updating the System Configuration
The configuration file stored in the CPU may or may not need to be updated, depending on the type of
board being installed.
When an I/O board is replaced with the same type of board, the configuration file will not
need to be updated.
When an I/O board is added to a previously empty slot (an upgrade) in a system, or if the
replacement is a different type of board, the system’s configuration file must be updated
before the board will work. If the system requires a new configuration file, the file is provided
on a CD and needs to be loaded using XNConnect configuration software.
Note: We recommend keeping a copy of the former configuration file for reference.
Important: When loading any part of a configuration file, the matrix switcher must not be actively
switching. You may want to disconnect any external controllers to ensure that no switches are
executed during the loading of the file.
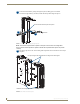
To update the system configuration (if applicable):
1.
Attach a PC to the enclosure’s CONTROL (RS-232) port with an RS-232 null modem cable.
2. Open a terminal emulation program (such as HyperTerminal) and set the port settings to:
baud rate = 9600, data bits = 8, stop bit = 1, parity = none, and flow control = none.
3. Plug in the enclosure.
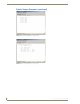
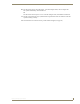
A short splash screen appears (the first two lines in FIG. 51).
4. Enter ~def!
Wait until a “V” appears (FIG. 51) to verify that the command is successful (this may take a few
minutes), then exit the program.
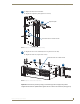
5. Install XNConnect from the AMX AutoPatch CD sent with the new board. (If XNConnect is already
installed on the PC, we strongly recommend uninstalling the old version before installing a new
version).
6. Open XNConnect.
7. From the File menu, select Open.
8. From the Communication menu, select Change Comm Settings. Check the settings for the selected
PC port and adjust if necessary (the default is Com 1, baud rate 9600).
9. Using the standard File Open dialog box, locate and open the .xcl configuration file that was sent
with the new board.
The default location for the file is at C:\AutoPatch\Configuration Software<Version>\MyXCL
folder.
FIG. 51 Short splash screen in HyperTerminal
[1:Enclosure] AutoPatch Optima v1.4.0
Ready
~def!V
Enter ~def! and wait for the V
Note: Your splash screen may differ.
AMX reserves the right to change the
contents and/or formatting of the splash
screen without notice.