instruction manual Design XPress Home Theater version 1.
Software Warranty Agreement PRE-RELEASE CODE. Portions of the AMX Software may, from time to time, as identified in the AMX Software, include PRE-RELEASE CODE and such code may not be at the level of performance, compatibility and functionality of the final code. The PRERELEASE CODE may not operate correctly and may be substantially modified prior to final release or certain features may not be generally released. AMX is not obligated to make or support any PRE-RELEASE CODE.
Table of Contents Table of Contents Introduction ...............................................................................................................1 DXP-HT v1.3 - New Features............................................................................................ 1 Minimum System Requirements .............................................................................................. 3 Required Software Applications ........................................................................
Table of Contents Using the DXP-HT Project Wizard ......................................................................... 19 Before You Start - Required Information......................................................................... 19 Launching the DXP-HT Project Wizard........................................................................... 19 Project Wizard Navigation Controls ....................................................................................... 20 System Information dialog..
Table of Contents Choose Touch Panel Text Colors dialog................................................................................ 45 Channel Preset Categories dialog................................................................................... 47 To create new Preset Categories........................................................................................... 47 To edit the Display Name for an existing Preset Category ....................................................
Table of Contents Copying a Design XPress - Home Theater Project................................................................ 65 Importing a DXP-HT Project................................................................................................... 65 Exporting a DXP-HT Project .................................................................................................. 65 Deleting a DXP-HT Project ...............................................................................................
Table of Contents Function Codes: G4CC .......................................................................................................... 79 Function Codes: HELP-ABOUT ............................................................................................. 80 Function Codes: KBKeyboard................................................................................................ 80 Function Codes: KBShift ........................................................................................
Table of Contents Function Codes: TNpenOptions............................................................................................. 93 Function Codes: TNtext ......................................................................................................... 94 Function Codes: TNshape ..................................................................................................... 94 Function Codes: Tuner Presets .............................................................................
Introduction Introduction Design XPress - Home Theater (DXP-HT)™ is a software package developed to assist AMX dealers in quickly designing, installing and programming a home theater control system. A home theater control system created using DXP-HT allows the selection and control of audio/video sources, audio-surround modes, display devices and room lighting among other functions. DXP-HT allows control via several types of AMX touch panels (see Supported Touch Panels for details).
Introduction Support for NI-700 NetLinx Integrated Controller: This new controller is treated the same as any of the other NI Series of Integrated Controllers. If the project requires more ports than the NI-700 can provide (2 Serial and 1 IR), it is disabled as a system controller option. Support For Output Zones on MAX Servers: When adding a MAX (IMS or MMS) Media Server as a device to your project, you can now specify an Output Zone number.
Introduction Support for PictureFrame: This new support appears as an option in the Touch Panel Interfaces dialog page. Selecting this radio box specifies that the output project file for the chosen touch panel will support the use of the PictureFrame application on the panel's inactivity page. Refer to the Touch Panel Interfaces dialog section on page 42 for details. Support for TakeNote: This new support is added as a selectable option within the Touch Panel Interfaces dialog page.
Introduction DXP-HT Version Information The DXP-HT version information is located on the Main Screen (under the Exit button). It is important to have the version information when calling AMX Technical Support. The version information will allow Tech Support to determine if software updates or patches may be available. The top number (for example, c1.0.12) is the version number of the Configuration Database.
Introduction Select Help > Web Update to launch this application. Refer to the WebUpdate on-line help for details and instructions. Supported Subsystems and Equipment DXP-HT (version 1.
Introduction G3 touch panels • CV6 (AXD-CV6) 6" wired touch panel with video • CA10 (AXT/D-CA10) 10.4" touch panel • CV10 (AXT/D-CV10) 10.4" touch panel with video The nomenclature " AXT" indicates the table-top (tilt) model, and "AXD" represents the wall-mount version.
Introduction • Philips Pro DVD 175 • Sony DVP-CX777ES • Yamaha DVD-C940 • Yamaha DVD-S2300MK2 MAX Servers by AMX MAX-MMS and MAX-IMS media servers are supported for G4 touch panels only, via Ethernet control. • AMX MAX-IMS / MAX-BSM • AMX MAX-MMS / MAX-AVM DXP-HT treats these devices essentially the same as any other Ethernet-controlled device (such as MP3 players).
Introduction Plasma Displays • Hitachi CMP4201 • Hitachi CMP5000 • Marantz PD5020D • NEC 42VP4 • Runco PL43HDX • Runco PL50HDX • Runco PL61GX • Samsung SyncMaster 403T • Sharp LCM3700 Receivers • Denon AVR2803 • Denon AVR3803 • Denon AVR4802 • Denon AVR-5800 • Denon AVR5803 • Integra DTR 9.
Introduction Video Projection Devices • Barco IQG300 • Barco IQR300 • ChristieDigital DS30 • ChristieDigital RoadRunnerL6 • ChristieDigital VistaS3 • Digital Projection iVisionSXGA • Eiki LCXG200 • Epson PowerLite7800p • Epson PowerLite811p • Epson PowerLite8150i • Epson PowerLite8300i • Hewlett Packard XP8010 • InFocus SP7200 • Marantz VP12S1 • Marantz VP12S2 • NEC Any GT Series • NEC Any LT Series • NEC Any MT Series • NEC Any SX Series • Optoma EzPro H55 • Optoma
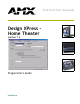
Introduction DXP-HT Main Screen When DXP-HT is launched, the first dialog to be displayed is the Main Screen. Use the Main Screen as the starting point for creating new projects and opening existing projects. The Main Screen also contains command buttons for copying projects and deleting projects. There are three main areas on the Main Screen: the Menu Bar, the Project Selection List, and the Project Maintenance command buttons.
Introduction DXP-HT Menu Bar There are four items in the menu bar (on the Main Screen): File Menu The Design XPress - Home Theater (DXP-HT) File menu contains several file control options: • New: Launches the Project Wizard, to create a new DXP-HT project file. • Open: Opens an existing DXP-HT project file. • Copy: Allows you to copy the active project file. This option launches the Copy Project dialog. • Delete: Allows you to delete the selected Project from your hard drive.
Introduction Help Menu The Help menu contains the following options: • Contents: Opens the online help file. • Web Update: Will launch the Web Update application to search the AMX site for an update to the DXP-HT software. Selecting Yes will close DXP-HT, begin the download of the update, and run the installation of the update. You must have an active Internet connection for Web Update to work. • About: Displays the DXP-HT splash screen.
Introduction Project Selection List Context Menu Right-click anywhere inside the Project Selection List (on the Main Screen) to open the Project Selection List context menu, containing shortcuts to several project-related operations: • New: Launches the DXP-HT Project Wizard to create a new project. This is the same as clicking the Create New Project command button (or selecting File > New). • Open: Opens an existing project.
Introduction Main Screen Command Buttons Create New Project: Click this command button to launch the Design XPress - Home Theater Project Wizard. Use the Project Wizard to step through the process of designing and configuring the system. Open Project: Click to highlight a project in the Project Selection List, and click the Open Project command button to open the selected Project. When a project is opened, the first Wizard dialog (System Information) is displayed.
Introduction This dialog is also used by the Design XPress application to fill-in some data within the project. This means that if you do an initial installation of DXP-HT you will be asked to enter your information into the User Information dialog. Once this data has been entered, you will not be asked for it again. Consecutive launches of the application display the User Information dialog already populated with the preentered data.
Introduction Warn On Duplicate IR Functions and Channels: Alerts you to the creation of duplicate IR functions and Channels. All IR Function and Channel assignments must be unique. Warn On Duplicate Lighting Scene Names: Alerts you to the creation of duplicate Lighting Scene names. All Lighting Scene names must be unique. Warn On Duplicate Surround Sound Names: Alerts you to the creation of duplicate Surround Sound mode names. All Surround Sound names must be unique.
Introduction Getting Started To launch the DXP-HT Project Wizard Select the sample project (highlight "Sample Updated for DXPHT 1.3" in the Project Selection List (on the Main Screen), and click the Open Project command button). This invokes the first Wizard dialog: System Information, containing a summary of the system information for this project. Refer to the System Information dialog section on page 21 for details.
Introduction 18 DXP-HT v1.
Using the DXP-HT Project Wizard Using the DXP-HT Project Wizard DXP-HT uses a Project Wizard to step you through the process of designing a control system. To launch the DXP-HT Project Wizard, click the Create New Project button on the Main Screen. The results of the DXP-HT project are placed in "Projects\Job Name\Rev #", in the application directory. Before You Start - Required Information Before you begin to use DXP-HT to build a system, you should first gather information about the installation.
Using the DXP-HT Project Wizard At the lower-left corner of this and all Wizard dialogs is a drop-down list titled Jump To. Click the down-arrow to open a list of all Wizard dialogs, and select any dialog from this list to jump to that dialog. Additionally, all of the dialogs in the Project Wizard have a set of Navigation Control buttons along the bottom of the dialog to allow you move back and forth through the wizard dialogs, and save or cancel your changes.
Using the DXP-HT Project Wizard System Information dialog The first dialog in the Project Wizard is the System Information dialog (FIG. 1). This dialog contains the information used by Design XPress - Home Theater (DXP-HT) to create and program the control system. Double-click on any device in the list to access the Device Configuration dialog, containing all control information associated with the device. FIG.
Using the DXP-HT Project Wizard • Lighting System: Click the down-arrow to open a drop-down list of lighting systems supported by DXP-HT. Select the lighting system you are using, or select No Lighting Control (at the top of the list) if your project does not include any lighting control. Additional fields may be displayed depending upon the device configuration requirements of the selected lighting system.
Using the DXP-HT Project Wizard 4. Use the radio buttons to select the Control Method associated with the new device (IR, Serial or IP). If IR is selected, you must locate the associated IRL file by using the Browse button from the IR Data section. If you are using Serial as a Control Method, choose the device from the Control Logic drop-down list. The control method(s) available for selection depend on the device type specified.
Using the DXP-HT Project Wizard Inversely, you can manually remove any IR functions from Touch Panel functions by selecting a Touch Panel function (from the right-hand table), and click the left-arrows button. When adding multiple devices of similar type to a Project, in some cases the devices could have very different requirements in terms of functionality and associated Touch Panel pages/buttons.
Using the DXP-HT Project Wizard When you select a desired CD/DVD model from the Control Logic field, the changer size is automatically filled and is read-only. The control method(s) available for selection depend on the device type specified. 4. Select the required baud rate for the serial device from the Baud Rate drop-down list. (if applicable). Adding IP-Controlled Devices to the Project To add a device to your system, click the Add button in the System Information dialog.
Using the DXP-HT Project Wizard Duplicating a Source Device DXP-HT supports duplicating existing source devices and their settings via the Duplicate button on the System Information dialog. Use the Duplicate feature to make a copy of the currently selected device, to allow for quick configuration for systems with multiple identical devices. The Duplicate button is only enabled once a device (DVD, CDP, MP3 player etc.) is added to the project, and only if DXP-HT supports multiple devices of that type.
Using the DXP-HT Project Wizard Device Configuration dialog The Device Configuration dialog is used to add or edit devices in the Device Information List. Use the options in this dialog to select the device type, the display name, control method and other information specific to the control method. Click the Add button in the System Information dialog to open the Device Configuration dialog to configure a new device.
Using the DXP-HT Project Wizard FIG. 2 Device Configuration dialog (Device Data tab) There are several devices that have device specific options that become visible when the device is selected. • Source Type: Click the down-arrow to open a drop-down list of available device types (Compact Disc Player, Digital Satellite System, Digital Video Disc Player, etc). Click to select the device type that matches the device you are adding to the project.
Using the DXP-HT Project Wizard Control Logics are specific device behaviors that have been programmed into the NetLinx Code either through Modules, System Calls or Include files. A list of the applicable Control Logics will appear in the Control Logics combo box. • Control Method radio buttons: Use the radio buttons to specify the method of control for this device (IR, Serial or IP). This selection determines the other options that are enabled in this tab.
Using the DXP-HT Project Wizard IP Data: For IP-controlled devices, enter the IP address of the device in the IP Address field. The IP Port number is set within the Control Method and is not accessible. This field is only enabled if IP was selected as the Control Method. Each device IP Address must be unique, with only one exception: MAX servers can use one IP with multiple output zones per display name entry. For example, a MAXIMS assigned to IP Address 1.1.1.
Using the DXP-HT Project Wizard The Program Function List is on the right side of the screen. The Program Function List is populated with the supported functions for the Device Type selected on the Device Data tab. Mapping a Function 1. Click on the desired IR function on the IR Function List and click on the associated function in the Program Function List. 2.
Using the DXP-HT Project Wizard Device Configuration dialog - Control Configuration tab The options in the Control Configuration tab (FIG. 4) allow you to configure the AMX IR port to properly transmit the IR signal to the AV equipment. This tab requires that you know how your equipment operates. FIG. 4 Device Configuration dialog - Control Configuration tab IR Timing Parameters (1/10 second) - Sets the IR pulse times and the time gap between pulses. The default time is .5 seconds.
Using the DXP-HT Project Wizard • Mode 4 Mode 4 should only be used for channels 0-199, and sends the same IR sequences as the CH command. Stack Pulse Parameters - If the Tune Using XCH Command option is de-selected, the Stack Pulse Parameters options become available. The Stack Pulse option mimics the XCH commands, but uses IR pulses instead of sending commands.
Using the DXP-HT Project Wizard Govern Power - This option enables governing power to the device, which means that the System constantly monitors power to the device (for use with power sensors) rather than simply toggling power On/Off. Device/Power Feedback - This option enables the display of power status of the device on the touch panel. If this option is enabled, use the radio buttons to specify a Power Sensing Method, based on the type of power sensor being used with the device (PSS2, VSS2 or TVS).
Using the DXP-HT Project Wizard Which Screens? dialog The Which Screens? dialog (FIG. 6) is available for selection in the Jump To drop-down, once the project has been finished and re-opened. Use this dialog to specify which Project Wizard dialogs to include in the Jump To list, to further simplify using the application. By default, all dialogs are selected. Click the checkboxes to disable any dialogs that you don't intend to revisit for editing. FIG.
Using the DXP-HT Project Wizard Audio/Video Inputs dialog The Audio/Video Inputs dialog creates the association between the Devices defined on the System Information dialog, the Inputs defined for the receiver, and the physical input connectors on the back of the receiver. Each source Device must be associated with a Physical Label, an Input Type and the IR or Control Logic command required to switch the receiver.
Using the DXP-HT Project Wizard • Input Type: This field differentiates audio-only inputs from A/V inputs. Select the appropriate input from the drop-down list (Audio Only, Component, Composite, HD Component, HD RGB or S-Video). Note: If you select any Input Type other than Audio Only, an additional drop-down is displayed at the bottom of this dialog - Display Device (see below).
Using the DXP-HT Project Wizard The Add button will add a new surround mode to the top of the list. Note that you can only add new modes if IR has been specified as the receiver's Control Method (as indicated in the System Information dialog). The Delete button deletes the selected surround mode from the list. Click the Insert button to insert a new mode after the currently selected mode. Click the Apply button to apply any changes that have been made to the selected mode.
Using the DXP-HT Project Wizard Lighting Presets dialog The Lighting Presets dialog sets up the available presets for the Lighting system selected on the System information page. There is a maximum of nine presets available. DXP-HT does not allow for individual zone control or the setting of presets, only the recall of existing presets. FIG. 9 Lighting Presets dialog The defined lighting presets appear in the Lighting Presets table.
Using the DXP-HT Project Wizard The identifier entered into the Preset Name text box is the name that will be displayed on the touch panel. No duplicates allowed (8 characters maximum). The Address field correspond to either the lighting controller address and the preset number (as with AMX Radia), or the address of the keypad and the keypad button that will be emulated (as with the LiteTouch controller). For the AMX ALD-D48, the address is the 7-digit ID number of the ALD-D48 Device Server.
Using the DXP-HT Project Wizard (Dynalite): K:P:[14]:12:25 indicates area #14, go to preset scene #12 at 25-second fade rate. The Clear button clears the Preset Name, Address and Button Number information for a selected preset. Resorting the Presets List: Select a Preset and click the up/down arrows (to the right of the Lighting Presets table) to rearrange the order of the list.
Using the DXP-HT Project Wizard Touch Panel Interfaces dialog DXP-HT requires that at least one touch panel is defined within the system. You can define up to 8 touch panels in the system FIG. 10 Touch Panel Interfaces dialog The Touch Panel Interfaces table can be sorted by clicking on any of the three column header cells (Panel ID, Display Name and Type). Clicking the header cells toggles between sorting the column in ascending or descending order.
Using the DXP-HT Project Wizard Use Picture Frame for Inactivity Page Click this option to use the PictureFrame application as a screensaver when the touch panel becomes inactive (this option tells the panel to launch the PictureFrame application from the target PC rather than use the DXP-HT Logo page, when the panel times-out).
Using the DXP-HT Project Wizard Relay Button All of these selections are dependent on these devices first being defined. For example, if no lighting was previously defined, the Lights Button checkbox will be disabled. Choose Touch Panel Theme dialog The Choose Touch Panel Themes dialog allows you to select from a list of predefined layouts (or themes) for your touch panels. All of the touch panels in the system will get the same settings whether you are using a predefined or a custom theme. FIG.
Using the DXP-HT Project Wizard Choose Touch Panel Background dialog To select a background for your custom touch panel theme, click on one of the background names in the list on the left side of the screen. A small-scale preview image of the selected theme is displayed in this dialog. Click on the Preview button to see a full size preview of the panel page. FIG.
Using the DXP-HT Project Wizard FIG. 13 Choose Touch Panel Buttons dialog FIG. 14 Choose Touch Panel Text Colors dialog 46 DXP-HT v1.
Using the DXP-HT Project Wizard Channel Preset Categories dialog This dialog allows you to create up to 8 different preset categories. For example, you might create a presets category for Sports channels, one for Movies channels, another for Children's channels, and so on. These categories appear within the bottom-right of the Channel Presets pages (such as Channel Presets for DSS/TV/etc). By default, there is one entry in the table: All Presets (Default).
Using the DXP-HT Project Wizard To edit the Display Name for an existing Preset Category 1. Select one from the list, and enter the new name in the Display Name text field. 2. Click Apply to apply the change. 3. Use the up/down arrow buttons to change the order in which the Preset Category buttons will occur on the touch panel. To delete a Preset Category from the list, select one and click the Delete button.
Using the DXP-HT Project Wizard The Copy from: drop-down list allows you to copy a previously configured channel preset to the current device. Click the down arrow to view the list, and select the channel preset you want to copy into the Channel Presets table. The Button Image drop-down list contains all of the preset channels in the Design XPress -Home Theater wizard. When you select a button image, the image is previewed to the left of the combo box.
Using the DXP-HT Project Wizard The Control Logic drop-down menu allows you to select from 3 control type options: Latching, Momentary and Pulse Type: Latching relays remain on until another relay is selected. Momentary relays will remain on as long as the touch button is being pressed. Pulse Type relays will turn on for ½ second and then will automatically turn off. Latching relays can use one, two or three relays to control a motor controller.
Using the DXP-HT Project Wizard Presets for Receiver AM/FM Tuner dialog The Presets for Receiver AM/FM Tuner dialog sets up the radio presets for the receiver's AM/FM tuner. You can setup and define as many presets as are present on the AM/FM tuner. The presets must be discrete and must be on the same bank of presets. If you tuner has 3 sets of presets (for example FM1, FM2, AM), and each set has 10 presets for a total of 30 presets, DXP-HT would only be able to recall 10 presets.
Using the DXP-HT Project Wizard Deleting a Preset from the List Select one and click the Delete button. CD Titles dialog The CD Titles dialog allows you to setup CD or DVD titles in multi-disc changers. The number of title slots is determined by the changer size as set in the Device Configuration dialog (Device Data tab). This dialog is only included in the Wizard if the Project includes a CD or DVD player with at least a two-disc changer.
Using the DXP-HT Project Wizard Adding a new CD title: Manually enter either Artist or Disc Title information to enable the Add button. Click the Add button to add the new CD to the list. Alternatively, you can select an existing CD title from the list, then edit the Artist and Disc Title information, and click the Add as New button. Editing CD Information Select a CD title from the list to populate the Artist and Disc Title fields, where you can enter new information as desired.
Using the DXP-HT Project Wizard To prevent the CD from playing when it is inserted, hold down the shift key on the keyboard while loading the CD. 2. Click the down-arrow (in the Setting to receive CD data from freedb.org section of the dialog) to view a list of available CD drives on your PC. 3. Select the drive that you placed the CD in, and click the Retrieve CD Data from CD button. If the disc has never been read before, DXP-HT will attempt to download the data from freeDB.org.
Using the DXP-HT Project Wizard Creating a new macro and adding it to the Project 1. Click the Add command button in the System Information dialog to open the Device Configuration dialog and begin configuring a new device. 2. Enter a name for the new macro in the Macro Name text field. 3. Click the Apply button to access the other macro steps tabs (Delay, Device Function, Routing, Lighting Presets, Channel Presets, Relays, and Custom). 4. Select the tab associated with the first step in your macro.
Using the DXP-HT Project Wizard • Device Function: Use this tab to add a device and device function to the macro. Click the down arrow to access the Device drop-down list of devices defined in the System Information dialog. Once a device has been selected, a second set of function-oriented drop-down lists becomes available. Select a device function to be added as a macro step, and click Add to add the device function to the Macro Steps list.
Using the DXP-HT Project Wizard Navigation and Routing Macros This dialog is included in the wizard only if you selected the Use Macro for Menu Navigation and Device Routing check box in the Device Configuration dialog (Device Data tab). FIG. 21 Navigation and Routing Macros dialog A macro is a series of commands that are triggered by a single button on the touch panel, in this case the Main menu buttons.
Using the DXP-HT Project Wizard To modify the macro steps, click the Edit button at the bottom of this dialog. Building the Project Once you have gone through all of the configuration screens, it is time to build your project. 1. Click the Finish button at the bottom of any screen. DXP-HT will ask you if you want to save your project as the current revision or as a new revision. New revisions will always be 1 greater than the highest revision for the project. 2.
Using the DXP-HT Project Wizard For more information on how to operate NetLinx Studio see the NetLinx Studio Tutorial on the Training page of the AMX web site at www.amx.com, and consult the on-line help file and NetLinx Studio Instruction Manual (also available via the AMX website). Finishing the Job It is recommended that before your finish your project you follow these steps to properly utilize the DXP-HT project files: Finish your DXP-HT project.
Using the DXP-HT Project Wizard • General Information This section of the report details the user interface file names for each touch panel, which files need to be transferred to the master, lighting scene addresses, file names of the generated NetLinx software, etc. • AMX Recommended Equipment List This section of the report lists all of the AMX equipment that will be needed to build, install, and run the system.
Using the DXP-HT Project Wizard Transferring CD/DVD Title Information to the Master via FTP Anytime that you assign text to any type of preset button in your project, you must transfer the button text that appears on the buttons in Design XPress to the NetLinx Master, in order to display the button text on the panel(s) in the system. This is true for CD and DVD Titles. Use File Transfer Protocol (FTP) to transfer the files.
Using the DXP-HT Project Wizard 6. Enter the Name (assigned to this connection), Transport method (for communication), IP Address, and IP Port used for communication to the panel through the Master. 7. Click OK to return to the Connect dialog. 8. Click the Connect button to begin the communication process to the target panel. 9. From the TPD4 Main menu, select Transfer > Send to Panel to open the Send to Panel dialog. 10. Select the target panel from within the listed G4 devices. 11.
Using the DXP-HT Project Wizard Configuring TakeNote TakeNote is an AMX application that works in conjunction with G4 touch panels, TPDesign4 and G4 Computer Control (G4CC) to allow you to use a G4 panel to annotate to either a windows desktop or on other G4 panels. Using TakeNote, presenters can use a stylus to directly draw onto a G4 panel's LCD screen and then have those annotations immediately displayed on both the target PC and up to 4 separate Modero touch panels simultaneously.
Using the DXP-HT Project Wizard Configuring i!-TimeManager The i!-TimeManager remote time server application automatically updates the time information on any communicating Master running the i!-TimeManager code. Use the i!-TimeManager options in the System Information dialog to enable and configure the i!-TimeManager application. 1. In the System Information dialog, click the Use i!-TimeManager radio button to select a time zone and apply Daylight Savings Time rules. 2.
Using the DXP-HT Project Wizard Copying a Design XPress - Home Theater Project There are three ways to copy an existing DXP-HT project file under a new name. All three methods have the same result; they allow you to rename a copy of the Project selected (highlighted) in the Project Selection list (on the Main Screen), via the Copy Project dialog. First select a Project from the Project Selection List, then: Click the Copy Project button on the Main Screen Select File > Copy.
Using the DXP-HT Project Wizard Deleting a DXP-HT Project There are three ways to delete an existing DXP-HT project file. All three methods have the same result; they each delete the Project selected (highlighted) in the Project Selection list (on the Main Screen) from the hard drive. First select a Project from the Project Selection List, then: Click the Delete Project button on the Main Screen Select File > Delete. Select Delete from the Project Selection List context menu.
Working With IR Files Working With IR Files Selecting an IR File to Use Once you have found the IRL file that you want to use in association with the device (as specified in the Device Configuration dialog): 1. Select the IR file from within the Search Results table. 2. Verify the file is correct by reviewing the file information from within the lower IR file section. 3.
Working With IR Files Scanning Directories for IRL Files Once you have selected the folder containing the desired IR file(s). 1. Click the Scan button to begin scanning that directory for .*IRL files. The searching process is indicated both as a progress bargraph indicator and a # of # value below the bargraph. This process may take a few minutes to complete. During this process, the title of the dialog reads "(scanning for IR files)". This scan operation enables the Search Criteria functionality.
DXP-HT Touch Panel Channel Maps DXP-HT Touch Panel Channel Maps Channel Maps (Function Codes) - Overview The channel maps are generated in TPD4. Once you have created a touch panel project: 1. Open a TPD4 template file. 2. From the Main menu, click Panel to open a drop-down menu. 3. Select Generate Programmer's Report and choose the output file type for the information (Comma Separated Format, Text-Only format, and Web Page format).
DXP-HT Touch Panel Channel Maps 70 T CH Port: 0, CH Code: 520 Y CH Port: 0, CH Code: 521 U CH Port: 0, CH Code: 522 I CH Port: 0, CH Code: 523 O CH Port: 0, CH Code: 524 P CH Port: 0, CH Code: 525 {[ CH Port: 0, CH Code: 526 }] CH Port: 0, CH Code: 527 |\ CH Port: 0, CH Code: 543 Caps CH Port: 0, CH Code: 558 A CH Port: 0, CH Code: 530 S CH Port: 0, CH Code: 531 D CH Port: 0, CH Code: 532 F CH Port: 0, CH Code: 533 G CH Port: 0, CH Code: 534 H CH Port: 0, CH Code: 535 J CH
DXP-HT Touch Panel Channel Maps Ins CH Port: 0, CH Code: 610 Hm CH Port: 0, CH Code: 602 pg up CH Port: 0, CH Code: 604 Button 83 CH Port: 0, CH Code: 70 Function Codes: AMFM Tuner TUNER_BAND_BUTTON CH Port: 1, CH Code: 22, TUNER_TUNEUP_BUTTON CH Port: 1, CH Code: 23, TUNER_TUNEDOWN_BUTTON CH Port: 1, CH Code: 24, TUNER_PRESETUP_BUTTON CH Port: 1, CH Code: 25, TUNER_PRESETDOWN_BUTTON CH Port: 1, CH Code: 26, TUNER_PRESET_BUTTON CH Port: 1, CH Code: 251, TUNER_POWER_BUTTON CH Port: 1, CH C
DXP-HT Touch Panel Channel Maps CABLE_POWER_BUTTON CH Port: 1, CH Code: 194 CABLE_PRESET_BUTTON CH Port: 3, CH Code: 97 CABLETUNER_0_BUTTON CH Port: 1, CH Code: 180 CABLETUNER_PREVCHAN_BUTTON CH Port: 1, CH Code: 204 Function Codes: Cable Video CABLETUNER_PREVCHAN_BUTTON CH Port: 1, CH Code: 204 CABLETUNER_ENTER_BUTTON CH Port: 1, CH Code: 193 CABLE_GUIDE_BUTTON CH Port: 1, CH Code: 201 CABLE_UP_BUTTON CH Port: 1, CH Code: 195 CABLE_DOWN_BUTTON CH Port: 1, CH Code: 196 CABLE_LEFT_BUTTON CH
DXP-HT Touch Panel Channel Maps CDADVANCED_0_BUTTON CH Port: 3, CH Code: 44 CDADVANCED_ENTER_BUTTON CH Port: 3, CH Code: 46 CD_SELECTDISC_BUTTON CH Port: 3, CH Code: 57 AD Port: 3, AD Code: 57 CD_POWER_BUTTON CH Port: 3, CH Code: 25 CDADVANCED_SELECT_BUTTON CH Port: 3, CH Code: 45 CDADVANCED_+100_BUTTON CH Port: 3, CH Code: 47 CDADVANCED_CLEAR_BUTTON CH Port: 3, CH Code: 48 Function Codes: CD List CDLIST_UP_BUTTON CH Port: 3, CH Code: 9 CDLIST_DOWN_BUTTON CH Port: 3, CH Code: 10 CDLIST_ID4_
DXP-HT Touch Panel Channel Maps Function Codes: CD List Keyboard Enter CH Port: 1, CH Code: 234 45 AD Port: 3, AD Code: 23 36 AD Port: 3, AD Code: 22 Cap CH Port: 3, CH Code: 8 Function Codes: CD List - Title Only CDTTL_UP_BUTTON CH Port: 3, CH Code: 9 CDTTL_DOWN_BUTTON CH Port: 3, CH Code: 10 CDTTL_TTL4_BUTTON CH Port: 3, CH Code: 4 AD Port: 3, AD Code: 12 CDTTL_TTL5_BUTTON CH Port: 3, CH Code: 5 AD Port: 3, AD Code: 15 CDTTL_TTL6_BUTTON CH Port: 3, CH Code: 6 AD Port: 3, AD Code: 18 CD
DXP-HT Touch Panel Channel Maps Function Codes: Channel Preset Categories CHANCAT_UP_BUTTON CH Port: 1, CH Code: 130 CHANCAT_DOWN_BUTTON CH Port: 1, CH Code: 129 CHANCAT_HDR_BUTTON AD Port: 1, AD Code: 80 CHANCAT_1_BUTTON CH Port: 1, CH Code: 150 AD Port: 1, AD Code: 150 CHANCAT_2_BUTTON CH Port: 1, CH Code: 151 AD Port: 1, AD Code: 151 CHANCAT_3_BUTTON CH Port: 1, CH Code: 152 AD Port: 1, AD Code: 152 CHANCAT_4_BUTTON CH Port: 1, CH Code: 153 AD Port: 1, AD Code: 153 CHANCAT_5_BUTTON CH Port:
DXP-HT Touch Panel Channel Maps DISPLAY_9_BUTTON CH Port: 2, CH Code: 89 DISPLAY_ENTER_BUTTON CH Port: 2, CH Code: 91 DISPLAY_0_BUTTON CH Port: 2, CH Code: 80 DISPLAY_MENU_BUTTON CH Port: 2, CH Code: 141 DISPLAY_INPUT_BUTTON CH Port: 2, CH Code: 78 DISPLAY_CHANUP_BUTTON CH Port: 2, CH Code: 92 DISPLAY_CHANDN_BUTTON CH Port: 2, CH Code: 93 DISPLAY_NAVSELECT_BUTTON CH Port: 2, CH Code: 140 DISPLAY_+100_BUTTON CH Port: 2, CH Code: 146 DISPLAY_PREVCHAN_BUTTON CH Port: 2, CH Code: 144 DISPLAY_
DXP-HT Touch Panel Channel Maps Function Codes: Display - Projector PROJ_POWER_BUTTON CH Port: 2, CH Code: 94, PROJ_VIDEO1_BUTTON CH Port: 2, CH Code: 190 AD Port: 2, AD Code: 190 PROJ_VIDEO2_BUTTON CH Port: 2, CH Code: 191 AD Port: 2, AD Code: 191 PROJ_VIDEO3_BUTTON CH Port: 2, CH Code: 192 AD Port: 2, AD Code: 192 PROJ_VIDEO4_BUTTON CH Port: 2, CH Code: 193 AD Port: 2, AD Code: 193 PROJ_VIDEO5_BUTTON CH Port: 2, CH Code: 194 AD Port: 2, AD Code: 194 PROJ_VIDEO6_BUTTON CH Port: 2, CH Code: 19
DXP-HT Touch Panel Channel Maps Function Codes: DSS Tuner DSSTUNER_1_BUTTON CH Port: 2, CH Code: 151 DSSTUNER_2_BUTTON CH Port: 2, CH Code: 152 DSSTUNER_3_BUTTON CH Port: 2, CH Code: 153 DSSTUNER_4_BUTTON CH Port: 2, CH Code: 154 DSSTUNER_5_BUTTON CH Port: 2, CH Code: 155 DSSTUNER_6_BUTTON CH Port: 2, CH Code: 156 DSSTUNER_7_BUTTON CH Port: 2, CH Code: 157 DSSTUNER_8_BUTTON CH Port: 2, CH Code: 158 DSSTUNER_9_BUTTON CH Port: 2, CH Code: 159 DSSTUNER_0_BUTTON CH Port: 2, CH Code: 150 DSS
DXP-HT Touch Panel Channel Maps Function Codes: DVD Changer Advanced DVDADVANCED_1_BUTTON CH Port: 2, CH Code: 200 DVDADVANCED_2_BUTTON CH Port: 2, CH Code: 201 DVDADVANCED_3_BUTTON CH Port: 2, CH Code: 202 DVDADVANCED_4_BUTTON CH Port: 2, CH Code: 203 DVDADVANCED_5_BUTTON CH Port: 2, CH Code: 204 DVDADVANCED_6_BUTTON CH Port: 2, CH Code: 205 DVDADVANCED_7_BUTTON CH Port: 2, CH Code: 206 DVDADVANCED_8_BUTTON CH Port: 2, CH Code: 207 DVDADVANCED_9_BUTTON CH Port: 2, CH Code: 208 DVDADVANCE
DXP-HT Touch Panel Channel Maps Function Codes: HELP-ABOUT AMX_SETUP_BUTTON CH Port: 0, CH Code: 73 SYSINFO_JOBNAME AD Port: 1, AD Code: 210 SYSINFO_FILENAME AD Port: 1, AD Code: 211 SYSINFO_COMPANY AD Port: 1, AD Code: 213 SYSINFO_CREATEDBY AD Port: 1, AD Code: 212 SYSINFO_DATE_CREATED AD Port: 1, AD Code: 215 SYSINFO_SOFTWARE_REV AD Port: 1, AD Code: 214 BUTTON_BACK CH Port: 1, CH Code: 239 SLEEP_BUTTON CH Port: 1, CH Code: 18 SYSINFO_DEBUG CH Port: 1, CH Code: 8 INIT_IR CH Port: 1,
DXP-HT Touch Panel Channel Maps Function Codes: Logo LOGO_START_BUTTON CH Port: 4, CH Code: 255 SELECT_LBL_BUTTON AD Port: 4, CH Code: 255 Function Codes: Macros MACRO_1_BUTTON CH Port: 2, CH Code: 220 MACRO_5_BUTTON CH Port: 2, CH Code: 224 MACRO_9_BUTTON CH Port: 2, CH Code: 228 MACRO_13_BUTTON CH Port: 2, CH Code: 232 MACRO_2_BUTTON CH Port: 2, CH Code: 221 MACRO_6_BUTTON CH Port: 2, CH Code: 225 MACRO_10_BUTTON CH Port: 2, CH Code: 229 MACRO_14_BUTTON CH Port: 2, CH Code: 233 MACRO_3_BUTTON
DXP-HT Touch Panel Channel Maps Function Codes: Main Page MAIN_MENU_STATEVTB1_BUTTON CH Port: 1, CH Code: 19 AD Port: 1, AD Code: 202 MAIN_MENU_3_BUTTON CH Port: 1, CH Code: 3 AD Port: 1, AD Code: 3 MAIN_MENU_4_BUTTON CH Port: 1, CH Code: 4 AD Port: 1, AD Code: 4 MAIN_MENU_5_BUTTON CH Port: 1, CH Code: 5 AD Port: 1, AD Code: 5 MAIN_MENU_6_BUTTON CH Port: 1, CH Code: 6 AD Port: 1, AD Code: 6 MAIN_MENU_RIGHT_BUTTON CH Port: 1, CH Code: 10 AD Port: 1, AD Code: 10 MAIN_MENU_LEFT_BUTTON CH Port:
DXP-HT Touch Panel Channel Maps MAX AUDIO HEADER AD Port: 5, AD Code: 19 MAX AUDIO PLAYLISTS CH Port: 5, CH Code: 70 MAX AUDIO GENRES CH Port: 5, CH Code: 80 MAX AUDIO RECORD CH Port: 5, CH Code: 10 MAX AUDIO SEARCH CH Port: 5, CH Code: 50 Function Codes: MAX Genre MAX GENRE 1 CH Port: 5, CH Code: 81 AD Port: 5, AD Code: 81 MAX GENRE 2 CH Port: 5, CH Code: 82 AD Port: 5, AD Code: 82 MAX GENRE 3 CH Port: 5, CH Code: 83 AD Port: 5, AD Code: 83 MAX GENRE 4 CH Port: 5, CH Code: 84 AD Port: 5, AD
DXP-HT Touch Panel Channel Maps Function Codes: MAX Movie Search MAX MOVIE SEARCH TITLE HEADER AD Port: 5, AD Code: 50 MAX MOVIE SEARCH REQUESTED TEXT AD Port: 5, AD Code: 20 MAX MOVIE SEARCH TEXT LABEL AD Port: 5, AD Code: 18 MAX MOVIE SEARCH TITLE 1 CH Port: 5, CH Code: 115 AD Port: 5, AD Code: 115 MAX MOVIE SEARCH TITLE 7 CH Port: 5, CH Code: 121 AD Port: 5, AD Code: 121 MAX MOVIE SEARCH TITLE 2 CH Port: 5, CH Code: 116 AD Port: 5, AD Code: 116 MAX MOVIE SEARCH TITLE 8 CH Port: 5, CH Code:
DXP-HT Touch Panel Channel Maps Function Codes: MAX Video MAX VIDEO CHAPTER AD Port: 5, AD Code: 22 MAX VIDEO TITLE AD Port: 5, AD Code: 13 MAX VIDEO HEADER AD Port: 5, AD Code: 19 MAX VIDEO PLAY CH Port: 5, CH Code: 100 MAX VIDEO STOP CH Port: 5, CH Code: 101 MAX VIDEO PAUSE CH Port: 5, CH Code: 102 MAX VIDEO SKIP - CH Port: 5, CH Code: 103 MAX VIDEO SKIP + CH Port: 5, CH Code: 104 MAX VIDEO UP CH Port: 5, CH Code: 105 MAX VIDEO DN CH Port: 5, CH Code: 107 MAX VIDEO LEFT CH Port: 5, C
DXP-HT Touch Panel Channel Maps Function Codes: MM - Sources STATIC_MENU_SRC1 CH Port: 3, CH Code: 200 STATIC_MENU_SRC2 CH Port: 3, CH Code: 201 STATIC_MENU_SRC3 CH Port: 3, CH Code: 202 STATIC_MENU_SRC4 CH Port: 3, CH Code: 203 STATIC_MENU_SRC5 CH Port: 3, CH Code: 204 STATIC_MENU_SRC6 CH Port: 3, CH Code: 205 STATIC_MENU_SRC7 CH Port: 3, CH Code: 206 STATIC_MENU_SRC8 CH Port: 3, CH Code: 207 STATIC_MENU_SRC9 CH Port: 3, CH Code: 208 STATIC_MENU_SRC10 CH Port: 3, CH Code: 209 STATIC_MENU
DXP-HT Touch Panel Channel Maps 15 CH Port: 2, CH Code: 118 16 CH Port: 2, CH Code: 106 17 CH Port: 2, CH Code: 107 ARQNAV_SONGSLBL_BUTTON AD Port: 2, AD Code: 119 ARQNAV_ALL_BUTTON CH Port: 2, CH Code: 102 ARQNAV_ARTIST_BUTTON CH Port: 2, CH Code: 103 ARQNAV_ALBUM_BUTTON CH Port: 2, CH Code: 104 ARQNAV_JUKEBOX_BUTTON CH Port: 2, CH Code: 105 ARQNAV_PLAYLIST_BUTTON CH Port: 2, CH Code: 101 ARQNAV_SEARCH_BUTTON CH Port: 2, CH Code: 120 ARQNAV_PLAYER_BUTTON CH Port: 2, CH Code: 135 ARQN
DXP-HT Touch Panel Channel Maps ARQPLAYER_UP_BUTTON CH Port: 2, CH Code: 128 ARQPLAYER_DOWN_BUTTON CH Port: 2, CH Code: 129 ARQPLAYER_RANDOM_BUTTON CH Port: 2, CH Code: 132 ARQPLAYER_INTRO_BUTTON CH Port: 2, CH Code: 133 ARQPLAYER_SHUFFLE_BUTTON CH Port: 2, CH Code: 131 ARQPLAYER_REPEAT_BUTTON CH Port: 2, CH Code: 130 Function Codes: Projector Video PROJ_VIDEO1_BUTTON CH Port: 2, CH Code: 190 AD Port: 2, AD Code: 190 PROJ_VIDEO2_BUTTON CH Port: 2, CH Code: 191 AD Port: 2, AD Code: 191 PROJ_VIDE
DXP-HT Touch Panel Channel Maps PVRMNU_LEFT_BUTTON CH Port: 2, CH Code: 50 PVRMNU_RIGHT_BUTTON CH Port: 2, CH Code: 51 PVRMNU_NAVSELECT_BUTTON CH Port: 2, CH Code: 52 PVR_PRESET_BUTTON CH Port: 3, CH Code: 97 PVR_YES_BUTTON CH Port: 2, CH Code: 41 PVR_NO_BUTTON CH Port: 2, CH Code: 42 Function Codes: PVR Tuner PVRTUNER_1_BUTTON CH Port: 2, CH Code: 61 PVRTUNER_2_BUTTON CH Port: 2, CH Code: 62 PVRTUNER_3_BUTTON CH Port: 2, CH Code: 63 PVRTUNER_4_BUTTON CH Port: 2, CH Code: 64 PVRTUNER_5_BU
DXP-HT Touch Panel Channel Maps RECEIVER_PRESET_BUTTON CH Port: 1, CH Code: 251 RECEIVER_POWER_BUTTON CH Port: 1, CH Code: 21 RECEIVER_REAR_VOLUP_BUTTON CH Port: 1, CH Code: 110 RECEIVER_REAR_VOLDN_BUTTON CH Port: 1, CH Code: 111 RECEIVER_CENTER_VOLUP_BUTTON CH Port: 1, CH Code: 113 RECEIVER_CENTER_VOLDN_BUTTON CH Port: 1, CH Code: 114 Function Codes: Receiver Surround SURROUND_UP_BUTTON CH Port: 1, CH Code: 75, SURROUND_DOWN_BUTTON CH Port: 1, CH Code: 76, SURROUND_1_BUTTON CH Port: 1, CH Code
DXP-HT Touch Panel Channel Maps Function Codes: Receiver AV In AVINP_UP_BUTTON CH Port: 1, CH Code: 71 AVINP_DOWN_BUTTON CH Port: 1, CH Code: 72 AVINP_1_BUTTON CH Port: 1, CH Code: 31 AD Port: 1, AD Code: 31 AVINP_3_BUTTON CH Port: 1, CH Code: 33 AD Port: 1, AD Code: 33 AVINP_5_BUTTON CH Port: 1, CH Code: 35 AD Port: 1, AD Code: 35 AVINP_7_BUTTON CH Port: 1, CH Code: 37 AD Port: 1, AD Code: 37 AVINP_9_BUTTON CH Port: 1, CH Code: 39 AD Port: 1, AD Code: 39 AVINP_2_BUTTON CH Port: 1, CH Cod
DXP-HT Touch Panel Channel Maps Function Codes: TNadvancedControls Advanced CH Port: 0, CH Code: 70 Clear All Screens CH Port: 0, CH Code: 364 Clear All and Flush CH Port: 0, CH Code: 367 Function Codes: TNcolor picker brightnessPicker AD Port: 0, AD Code: 91 colorPicker LV Port: 0, LV Code: 91 brightnessPicker LV Port: 0, LV Code: 93 Color Close AD Port: 0, AD Code: 93 CH Port: 0, CH Code: 192 Mix Custom Color CH Port: 0, CH Code: 70 Function Codes: TNcanvas Canvas CH Port: 0, CH Code: 70
DXP-HT Touch Panel Channel Maps tool_line CH Port: 0, CH Code: 392 tool_rect CH Port: 0, CH Code: 393 tool_ellipse CH Port: 0, CH Code: 394 tool_select_grab CH Port: 0, CH Code: 397 tool_pointer CH Port: 0, CH Code: 391 Key Board CH Port: 0, CH Code: 398 $Vpt AD Port: 0, AD Code: 102 Function Codes: TNkeypad Keypad CH Port: 0, CH Code: 70 1 CH Port: 0, CH Code: 502 2 CH Port: 0, CH Code: 503 7 CH Port: 0, CH Code: 508 0 CH Port: 0, CH Code: 511 8 CH Port: 0, CH Code: 509 4 CH Port:
DXP-HT Touch Panel Channel Maps Function Codes: TNtext Text Size CH Port: 0, CH Code: 70 Undo 96pt 12pt 48pt $V pt Function Codes: TNshape Shape CH Port: 0, CH Code: 70 Undo shape_4 AD Port: 0, AD Code: 93 shape_6 AD Port: 0, AD Code: 93 shape_3 AD Port: 0, AD Code: 93 shape_3 AD Port: 0, AD Code: 93 Function Codes: Tuner Presets AMFMPRE_UP_BUTTON CH Port: 1, CH Code: 77, AMFMPRE_DOWN_BUTTON CH Port: 1, CH Code: 78, 94 AMFMPRE_1_BUTTON CH Port: 1, CH Code: 61 AD Port: 1, AD Code: 61 AMFMP
DXP-HT Touch Panel Channel Maps Function Codes: VCR VCR_PLAY_BUTTON CH Port: 1, CH Code: 81 VCR_STOP_BUTTON CH Port: 1, CH Code: 82 VCR_PAUSE_BUTTON CH Port: 1, CH Code: 83 VCR_SRCHREV_BUTTON CH Port: 1, CH Code: 87 VCR_REWIND_BUTTON CH Port: 1, CH Code: 85 VCR_FFWD_BUTTON CH Port: 1, CH Code: 84 VCR_SRCHFWD_BUTTON CH Port: 1, CH Code: 86 VCR_POWER_BUTTON CH Port: 1, CH Code: 104 VCR_TVVCR_BUTTON CH Port: 1, CH Code: 102 VCR_INPUT_BUTTON CH Port: 1, CH Code: 103 VCR_RECORD_BUTTON CH Port
DXP-HT Touch Panel Channel Maps VCRTUNER_PREVCHAN_BUTTON CH Port: 1, CH Code: 89 VCR_MENU_BUTTON CH Port: 1, CH Code: 107 VCRTUNER_+100_BUTTON CH Port: 1, CH Code: 106 Function Codes: VCR Video VCR_PLAY_BUTTON CH Port: 1, CH Code: 81 VCR_STOP_BUTTON CH Port: 1, CH Code: 82 VCR_PAUSE_BUTTON CH Port: 1, CH Code: 83 VCR_RECORD_BUTTON CH Port: 1, CH Code: 88 VCR_SRCHREV_BUTTON CH Port: 1, CH Code: 87 VCR_REWIND_BUTTON CH Port: 1, CH Code: 85 VCR_FFWD_BUTTON CH Port: 1, CH Code: 84 VCR_SRCHFWD
DXP-HT Touch Panel Channel Maps 72° F AD Port: 1, AD Code: 28 89° F AD Port: 1, AD Code: 34 69° F AD Port: 1, AD Code: 29 86° F AD Port: 1, AD Code: 35 67° F AD Port: 1, AD Code: 30 99° F AD Port: 1, AD Code: 36 78° F Refresh AD Port: 1, AD Code: 31 CH Port: 1, CH Code: 34 Update Locations CH Port: 1, CH Code: 35 Select Locations CH Port: 1, CH Code: 52 AD Port: 1, AD Code: 52 Partly Cloudy AD Port: 1, AD Code: 37 Cloudy AD Port: 1, AD Code: 38 Thunderstorms AD Port: 1, AD Code: 39
DXP-HT Touch Panel Channel Maps Function Codes: WeatherConfig SN AD Port: 1, AD Code: 75 SN AD Port: 1, AD Code: 76 Function Codes: WeatherDownload PROGRESS LV Port: 1, LV Code: 7 Start Download CH Port: 1, CH Code: 73 Clear CH Port: 1, CH Code: 74 AD Port: 1, AD Code: 74 percent AD Port: 1, AD Code: 73 BackArrow AD Port: 1, AD Code: 72 Function Codes: WeatherLocation PRESET1 CH Port: 1, CH Code: 54 AD Port: 1, AD Code: 54 PRESET2 CH Port: 1, CH Code: 55 AD Port: 1, AD Code: 55 PRESET3 CH Por
Working With IR Files DXP-HT v1.
033-004-2669 1/05 ©2005 AMX Corporation. All rights reserved. AMX, the AMX logo, the building icon, the home icon, and the light bulb icon are all trademarks of AMX Corporation. *In Canada doing business as Panja Inc. AMX reserves the right to alter specifications without notice at any time.