
User Guide

Introduction
11
D
XP-HT v1.3 - Programmer’s Guide
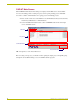
DXP-HT Menu Bar
There are four items in the menu bar (on the Main Screen):
File Menu
The Design XPress - Home Theater (DXP-HT) File menu contains several file control options:
DXP-HT maintains all of its projects in a single database. To move a project from one DXP-HT
installation to another (for example moving a project from your desktop computer to your laptop),
you must export the project from one computer and import the project on the other computer.
Edit Menu
The Edit menu provides several customizable settings for DXP-HT:
View Menu
The View menu contains options for sorting the Project list:
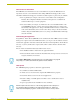
• New: Launches the Project Wizard, to create a new DXP-HT project file.
• Open: Opens an existing DXP-HT project file.
• Copy: Allows you to copy the active project file. This option launches the Copy Project
dialog.
• Delete: Allows you to delete the selected Project from your hard drive.
• Import Project: Allows you to import a file into the Project Selection List.
• Export Project: Allows you to export the active Project.
• Exit: Exits the DXP-HT application.
The New, Open, Copy, Delete and Exit options are also available via the command
buttons along the bottom of the Main Screen.
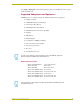
•User
Information:
Opens the User Information dialog, where you can enter and save basic user
information for the active Project (User Name, Company Name, Phone and E-
mail Address). The user's name and company are used to auto complete the
Name and Company fields within the Project Information dialog. The user's
phone number and e-mail address are not currently used, but are included for
future DXP-HT features.
• CD Titles
Maintenance:
Opens the CD Titles Maintenance dialog, where you can add/remove and edit
CD information (Artist and Title), as well as automatically retrieve CD information
from an on-line CD database (via freedb.org, on an internet-enabled computer).
• Preferences: Opens the Preferences dialog, containing various global preference settings for
DXP-HT, including enable/disable warning messages within the wizard, select a
progress bar style, and select default folders for Projects and IR files.
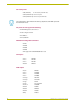
• Sort Projects: Click to access the Project Sorting window. The listed projects can be sorted by
up to four criteria in either ascending or descending order.