
Specifications

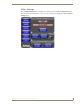
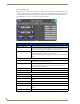
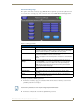
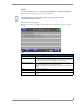
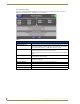
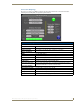

Table Of Contents
- MVP-5100/5150 Modero® ViewPoint® Touch Panels, 5.2" and 5”
- Introduction
- Accessories
- Configuring Communication
- Overview
- IR Communication
- Modero Setup and System Settings
- Wireless Settings - Wireless Access Overview (MVP-5150 Only)
- Configuring Wireless Network Access (MVP-5150 Only)
- Step 1: Configure the Device’s Wireless IP Settings (MVP- 5150 Only)
- Step 2: Configure the Card’s Wireless Security Settings
- Panel Downloads and Firmware Updates
- Setup Pages
- Protected Setup Pages
- Upgrading Firmware
- Programming
- Overview
- Page Commands
- Programming Numbers
- "^" Button Commands
- ^ANI
- ^APF
- ^BAT
- ^BAU
- ^BCB
- ^BCF
- ^BCT
- ^BDO
- ^BFB
- ^BIM
- ^BLN
- ^BMC
- ^BMF
- ^BMI
- ^BML
- ^BMP
- ^BNC
- ^BNN
- ^BNT
- ^BOP
- ^BOR
- ^BOS
- ^BPP
- ^BRD
- ^BSF
- ^BSM
- ^BSO
- ^BSP
- ^BVL
- ^BVN
- ^BVP
- ^BVT
- ^BWW
- ^CPF
- ^DLD
- ^DPF
- ^ENA
- ^FON
- ^GDI
- ^GIV
- ^GLH
- ^GLL
- ^GRD
- ^GRU
- ^GSC
- ^GSN
- ^ICO
- ^IRM
- ^JSB
- ^JSI
- ^JST
- ^MBT
- ^MDC
- ^SHO
- ^TEC
- ^TEF
- ^TOP
- ^TXT
- ^UNI
- Miscellaneous MVP Strings back to the Master
- MVP Panel Lock Passcode commands
- Text Effects Names
- Button Query Commands
- Panel Runtime Operations
- Input Commands
- Embedded codes
- Panel Setup Commands
- Battery Life and Replacement
- Appendix A: Text Formatting
- Appendix B: Wireless Technology
- Appendix C: Troubleshooting
- Overview
- Panel Doesn’t Respond To Touches
- Battery Will Not Hold Or Take A Charge
- MVP Isn’t Appearing In The Online Tree Tab
- MVP Can’t Obtain a DHCP Address
- My WEP Doesn’t Seem To Be Working
- NetLinx Studio Only Detects One Of My Connected Masters
- Can’t Connect To a NetLinx Master
- Only One Modero Panel In My System Shows Up
- Panel Behaves Strangely After Downloading A Panel File Or Firmware
- Overview
Protected Setup Pages
83
MVP-5100/5150 5.2" Modero Viewpoint Touch Panels
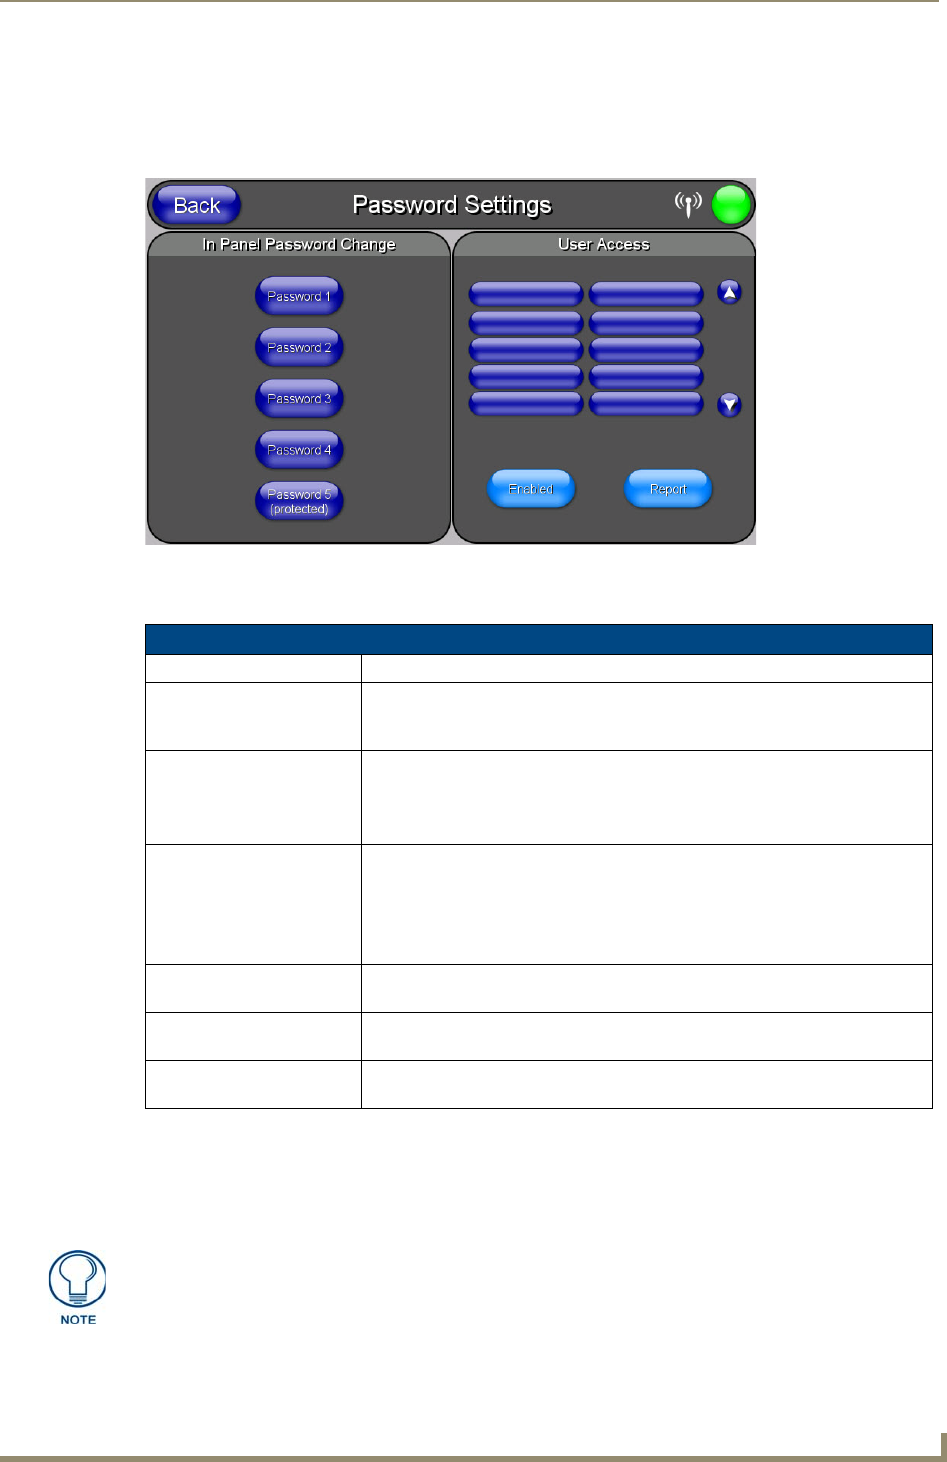
Password Settings Page
The options on the Password Settings page (FIG. 60) allow assignment of passwords required for users
to access the Protected Setup page, and to release the device from a MVP-WCS-52 Charging Station.
Features on this page include:
To change a previously established password:
1. In the Password Settings page, press the button in the In Panel Password Change section for the
particular password to be changed.
2. In the Password keyboard, enter the new alphanumeric password.
FIG. 60 Password Settings page
Password Settings Page
Back: Saves all changes and returns to the previous page.
WiFi/Wired/USB Icon: The icon to the left of the Connection Status Icon displays whether the current
connection to the Master is
Wireless (image of a radio antenna), Wired (image
of three networked computers), or
USB (USB connection symbol).
Connection Status icon: The icon in the upper-right corner of each Protected Setup page provides a
constant visual indication of current connection status.
Note: a Lock appears on the icon if the panel is connected to a secured NetLinx
Master.
In Panel Password
Change:
Accesses the alphanumeric values associated to particular password sets.
• The PASSWORD 1, 2, 3, 4 and 5 (protected) buttons open a keyboard to
enter alphanumeric values associated to the selected password group.
Note: Clearing Password #5 removes the need to enter a password before
accessing the Protected Setup page.
User Access: Lists all previous password users, in the order in which they accessed the
device.
Enable/Enabled: When enabled, this button notes that all password entry attempts will be
recorded.
Report: When enabled, this button sends a report to the Master on any attempts or
successes at entering a password.
Password 5 is protected, and can only be changed by the Administrator.