
User's Manual


NetLinx Security and Web Server
66
NetLinx Integrated Controllers
A single '/' is sufficient to grant access to all files and directories in the user directory and it's
subdirectory. The '/*' wildcard can also be added to enable access to all files. All entries should start
with a '/'. Here are some examples of valid entries:
By default, all accounts that enable HTTP Access are given a '/*' Directory Association if no other
Directory Association has been assigned to the account.
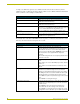
Valid Directory Association Entries
Path Description
/ Enables access to the user directory and all files and
subdirectories in that user directory.
/* Enables access to the user directory and all files and
subdirectories in that user directory.
/user1 If user1 is a file in the user directory, only the file is granted
access. If user1 is a subdirectory of the user directory, all files in
the user1 and its sub-directories are granted access.
/user1/ user1 is a subdirectory of the user directory. All files in the
user1 and its sub-directories are granted access.
/Room1/iWebControlPages/* /Room1/iWebControlPages is a subdirectory and all files and
its subdirectories are granted access.
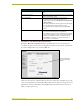
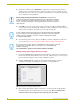
User Directory Association Entries
Feature Description
Select User Provides a drop-down listing of the available users.
• Initially, administrator and NetLinx are listed as default users.
Thereafter, the last user accessed is then always shown.
• As more users are added through the Add Group section of the
Security tab; those users appear within the drop-down
selection.
• The checkbox alongside each access right is populated when a
new user is selected.
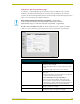
Add Association This field displays all existing directories currently on the target
Master.
• These folders can consist of G3 HTML project folders, data file
folders, etc.
• These folders are located beneath the User directory on the
Master.
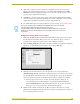
Adding Association This field is used to specify the path for the file or directory
granted for access and then assigned to the selected user.
• Clicking on a folder within the Add Association area populates
the Adding Association association field with the folder’s path.
• Another field option is to manually enter the directory path.
• Press Add to accept the new path and assign it to the selected
user.
• Press Cancel to void any path changes.
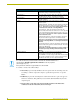
Delete/Select Association This drop-down listing displays any current directory associations
assigned to the user and prompts you to select the association
you want to delete.
• Press Delete to remove the currently selected directory
association and save those changes to the user profile.
• Press Cancel to void any path changes, disables the security
configuration session, and returns you to a blank Security tab.