
User guide


The use of layers on the Di-VentiX II will help you create
stunning shows by ne tuning all the parameters of any of
your sources to achieve what it is you want to do with your
Di-VentiX II. Once your inputs have all been congured,
you can affect them to any of the four available layers to
position them on the screen, size them, adjust color and
transparency, use or create presets to animate them (see
also Layer Functions...).
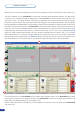
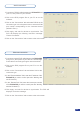
1/ Click on the “Image” tab of the RCS interface. The empty
“Image” screen will appear on screen.
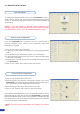
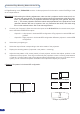
2/ By clicking on the drop-down menu in the Preview section,
situated next to the layer you wish to use (in this case,
layer A), you will access the image parameters of the
source you select (#1 to #8). The input button lights up green. On
the preview screen, the source will appear in the layer rectangle,
and A01 will be indicated in the layer rectangle (where A is the
layer, and 01 is the input affected to that layer).
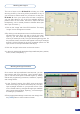
3/ Click the “Images” tab to return to the main screen.
4/ In the main window edit the desired layer attributes (size, position,
zoom, border, transparency...).
Once source and layer attributes have been set, you can
start working with layer functions. Layer functions allow
you to ne tune and stylize individual layers by adding
effects and programming movement, transitions, opening
and closing effects.
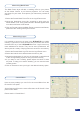
1/ In the “Preview” section of the RCS, click on the layer
button of the layer you wish to work with (A-D). The color
layer rectangle will blink on your preview screen. Click
on the Preset button to navigate through layer attribute
tabs (Layout, Keying/Titling, Opening...) to set the layer
according to your wishes.
2/ Enter appropriate settings in each tab, then simply click
the [TAKE] button to view results on screen.
Working with Layers
Working with layer functions
55