
User guide


It is possible to store up to 6 frames in the PLS300 non volatile
memory. Frames are mainly used as backgrounds in a typical show
or event setup, and can be recorded from any of the PLS300’
10 sources and called back at the press of a single button.
* NOTE * : Frames may be used only one at a time and cannot be
placed in a layer.
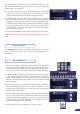
1/ In the Input Selection section, press the source button (#1 to #10)
of the source you wish to record as a frame. The source button
will start blinking. Press the [TAKE] button to display that source
on the main display.
2/ Select Logos/Frames in the menu by rotating the scroll knob, then
pressing the [ENTER] button.
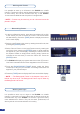
3/ Select Record Frames in the Logo/Frames menu by rotating the
scroll knob, then pressing the [ENTER] button. A white rectangle
will appear on your main display, indicating the frame which will
be captured. Select an empty frame memory (empty frames are
indicated in the sub-menu) to store the frame into. Press the
[ENTER] button.
4/ The PLS300 will display a progress status bar on the VFD screen.
Your frame is stored when the menu reappears on the VFD screen.
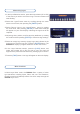
5/ Press the [BACKGROUND FRAME] button, select the frame
number (#1 to #6) you just recorded. Your background frame will
appear on your preview output.
6/ Press the [TAKE] button to display that Frame on the Main display.
* NOTE * : The Background Frame is the deepest Layer and is
behind any other Layer. The Background Frame may be hiden by
the Background Live source.
Working with Frames
Memorizing Frames
Working with logos
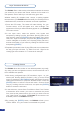
It is possible to store up to 6 logos in the PLS300 non volatile
memory. Logos work in much the same way as frames, and can be
recorded from any of the PLS300’ 10 sources. Logos have many
more attributes than frames. They can be sized, positionned, but
also keyed via color cutout selection or luma key.
30