
User guide
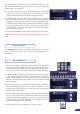


1/ In the Input Selection section, press the source button (#1 to #10)
of the source you wish to record as a logo. The source button will
start blinking.
2/ Select the Logos/Frames menu by scrolling through the menu
with the scroll knob, then pressing the [ENTER] button.
3/ Select Record Logos in the Logos/Frames menu by rotating
the scroll knob, then pressing [ENTER]. A small white rectangle
will appear on your main display, indicating the logo that will be
captured.
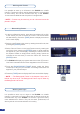
4/ Adjust logo size, position, and ne tune key attributes by rotating
the scroll knob and pressing [ENTER] to memorize logo settings.
5/ Select an empty logo memory (empty logos are indicated in the
sub-menu) to store the logo into. Press the [ENTER] button. The
PLS300 will display a progress status bar on the VFD screen.
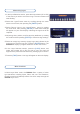
6/ In the Layer Selection section, press the [LOGO] button, and
select logo number (#1 to #6) you wish to use. Your logo will
appear on the preview screen above any existing layer on screen.
7/ Press the [TAKE] button. Your logo will appear on the main display.
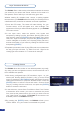
In Multi Layer Mixer mode, the PLS300 offers a variety of mixer
type transitions, including wipes, fades, and cuts. The transitions,
transition times and fade/wipe effects can all be setup through the
PLS300 Layer menu.
Memorizing logos
Mixer functions
31