
User Manual

36
Working with Frames with an Analog Way Controller or RCS
Opening transitions & closing Still Layers (Logos or Frames)
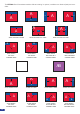
It is possible to store up to 4 frames in the STE200 non volatile memory. Frames are mainly used
as backgrounds in a typical show or event setup, and can be recorded from any of the STE200’s
12 sources and called back at the press of a single button. To use a frame, be sure rst that it is well saved,
then:
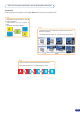
Press Background frame button → Press Frame # button
* NOTE * : Frames may be used only one at a time and can be placed only in the background Frame layer.
When transitioning still layers, depending on how many scalers are in use, the STE200 [TAKE] function will
act in one of 2 different ways when transitioning the Next Preset (Preview) to the Current Preset (Main):
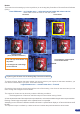
• Take shot: #1
- All still frames make an opening and closing phase.
- All sources of the same layer are completely different between the Current Preset and the Next Preset. The
opening and closing effects of the Layer are set to Cut.
• Take shot: #2
- One of the Layer makes a change of source which be not in Cut.
- The opening and closing phases can be done with different effects.
- The still frame appears and disappears of the layer with the following effects: Cut, Fade, Slide or Wipe.
Memorizing Frames with an Analog Way Controller
The STE200 can memorize up to 4 frames from any resolution (see capturing still Frames).
1. In the Input Selection section, press the source button (#1 to #12) of the source you wish to record as a
frame. Press the [TAKE] button to display that source on the main display.
2. Select Logos/Frames in the menu. Select the output you want to record in capture source menu.
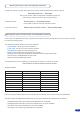
3. Select Record Frames in the Logo/Frames menu. A white rectangle will appear on your main display,
indicating the frame which will be captured. Select an empty frame memory (empty frames are indicated
in the sub-menu) to store the frame into.
4. The STE200 will display a progress status bar on the VFD screen. Your frame is stored when the menu
reappears on the VFD screen.
5. Press the [BACKGROUND FRAME] button, select the frame number (#1 to #4) you just recorded, and
press the [TAKE] button. Your background frame will appear on your program output.
Frame input setup menu with an Analog Way Controller
In the frame input setup menu, you have the possibility to save a frame, and the possibility to erase a stored
frame:
Logos/Frames menu → save Frame → Frame #
Logos/Frames menu → Erase → Frame #