
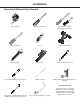
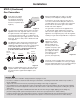
Installation Guide


— 20 —
STEP 5 (Continued)
Liquefied Pet oleum (Propane)
Gas Conversion
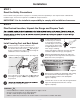
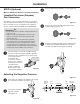
Testing Flame Stability
am
T
est 1:TurnaburnerknobfromHigh( ) to Low
( )quickly.Iftheupperrowofamesgoesoutat
thissetting,increasetheamesizeandtestagain.
Repeat for all burners.
Test 2: With a burner knob set to Low
( )
, open and
closethecabinetdoorundertherange.Iftheame
is extinguished by the air currents created by the
doormovement,increasetheameheightandtest
again. Repeat for all burners.
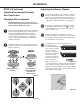
an
After the adjustment is made, turn all burners off.
Igniteeachburnerindividually.Observetheame
with each burner knob in the
High( )
position.
Rotate the knob to the lowest setting and make sure
thattheamesizedecreasesastheknobisrotated
counter-clockwise.
Adjusttheheightoftopburnerames.Whena
burner knob is set to
Low ( )
,theburnerame
shouldbeasteadyblueameapproximately1/4”
(0.64 cm) over burner cap.
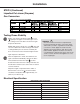
Electrical Specification
WARNING:
Once the conversion has been completed and
has passed testing, fill out the conversion sticker
and include your name, organization and the date
conversion is made. Apply the sticker near the
appliance gas inlet opening to alert others in the
future that this appliance has been converted. If
converting back to Natural Gas, please remove the
sticker so others know that the appliance is set to
use its original gas.
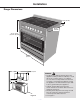
Installation
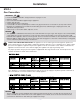
Oven Light
Upper Heating Element
Bottom Heating Element
Grill Heating Element
Convection Heating Element
Ventilator Motor
Cooling Fan
3 x 25 W
2395 W
1960 W
3158 W
2 x 1250 W
2 x 20 W
22.5 W
ELECTRICAL SPECIFICATIONS
SYSTEM WAT TAGE