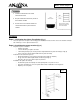
If you need some support or before returning this product, please contact us at: Email : service@asiamsolutions.
Tools Required DRILL & BIT STAR HEAD SCREWDRIVERS FLAT HEAD SCREWDRIVERS PENCIL ALLEN KEYS MEASURING TAPE Ancona Wal l Hardwire Parts for wall-mounted installation Pièces pour installation 6pcs 4pcs Ø8mm 4pcs 4pcs 6pcs 4pcs 4pcs Product Dimensions LEVEL 1pc
Model : Ancona Comfort 7 24” 1. Install in accordance with national and local codes 2. Do not install in the shower, sauna or any wet locations 3. Make sure towel warmer is properly secured to the wall before use. Installation Step 1: Verifying installation parts (fig. 1) - Ensure all parts for mounting installation were supplied with your towel warmer. If any are missing, please contact us. Step 2: Installing wall mount posts (fig.
Model : Ancona Comfort 7 Installation cont’d Step 3: Marking holes for wall mount posts (fig. 3) - Take towel warmer with 4 wall leg mounted, as per step 2 Position against the wall where you will want to install the towel warmer Ensure the hard wire post is turned in at 90 degrees so you can also mark this leg Use light pencil to mark legs on the wall (you may want to erase the pencil mark following installation completion, so make sure you mark lightly) Fig. 3 Fig. 4 Fig.
Model : Ancona Comfort 7 Properly hang towels PROPERLY HANG TOWELS Operation and maintenance instruction • • • After installation, connect the electric power and turn on the switch. The indicator light will show red and the towel warmer will start to work. Turn off the switch when the towel warmer is not in use. The indicator light will turn dark and the towel warmer will stop working. Clean the towel warmer with a soft dry towel. Do not clean with abrasive cleaning powder.
This Towel Warmer is warranted by AMS, in the manner fully set forth below, to be free from defects in material and workmanship and to operate properly in accordance with specifications, provided that it is used under the normal operating conditions and for ordinary home use and service in Canada and the USA. AMS provides a limited warranty for its Products for a period of 1 year from the original date of purchase (the “Warranty Period”), against any defects in workmanship and materials (the “Warranty”).
Pour support technique ou avant de retourner le produit veuillez contacter Courriel : service@asiamsolutions.
Outils nécessaires TOURNEVIS ÉTOILE PERÇEUSE ET MÈCHE TOURNEVIS PLAT CRAYON CLEF HEXAGONALE RUBAN À MESURER Ancona à Raccordement Fixe NIVEAU Pièces pour installation Pièces pour installation 6pcs 4pcs Ø8mm 4pcs 4pcs 6pcs 4pcs 4pcs Dimensions du Product 1pc
Model : Ancona Comfort 7 1. Installer conformément aux codes nationaux et locaux 2. Ne pas installer dans la douche, sauna ou des endroits mouillés 3. Assurez-vous une serviette chaude est correctement fixé à la paroi avant de l'utiliser. 24” Zone douche / bain Ne placez pas le chauffeserviettes à l’intérieur de la zone douche/bain À des fins d’illustrations seulement Installation Étape 1: Vérification des pièces d'installation (fig.
Model : Ancona Comfort 7 Installation suite Étape 3: Marquage des trous pour le montage murale (fig. 3) - Prendre le chauffe-serviette avec les 4 pattes installées selon l’étape 2 Positionner contre le mur où vous installer le chauffe-serviette Assurez-vous que le Poteau de raccordement électrique est tourné à 90° en sorte que vous pouvez aussi le marquer.
Model : Ancona Comfort 7 SUSPENDEZ LES SERVIETTES CORRECTEMENT Instruction de fonctionnement et d’entretien • • • • • Après avoir terminé l’installation, brancher le fil électrique et mettre l’interrupteur à « ON ». L’indicateur s’allumera en rouge et le chauffe-serviettes se mettra en marche. Mettre l’interrupteur à « OFF » lorsque l’appareil n’est pas utilisé. L’indicateur s’assombrira et l’appareil s’éteindra.
Ce produit chauffe-serviette d’Ancona bathroom products est garanti par AMS, entièrement comme énoncé ci-dessous, contre tout défaut de matériel et de fabrication ; par ailleurs, AMS garantit que le produit fonctionnera normalement, conformément aux caractéristiques techniques, pourvu qu’il soit utilisé dans des conditions de fonctionnement et pour une utilisation domiciliaire normale et un service au Canada et aux États-Unis.