
User`s guide


ACQUISITION MODES
SDK SECTION 4
Page 40
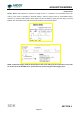
iCam Run Till Abort
When in this mode of operation (Run Till Abort) some systems have an enhanced trigger mode and
enhanced exposure time capability. To check if these enhanced features are available with your system,
use the function
GetCapabilities and check the ulTriggerModes variable for bit 3
(AC_TRIGGERMODE_CONTINUOUS) being set.
The enhanced features include:·
1. Ring of exposures
2. Software Trigger or External trigger
3. Ability to change exposure times during acquisition without aborting the run.
4. External Level Exposure (Bulb) Trigger
These enhanced features are particular useful in situations where you need to acquire data at a fast rate but
not at some predefined rate or when you need to change the exposure time between successive scans. A
good example would be calcium imaging where you need to take 2 images at different wavelengths with
possibly different light levels. With this new mode of operation you would set the experiment up as follows:
1. Configure the camera to acquire an image
SetReadMode, SetImage, SetFrameTransferMode
2. Select Run-till-abort mode SetAcquisitionMode
3. Select Software trigger SetTriggerMode(10)
Confirm with IsTriggerModeAvailable(10)
4. Set exposure time. SetExposureTime or SetRingExposureTimes
5. Move filter to first position
6. Start acquisition. StartAcquisition
7. Send software Trigger. SendSoftwareTrigger
8. Wait for an acquisition event. See SetDriverEvent
9. Move Filter to next position.
10. Change exposure time. See SetExposureTime
11. Retrieve data see GetAcquiredData
12. Go to step 7
In the procedure outlined above we manually changed the exposure during the sequence. However, we
could have used the new “Ring of exposures” feature to set up the two exposure times in advance and let
the camera automatically switch between them as necessary. see SetRingExposureTimes
There is also the ability to detect the end of the exposure and start reconfiguring the experiment for the next