
Installation Guide
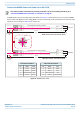
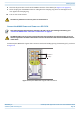
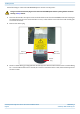

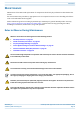


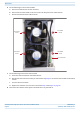
Table Of Contents
- Table of Contents
- Document Overview
- ERA System Overview
- CAP H Overview
- Safely Working with a CAP H
- Installing a CAP H
- Using the Status LED to Determine State of the CAP H
- Maintenance
- Contacting CommScope

CommScope ERA
®
High Power Carrier Access Point Installation Guide M0201AKG_uc
Page 50 © February 2021 CommScope, Inc.
Installing a CAP H
Do the following to connect the CAP H MAINS power connector to DC power.
1 Unscrew the two M3 x 12 captive screws and take off the cover from the DC MAINS connector housing. At
the CAP H housing, the cover is inserted into a recess, so first lift the cover at the front and carefully pull
it out from the recess.
2 Remove the rubber plug.
3 Install a conduit fitting (not shipped with the CAP H) to the 34.52 mm hole. This must be a suitable fitting
for a 1-inch conduit with lock nut. Inside, the clearance around the hole is 5 mm, the maximum space for
the nut is 8 mm.
Danger of electrical hazard by high current. Disconnect MAINS power before opening the DC connector
housing in Step 1 below.
Rubber
plug
M3 x 12
capve screw
M3 x 12
capve screw