
User's Manual


4
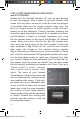
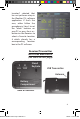
4) Setup the Receiver Unit (Remote Display)
Insert 4xAA batteries into the Receiver, or connect its supplied AC
adapter. The Receiver’s display initializes and reads “Searching for
PC” (press the SEARCH button on the back of the unit if this does not
appear). Attach the easel stand to the Receiver and place it near
the PC so you can see its display while you complete the setup.
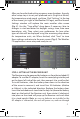
5) Transmit Weather Data from the PC Application
to the Receiver
Click “Send to Receiver” on the Weather FXi program window. The
red LED on the USB Transmitter will glow, then blink while data is
transferred from the PC software to the Receiver. The Receiver will
indicate “PC FOUND-PLS WAIT 5 MINS” When the Transmitter’s light
stops ashing, check to see that the Receiver’s display matches
the weather data shown on the PC screen. Make sure the location
box selected on the Weather FXi application and the “Favorite”
location # on the Receiver display are the same (use the +/- buttons
on the Receiver to change locations). Also be sure the units for
temperature, wind speed, etc. are set the same (click “Settings” on
the software screen, press UNITS on back of the Receiver and change
them using the +/- buttons if necessary-press UNITS again to change
other displayed units). Keep the Weather FXi application running in
the background and keep your PC powered on and connected to
the internet, so the Receiver can provide you with the latest up-to-
date forecast information.
Problems? Questions?
Please read the following detailed Instructions
and Troubleshooting.
INSTALLATION and SETUP INSTRUCTIONS
STEP 1: INSTALL THE SOFTWARE
Before connecting or operating the Transmitter or Receiver
hardware, you should install the Weather FXi software program
on your PC, as they will not function without the software. The
960900C Weather FXi 7-Day 1LIM.indd 4 2/6/09 11:01:42 AM