Antelope Audio Orion Studio Synergy Core USER MANUAL
Contents Before you begin ................................................................................................................. 2 System Requirements .................................................................................................... 4 Product activation ............................................................................................................... 5 Configuring for Windows 10 .......................................................................................
Limited warranty policy .................................................................................................... 68 Safety notes ....................................................................................................................... 73 Technical specifications ...................................................................................................
software plug-ins applied to your audio tracks. At the time of writing, AFX2DAW is only available for Mac users over Thunderbolt™. AFX2DAW for Windows is currently in development. Click here to learn more. After the initial setup, it is also possible to use Orion Studio Synergy Core without a computer connection. In this case, the unit functions as a digital mixer operated from the front panel controls. The last known signal routing configuration from the software Control Panel is applied.
System Requirements Mac: • Apple Mac 2012 or newer with Thunderbolt™ & USB 2.0/3.0/3.1 port • Minimum: Mac OS X 10.12 Sierra. Recommended: Mac OS X 11.02 Big Sur • Available storage space (Minimum 4 GB) • Memory (RAM): 4 GB minimum (8 GB or more recommended) Windows: • PC computer with USB 2.0/3.0/3.
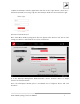
Product activation Please note that the mandatory device activation procedure requires an active Internet connection on your computer. Activating an Antelope Audio device offline is not possible. Once the unit is connected to an AC power source and your computer is switched on: 1. Connect a USB 2.0 Type-B or Thunderbolt™ 3 cable to the corresponding ports on the Orion Studio Synergy Core and your computer.
6. Download and install the Antelope Launcher application for Windows or macOS.
7. Open the Antelope Launcher application and click on the 'Login' button. Enter the email and password you used to login into the Antelope Audio user area and click 'Login'. 8. Click on 'Activate device'. Note: If the Orion Studio Synergy Core does not appear in the 'Devices' tab, click on 'Not seeing your device?' and follow the on-screen instructions. 9. In the Antelope Management Wizard window, choose 'Activate device or assign features' and click 'Continue'. 10.
11. Upon successful activation, the final window will read 'Congratulations! You have successfully activated your device.' Click 'Done' and the activation is finished. Please proceed with the 'Setting up' chapter below to configure the Orion Studio Synergy Core for use with your Windows or macOS computer. Note: The Orion Studio Synergy Core will be listed in the 'My Hardware' page of the Antelope Audio user area with its serial number and activation date.
4. Enter the ‘Enhancements’ tab and disable all enhancements. 5. Enter the ‘Advanced’ tab and choose any of the available “2 channel, 24-bit” modes from the drop-down menu. Click ‘OK’ to close the window. 6. Back in Sound settings, click 'Device Properties' under 'Input'. Then, click 'Additional Device Properties'. Enter the 'Enhancements' tab and disable all enhancements. Click 'OK' to close the window.
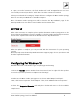
● In some cases, disabling the ‘Exclusive mode’ functionality from the ‘Advanced’ tab in ‘Playback’ Properties might help when running multiple playback applications at the same time. ● Disabling the 32kHz sample rate isn’t mandatory, but it might help in general. Further reading ● Antelope Audio Knowledge Base - Windows 10 Optimization Configuring for macOS Mojave 10.14 (or later) The new security settings introduced in macOS Mojave 10.
Thunderbolt™ 3 ports. One port is occupied by the Orion Studio while the other connects to a computer or another Thunderbolt™ 3 device in the chain. The following rules are in place: 1. The Thunderbolt™ 3 specification places a limit of up to 6 devices per chain. However, the 6-device limit does not apply to the following Apple computers: ● ● ● 2018 MacBook Pro or later 2018 Mac mini 2017 iMac Pro These machines have dual Thunderbolt™ 3 busses and support up to 12 devices per chain. 2.
Antelope Launcher The Antelope Launcher is a streamlined hub for managing and troubleshooting your Antelope Audio products. The application is organized into the following tabs: ‘Devices’ tab All Antelope Audio devices currently connected to your computer are listed in this section. In this example, we have connected the Orion 32+ | Gen 3. However, the application functionality is identical for each Antelope device.
Device Info Click to display the following information (useful for troubleshooting): ● Serial number ● Hardware version ● Firmware version ● Control Panel version ● USB/Thunderbolt ™ driver version ● Software Bundle version Click the information window to close it. Start Control Panel Click to start the device’s Control Panel application. You can also click the device’s picture.
Choose your device and connection type from the drop-down menus, disconnect the device from your computer, and click ‘Next’ to perform a driver re-install. Note: If the issue persists, please contact Antelope Audio Customer Support.
'Plug-ins’ tab This section lets you install, update, and uninstall Antelope Audio software such as native mic emulations and AFX2DAW. By default, the Bundle Version drop-down menus show the most recent software bundle available for each product. Clicking the menu shows the currently installed software bundle version and lets you roll-back to an older build.
'System’ tab Here, you can do the following: ● Update or roll-back the Manager Server, USB and Thunderbolt™ Driver versions. Choose your desired Bundle Version from the drop-down menu, click the check mark, then click the ‘Update’ button. ● Restart the Manager Server and enable/disable remote connections from other computers on your network. ● Install the Antelope Audio Thunderbolt™ driver. Choose a Bundle Version from the drop-down menu, click the check mark, then click the ‘Update’ button.
Click and enter your Antelope Audio username and password, then click ‘Login’. If you don't have an Antelope Audio account, click ‘Register’ and follow the on-screen instructions. Settings button Click to open the Settings window.
● Click ‘View Logs’ to view, save, and send activity logs to Antelope Audio Customer Support. ● Click 'Advanced' to enable or disable automatic updates for each of the following: - Device firmware - USB Driver - Control Panel - Effects - Thunderbolt™ driver Make your selection(s) in the drop-down menu(s) and click 'OK'. ● Click ‘Network’ to view network status and logs.
Front panel explained 1. ON/STANDBY BUTTON Toggles between 'Standby' and 'On' states. Press to power on. Press again to enter Standby. Note: Orion Studio Synergy Core will remain in Standby mode as long as it’s connected to an AC outlet. Unplug the power adapter to completely shut down the unit. 2. FOUR PREAMP/COMBO INPUTS 4 Class-A ultra-linear discrete mic preamps with phantom power on combo XLR inputs. Switchable between Mic/Line/Hi-Z/Direct from the software Control Panel.
● Press to quickly mute or un-mute the outputs. 5. GAIN, HP & A/B BUTTONS ● Press the Gain button to adjust gain for all 12 Preamp/Combo inputs. Turn the rotary control to select the input and press to confirm. Turn to adjust gain (in dB). Press again to confirm. Press the Gain button to exit. ● Press the HP button to cycle through Headphone outputs 1 & 2 and adjust their volume with the rotary control. Press again to exit.
Comm. Interface Allows you to choose between Thunderbolt™ and USB connectivity. Make sure your choice matches your computer connection. Device Info Displays the device’s serial number, hardware revision and firmware version. Useful for troubleshooting with Customer Support. Scr Save Time Choose how long it takes for the screensaver to appear. Scr Save Style Choose the screensaver style. Note: Overlooking the screensaver options may result in screen burn-in if the unit operates for longer durations.
Control menu Holding the Middle Function button enters the Control Menu with the following submenus. Turn the rotary control to navigate. Press the rotary control to enter. Press and hold the rotary control to confirm. Press any of the function buttons to exit. Clock Source Set the clock source.
Presets menu Here, you can load up to five presets with session parameters and device settings. Presets are stored from the software Control Panel. ● Press the Bottom button to enter the Presets Menu. ● Turn the rotary knob to choose Preset 1 – 5. ● Press the rotary control to load the chosen preset. Back to the front panel… 8. HEADPHONE OUTPUTS 1 & 2 Two independent stereo headphone outputs on 1/4-inch TRS jacks. The white lights indicate which output is currently operational. 9.
Rear panel explained 10. DC POWER CONNECTION For use with the Antelope DC power supply unit only! 11. USB HIGH-SPEED USB 2.0 Type-B port. Supports up to 24 I/O audio channels. 12. THUNDERBOLT™ 3 PORT Thunderbolt™ 3 Type-C port. Supports up to 32 I/O audio channels. 13. ADAT I/O 2 inputs and 2 outputs carrying up to 16 I/O audio channels over Toslink fiber optic cables. Note that ADAT runs on S/MUX. Standard ADAT audio limits apply: ● ● ● ● Up to 16 I/O channels of 24-bit, 48kHz audio.
16. S/PDIF I/O 75ohm S/PDIF connectors for use with compatible equipment over coaxial RCA cables. 17. WORD CLOCK OUTPUT (TOP) BNC connector to output Word Clock reference signal using a standard BNC cable. WORD CLOCK INPUT (BOTTOM) BNC connector to accept Word Clock reference signal from another device using a standard BNC cable. 18. EIGHT PREAMP/COMBO INPUTS 8 Class-A mic discrete ultra-linear preamps with phantom power on combo XLR connectors.
Incoming analog audio from preamp/combo inputs A1 and A2 is automatically routed and processed through your external equipment before it’s fed back into the interface to hit the A/D converters. This is accomplished via stereo Y-cables (L/R 1/4-inch TS connectors on one end, stereo 1/4-inch TRS connector on the other end). The L/R 1/4-inch TS connectors hook to your equipment’s input and output connections, the stereo 1/4-inch TRS connector connects to the AD Insert.
Control panel Introduction Welcome to the Orion Studio Synergy Core Control Panel application! Upgraded with a new stylish design, the Control Panel is more than just an alternative to the front panel controls. It provides intuitive and comprehensive access to each aspect of the interface's functionality. This includes settings, inputs, signal routing, audio mixing, effects stacking, monitoring, metering, and presets.
Note: These examples do not convey the "correct" or "only" way of accomplishing the following tasks. They merely illustrate some fundamental logic and offer solutions to the initial stumbling blocks most often encountered by novice users. Monitor incoming audio via headphones Say you want to monitor incoming audio from preamp/combo input 1 via headphones hooked to HP Output 1. Open the Control Panel and enter the ‘Routing tab’.
CHANNEL 1 and choose ‘Hi-Z’. Adjust gain by playing guitar while clicking and dragging the knob. Yes, it’s possible with just one pair of hands. Yes, it’s awkward. Note: Be careful not to run the input into the red with too much gain. Ideally, your strongest picking or strumming should cause the meter to run into the yellow. Now that we’ve gone through all that hard work called ‘gain calibration’, let’s sort out signal routing. Enter the ‘Routing’ tab.
Any audio source listed in the Control Panel ‘Routing’ tab can reach your DAW by dragging its colored number block(s) onto any of the 32 (on Thunderbolt™ connection) COMP REC or (on USB connection) 24 blocks labeled ‘COMP REC’ . The ‘COMP REC’ blocks should appear in your DAW as Inputs 1 – 32 (Thunderbolt™) or Inputs 1 – 24 (USB).
● Click any peak meter to clear it. ● Click and drag the corners of the Control Panel application window to freely resize the interface. Note that black bands will be automatically added to the window to preserve the screen ratio. This is by design and it's not a bug. Main view The Main View is always visible, except in Mixer 1 where it’s replaced by AuraVerb.
External Sync Indicator Sample Rate Settings Button Minimize/Expand/Full Screen Buttons Close Button ● ADAT (2x, 4x) - ADAT input(s) (external) ● S/PDIF - S/PDIF digital audio input (external) ● ‘USB’. In ‘USB’ mode the unit still uses its internal clock. Lights up when the interface is locked to an external clock source. Drop-down menu for choosing a device sample rate between 32.0kHz – 192kHz. Please make sure the device sample rate matches the sample rate in your DAW and operating system settings. .
Input type Link button Gain Knob Input Signal Meter Mic Emulations 48V button Phase button Text Label Orion Studio Synergy Core User Manual Drop-down menu to choose the type of incoming input: ● Mic (microphone) ● Line (line level sources) ● Hi-Z (high-impedance musical instruments) ● Direct (direct input) Links adjacent channels in pairs. Any change made to one channel applies the same exact change to its adjacent channel.
The 48v phantom power button is protected with a tooltip. Press Ctrl + Left Click to enable phantom power on the selected mic preamp. Notes : ● The Hi-Z option is available only on Channels 1 – 4 representing the four front panel preamp/combo inputs labeled A1 – A4. ● The Direct option hard-bypasses the preamp circuitry and takes incoming signal straight to the A/D conversion stage. instrument-level It is to be used on line-level and sources only.
ADAT IN Tab This tab contains controls for 16 ADAT digital audio inputs with editable text labels, gain adjustment knobs, Link buttons and signal strength meters. The available input gain range for all channels is -6dB – 12dB. A switch to the right lets you access ADAT Inputs 13 - 16. Note that ADAT runs on S/MUX. S/PDIF IN Tab This tab contains controls for 2 S/PDIF digital audio inputs with editable text labels, gain adjustment knobs, Link buttons and signal meters.
This tab has a dedicated monitoring control section for the monitor outputs, and controls for the headphone outputs, and the integrated Talkback microphone. Monitor Section ● Click the Dim, Mute, and Mono buttons to downmix, mute, or dim monitor outputs A and B. ● Click and drag the gain knobs to adjust output gain for monitor outputs A and B. ● Click the 'A' and 'B' buttons to activate or deactivate monitor outputs A and B.
a project. Click the ‘Save’ button to save a project. Click the ‘Load’ button to load a project. Project sessions are complete "snapshots" of entire Control Panel configurations. When saving a session, you can choose the exact components you want stored and export Session files for storage and sharing from the Save As button. When loading a session, you can browse your computer for session files and choose which components to load.
LINE OUT TRIM PANNING LAW LINE OUT VOLUME REAMP VOLUME OSCILLATOR 1 LEVEL OSCILLATOR 2 MUTE TB LATENCY MODE DC COUPLED INPUTS BUFFER SIZE (WINDOWS) USB STREAMING MODE BRIGHTNESS ANIMATIONS Monitor B Outputs from the drop-down menu. Choose the signal trim amount (in dBu) for all line outputs from the drop-down menu. Specify Panning Law compensation between 0dB (none) to -4.5dB. Adjust line outputs volume (in dB). Adjust REAMP outputs 1 & 2 volume (in dB).
This tab contains helpful links and information useful when troubleshooting. Contact Tech Support, read the online manual or get access to Antelope Audio’s contacts. It also lets you launch the Antelope Registration Wizard to register/unregister Antelope Audio devices from your account and assign/un-assign purchased effects and functionality between them. The Control Panel, Routing and FX buttons will take you to a webpage, explaining more about each feature.
● Show/hide channels from the input & output sections by pressing the small arrow pointing right. ● Use Ctrl/Command + Click and Shift + Click operating system shortcuts to select multiple blocks. ● An alternative grid-based view is available (‘MATRIX’). Please read the guide. ● Undo/Redo buttons are available. ● Save/Load buttons let you save and load routing setups (as opposed to entire Sessions).
COMP PLAY ADAT IN S/PDIF IN AFX OUT Low Latency Mixer Outputs Orion Studio Synergy Core User Manual interesting possibilities, such as: ● Simultaneous monitoring and recording of dry microphone audio from the ‘PREAMP’ row and mic emulation audio from the ‘EMU MIC’ row on separate audio tracks in your DAW – with and without Synergy Core FX added on top. ● Setting up multiple monitoring mixes, e.g.
Output (Destination) LINE OUT HP1 HP2 MONITOR A MONITOR B REAMP COMP REC Orion Studio Synergy Core User Manual Section: This row represents 16 line outputs over two D-Sub 25-pin connectors (TASCAM Standard Pin Layout). Each D-Sub connector provides 8 mono audio channels. This row represents Headphone output 1 as two mono (L/R) channels. This row represents Headphone output 2 as two mono (L/R) channels. This row represents Monitor A output as two mono (L/R) channels.
ADAT OUT S/PDIF OUT AFX IN MIX CH1 - CH4 This row lets you route up to 16 mono audio channels to the ADAT outputs (2 ports of 8 mono audio channels each). Note thatADAT runs on S/MUX. This row lets you route 2 audio channels to S/PDIF-compliant equipment over coaxial RCA cable. The AFX IN row (‘AFX’ short for 'Antelope FX') lets you route audio into the Synergy Core FX. You can route up to 32 mono channels and stack up to 8 effects on each, independent of sample rate.
Mixer tab The Mixer tab is home to four 32-channel software mixers. Each channel is equipped with Pan, Volume, Solo, and Link controls (on odd-numbered channels), as well as metering. The Master channel has Volume and Mute controls. Note the colored sliders above and below the Master fader. Drag it left and right to scroll horizontally between mixer channels 1 – 32.
AuraVerb AuraVerb provides richness and color using a special new approach and a unique algorithm. The reverb features eight different controls, including a ‘Color’ parameter to create everything between darkened textures to bright, sizzling presence. In addition, there are 24 presets done by award-winning audio engineer & producer Brian Vibberts. The following parameters are available in AuraVerb: Color The Color control lets you adjust the overall tone of the reverb.
Reverb Time controls the length of decay, while Room Size increases the virtual space dimensions. The perceived decay time will also be affected by Richness and Color on sources with a lot of high frequency content. Generally, as the size of the space increases, the Reverb Time will also increase. Setting Reverb Time to 50% gives a natural sounding tail for all room sizes.
channel strip. Apply up to 8 Synergy Core effects per mono audio channel for a total of 32 channel strips and up to 256 FX instances, independent of sample rate. Note: AuraVerb is only available as a Send effect in Mixer 1. FX Basics ● ● Route audio to the ‘AFX IN’ row inputs in the ‘Routing’ tab. Click the audio input (or linked pair) you want to work on: ● ‘Link’ buttons are available for each pair of inputs. Linking two inputs means the exact same FX processing is applied to both.
Orion Studio Synergy Core ships with a library of 51 Synergy Core effects. The following products are included: MIC PREAMPS 1. Gyraf Gyratec IX 2. BA-31 GUITAR AMPS 3. Plexi 59 (UK) 4. Bass SuperTube VR 5. Darkface 65 (US) 6. Top30 (UK) Bright 7. Tweed Deluxe (US) 8. Overange 120 (UK) 9. BurnSphere (DE) Lead 10. Marcus II (US) Lead 11. Modern (US) CH3 12. Rock 75 (UK) 13. Rock 22.10 (UK) GUITAR CABINETS 14. Darkface 65 2x12 15. Top30 2x12 16. Modern 4x12 17. Green 2x12 18. Vintage 4x12 19.
UTILITY EFFECTS 46. PowerFFC (Compressor) 47. Power EX (Expander) 48. Power Gate (Gate) 49. Master De-Esser (De-Esser) 50. Clear Q (Parametric EQ) 51. A-Tuner (Guitar Tuner) More information about each effect can be found here. Additional FX can be purchased from the Antelope Audio website. Meters tab The Meters tab provides up to 32 individual volume meters for each row from the ‘Routing’ tab, selectable from the drop-down menu.
1. Connect your electric guitar or bass to one of the four preamp/combo inputs on the device’s front panel using a standard 1/4-inch TS instrument cable. 2. Open the Control Panel application and head to the ‘PREAMPS’ tab. Click the dropdown menu for the relevant input and choose ‘Hi-Z’. Adjust input gain as you play the instrument, careful not to run the meter into the red. 3.
● Click the ‘LPF’ button to engage a preset low-pass filter (tames harsh or shrillsounding highs). ● Click the ‘BP’ button to bypass the cab sim. 6. If you want to take the guitar sound into your DAW for recording and additional processing, enter the 'Routing' tab and drag the corresponding ‘AFX OUT’ block onto a block labeled ‘COMP REC’. Setup the rest of your routing so you are recording from the ‘COMP REC’ output (e.g.
4. Next, route the inputs you will be recording from into the ‘COMP REC’ channels. Set up DAW tracks to record audio from them - e.g. 'COMP REC' 1 = DAW 'Input 1'. 5. Hit ‘Play’ and you should be hearing your performance through your guitar rig. Shape your tone and start recording when you are ready. Notes: ● Level faders for the REAMP outputs are available in the Control Panel application’s ‘Settings Window’ (the ‘Gear’ symbol). Attenuate the signal if you are overdriving the amplifier’s front end.
Edge & Verge mic emulations Edge & Verge mic emulations are available on preamp/combo inputs 5 – 12. They are intended for use with the Antelope Audio Edge & Verge modeling microphones only. We cannot guarantee optimal (or even usable) results with other microphones. Before attempting to use mic emulations, make sure of the following: 1. The mic emulations for your modeling microphone are installed from the ‘Software’ tab in the Antelope Launcher. Install them if they are not. 2.
Edge Solo Mic Emulations Window The following functionality is available: ● ● ● Choose mic emulations from the drop-down menu on the right. Click and turn the ‘Phase Invert’ dial to flip the microphone’s polarity. Click and drag the ‘48’V switch to activate or turn off phantom power. Recording and Monitoring Edge Solo Edge Solo is a single-membrane condenser microphone.
● ● Route the ‘EMU MIC’ output for Edge Solo (same number as the ‘PREAMP’ input) to your desired outputs to monitor ‘mic emulation’ audio. Route to a ‘COMP REC’ block to record from the corresponding input in your DAW. Route ‘PREAMP’ and ‘EMU MIC’ blocks to your desired outputs and ‘COMP REC’ channels to monitor and record both ‘dry’ and ‘mic emulation’ audio. For more information about Edge Solo, visit its product page.
Edge Duo is a dual-membrane condenser microphone – it has one capsule with dual membranes and connects with an Y-XLR cable (included), one XLR connector for each membrane. The Left (white) connector is the front membrane, the Right (red) is for the rear membrane. The microphone occupies two physical mic preamp inputs, two blocks in the Routing Matrix ‘PREAMP’ row, and two blocks in the ‘EMU MIC’ row. Note: You can use Edge Duo as a single-membrane condenser mic by disconnecting one of the XLR connectors.
Edge Quadro Connecting Edge Quadro Edge Quadro is a quad-membrane condenser microphone – it has two heads, each with dual membranes. The Top head rotates 360-degrees, enabling stereo recording techniques such as M/S, X/Y, Blumlein, and even 3D sound. Therefore, the microphone is bundled with a pair of Y-XLR cables. Their Left (White) connectors are for the front membranes, and their Right (red) connectors are for the rear membranes.
As a quad-membrane rotatable condenser microphone. Connect all XLRs from both heads with the corresponding cables. This is the only option for using the Edge Quadro mic emulations. Edge Quadro Mic Emulations Window Edge Quadro and Edge Duo mic emulations are identical, except for the ability to apply two different mic emulations in unison - one for each head – complete with two different polar patterns that are also swappable.
Verge Verge is a small-diaphragm condenser microphone that’s as simple to use as the Edge Solo. Its dimensions and ability to handle high sound pressure levels make it a better fit for positioning in tight spaces and recording very loud sources, such as drum kits. Verge Mic Emulations Window The following functionality is available: ● ● ● Choose mic emulations from the drop-down menu on the right. Click and turn the ‘Phase Invert’ dial to flip the microphone’s polarity.
● ● Route the ‘EMU MIC’ output for Verge (same number as the ‘PREAMP’ input) to your desired outputs to monitor ‘mic emulation’ audio. Route to a ‘COMP REC’ row to record from the corresponding input in your DAW. Route ‘PREAMP’ and ‘EMU MIC’ blocks to your desired outputs and ‘COMP REC’ inputs to monitor and record both ‘dry’ and ‘mic emulation’ audio. For more information about Verge, visit its product page.
Note: If the e-mail doesn't seem to arrive in your inbox, please check your 'Spam' and 'Junk' folders. 1. Log-in to antelopeaudio.com and head to the 'Claim Features' page to enter your Claim Code. 2. Open Antelope Launcher and click the 'Plug-ins' button. Download and install the latest version of 'AFX2DAW'. 3. Click the 'Devices' button and launch the Orion Studio Synergy Core Control Panel. 4. Click the '?' button, then click 'ADMINISTRATION'.
Note: Closing all open AFX2DAW windows in your DAW session eliminates the use of CPU power to animate peak meter movement, as such is no longer being rendered on or offscreen.
Advanced user tips Use the Orion Studio Synergy Core as a Master clock We recommend taking advantage of the Orion Studio Synergy Core’s highly stable and musical clocking, provided by an oven-controlled crystal oscillator and proprietary 64-bit algorithms (Acoustically Focused Clocking & Jitter Management) to generate timing reference for other digital audio devices in your setup. This is done in a Master - Slave arrangement where the Master device "clocks" the Slave device with its timing reference signal.
Ableton Live can access a total of 12 inputs and 40 outputs for a total of 52 CV-ready channels: ● ● ● ● ● The 12 preamp/combo inputs. Make sure ‘DC COUPLED INPUTS’ is active in the Control Panel’s Settings Window, use the Line or Direct settings and start at unity gain (0dB) for each channel. The 2 ReAmp outputs. The Monitor A L/R and Monitor B L/R outputs. The 16 line outputs on DB-25 breakout cables. The Headphone 1 and Headphone 2 outputs. How to get started 1.
Customer support information Antelope Audio Customer Support can be reached by the following means: Online Visit support.antelopeaudio.com Phone We are there for you around the clock, 21 hours/day, Monday to Friday. North America +1-916-238-1643 01:00 a.m. – 10:00 p.m. (EST) International +44 19 2593 3423 06:00 a.m. – 03:00 a.m. (GMT) Pour le Support francophone: +44 20 3389 8108 09:00 a.m. - 17:30 p.m.
If you can't find a solution on your own, please get in touch with us so we check if you are having a hardware-related issue. If this is the case, we'll guide you through the repair process. If the product should be returned, a RMA number will be issued so we can begin the procedure. What's an RMA number? Issuing a RMA (Return Merchandise Authorization) number is required for any factory service or repair procedure.
Antelope Audio cannot cover any repair costs for product damages due to poor packaging.
Limited warranty policy This is a non-transferable voluntary Limited Product Warranty provided to end-customers who have purchased Antelope Audio-branded hardware product (hereinafter referred to as “Product”) from an authorized Antelope Audio re-seller.
All warranty terms contained hereunder apply also to the B-stock Warranty, unless otherwise specified.
someone authorized by Antelope Audio to do warranty work; any unauthorized repairs will void this warranty(iv)Any improper operation, maintenance or installation, including any use not in accordance with any supplied product instructions; (v)Connection to any improper voltage supply; (vi)Use of consumables or spare parts not supplied by Antelope Audio, except where such restriction is prohibited by applicable local law; (vii)Any other cause which does not relate to a Product defect in materials or workmansh
warranty claims that cannot reprocessed through your original point of purchase should be addressed directly to Antelope Audio. Our customer service contact information can be found on the web or in the documentation included with your Product. Returning Your Product In the event that you need to return your Antelope Audio products for repair or replacement, Antelope Audio will provide you with a Return Merchandise Authorization Number (RMA#) as well as return instructions.
Company information Antelope Audio is the trade name, under which the company Elektrosfera ltd., registered under the legislation of the Republic of Bulgaria with UIN: 131052590, is doing business and is worldwide known. Elsewhere in this document where the trade name Antelope Audio is used shall refer to Elektrosfera ltd., with address of management: Tsarigradsko Shose Blvd., 7th km, Building of BIC IZOT, floor 6, Mladost region, Sofia, Bulgaria.
Safety notes To reduce the risk of electrical shocks, fire, and related hazards: ● Do not remove screws, cover, or cabinet. There are no user serviceable parts inside. Refer servicing to qualified service personnel. ● Do not expose this device to rain, moisture or spillover of liquid of any kind. ● Should any form of liquid or a foreign object enter the device, do not use it. Switch off the device and then unplug it from the power source.
● Your unit should always be un-racked when traveling or in a flight case. ● The device is designed to operate in a temperate environment, with a correct Operating Temperature of 0-50° C, 32-122° F.
Technical specifications Analog Inputs 8 x Mic / Line Inputs / Direct In 4 x Mic / Line / Hi-Z Inputs / Direct In 2 x AD inserts Analog Outputs 2 x Monitor Out on TRS 1/4 Jacks 2 x ReAmp Out on TRS 1/4 Jacks 2 x Line Out (16 channels) on DB-25, +20 dBu max, impedance balanced 2 x stereo Headphone Outputs Note: All analog I/O is DC-coupled and suitable for CV (control voltage) applications.
Clocking System 4th Generation Acoustically Focused Clocking 64-bit DDS Oven-controlled crystal oscillator Clock Stability <+/-0.02 ppm, oven controlled at 64.5ºC/ 148.1ºF Clock Aging < 1 ppm per year Clock Calibration < +/-0.001 ppm Sample Rates (kHz) 32, 44.1, 48, 88.2, 96, 176.