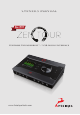
Owner’s Manual ™ Portable Thunderbolt / USB Audio Interface www.AntelopeAudio.
Contents 1. Safety Notes 5 2. Introduction 6 3. Features 7 4. Installation Guide 8 5. Activation Guide 9 6. Front Panel Explained 10 7. Rear Panel Explained 11 8. Touchscreen Explained 12 9. Software Control Panel 17 10. In the Box 11. 24 Troubleshooting 24 12. Technical Specifications 26 13.
1. Safety Notes • To reduce the risk of electrical shocks, fire, and related hazards: • Do not remove screws, cover, or cabinet. There are no user serviceable parts inside. Refer servicing to qualified service personnel. • Do not expose this device to rain, moisture or spillover of liquid of any kind. • Should any form of liquid or a foreign object enter the device, do not use it. Unplug it from the power source.
2. Introduction Thank you for purchasing Zen Tour from Antelope Audio. Producing your own music has become the contemporary equivalent of writing poetry. Current technologies have made sound recording as easy as grabbing a pen and pouring your feelings on paper. However, unlike the solitude writing requires, music creation is usually a shared experience. A simple two or four-channel audio interface is no longer enough.
3. Features • 1x Custom USB 2.0 Type-B Connector • 1x Thunderbolt™ Gen1 • 4x Mic / Line In on TRS / XLR combo • 4x Hi-Z / Line In on TRS • 8x Line Out on DB25 (8 channels) • 2x ReAmp Outs on TRS • 2x HP Outs on TRS • 2x Monitor Line Out on 1/4 TRS stereo jacks (L/R CHs) for pair of stereo monitors • 1x S/PDIF I/O on 2x RCA • 2x ADAT I/O on Fiber optic • 1x TALKBACK Mic • 1x 3.
4. Installation Guide Connect the DC power source on the rear panel. Windows: 1. Connect the USB cable to the USB port on your computer. 2. Download the Zen Tour launcher from www.antelopeaudio.com/products/zen-tour/. 3. Start the application, the launcher will automatically download the Software Control Panel. 4. Open your Control Panel by double clicking and follow the device activation procedure. 5. Connect your inputs and outputs of choice to Zen Tour. 6.
5. Activation Guide It is essential to activate Zen Tour before using it. Once the DC power source is plugged and the device is connected to your computer via USB or Thunderbolt™ follow the steps below: 1. Navigate to www.antelopeaudio.com/products/zen-tour/. 2. Download the Zen Tour Launcher. 3. Start the application (If you are on a PC install the launcher). The launcher will automatically download the Software Control Panel. 4. You will be greeted by an Activation Screen.
6. Front Panel Explained 5 4 6 8 9 7 1 10 3 2 1. 4 Line / Instruments (Hi-Z) Inputs Inputs suitable for connecting instruments such as bass or guitar to Zen Tour. 2. 2 Headphone Outputs Two independently assignable headphone outputs, selectable and controllable via the main volume control knob. Which headphone output is currently controlled will be indicated on the touchscreen display. 3. 2 Reamp Outputs These outputs are direct outputs that should be used with guitar amplifiers for re-amping.
7. Rear Panel Explained 13 16 15 17 14 12 11 11. 4 Mic Preamp / Line Inputs 4 Class-A mic preamps with phantom power over the Combo Inputs on the rear panel of Zen Tour. 12. Monitor Outputs Assignable balanced stereo output (left channel at the top and right channel below). Only one active at a time. 13. S/PDIF Input and Output 75 Ω S/PDIF inputs and outputs for use with compatible equipment. 14. Line Output D-SUB 25 D-SUB 25 connector with 8 outs (following TASCAM standard). 15. USB 2.
7. Touchscreen Explained Zen Tour features a touchscreen on its front panel. From it you can access all functions of the device. The touchscreen features the following options: MENU Here you can adjust different Zen Tour parameters: Brightness Adjusts the touchscreen brightness. Comm Interface Selects which is the current type of connection between the computer and Zen Tour, USB or Thunderbolt™.
Power Powers off the device. When in standby mode the Zen Tour touchscreen will be switched off. Tap it to see the power icon then tap it again to switch the device on. ACTIVATE This screen indicates you have to activate your device. MAIN DISPLAY Tap here to get the listed meter sources and scroll by pressing and dragging to find the source you need displayed.
MON Enter the Monitor menu to adjust the Monitor volume level from the main Volume Knob. Tap speaker icon to mute (or press the Zen Tour knob). LINE Enter the Line Out menu to adjust the output volume level. Tap speaker icon to mute (or press the Zen Tour knob). HEADPHONES Cycle through the two Headphone outputs and set their volume levels. Tap speaker icon to mute (or press the Zen Tour knob).
SAMPLE RATE Here you select the Sample Rate for Zen Tour. Tap the SR button to see the available Sample Rates. The current one will be displayed on the top of the touchscreen. TALKBACK Press and hold the Talkback button on the Zen Tour Front Panel to adjust Talkback volume level and select / mute Talkback on Headphone Outs 1 & 2 and on Monitors.
METERS Select a signal type to be displayed in Meters mode. Presets 1–5 The Global Presets save all device settings to one of the five available Preset slots. By pressing buttons P1 to P5 you switch between all customizable presets.
1 2 3 4 5 6 12 11 22 21 20 17 7 13 14 8 15 9 10 16 23 18 24 19 8. Software Control Panel 8.1. Main View and Routing Tab The universal panel view is constantly located on the upper half of the control panel for quick access to the most important features. Main view: 1. 2. 3. 4. 5. 6. 7. 8. 9. 10. 11. 12. 13. 14. 15. 16. 17. 18.
19. 20. 21. 22. 23. 24. 25. ‘To’ Section (from Routing tab) Mixer Section Effects Section Meters Section Presets Undo/Redo Routing; Save/Load (from Routing tab) Hi-Z and Line (Front inputs on TRS) modes selectable via dropdown menu (please ensure your selection from the dropdown menu matches the type of signal being inputted) 27 26 26.
2 3 4 1 6 11 7 5 8 10 9 8.2. Mixer Tab 1. Fader (double-click to reset to zero) 2. Fader Level indication 3. Solo 4. Mute 5. Stereo Link 6. Pan (double-click to reset to zero) 7. Send (double-click to reset to zero) 8. Master Mix Fader (double-click to reset to zero) 9. Master Mix Level indication 10. Master Mix Mute 11.
The low latency mixers provide all basic functions of a real mixer such as: Solo, Mute, Pan, Stereo Link, Volume Level fader control and a Master Fader, so you can easily make a stereo mix plus an Auxiliary send in order to use AuraVerb. AuraVerb is a powerful and flexible algorithmic reverb effect powered by Zen Tour’s Custom FPGA-based DSP. It provides near zero-latency effect monitoring without taxing your CPU. AuraVerb can also be used as a hardware effect from your DAW.
• Early Reflection Gain This is the linear gain value for all early reflections. These reflections are perceptually grouped with the direct sound when set at lower levels and can nicely thicken a track when increased. • Late Reflection Delay Among other things, AuraVerb calculates reflected energy from the side walls and ceiling of the virtual space.
EQ 1. 2. 3. 4. 5. 6. 7. 8. Frequency Adjust Dials (double-click to return to default) Gain Adjust Dials (double-click to return to default) Q Factor Adjust Dials (double-click to return to default) Frequency Band Analysis Screen Save / Load / Bypass EQ Output Metering Selectable High Pass or High Shelf Filter (in green) Bandpass / Notch Filter (in blue / red) Compressor 9. 10. 11. 12. 13. 14. 15. 16. 17. 18. 19.
matrix sections, whose signal levels you want to visualize. The peak meters shown in the Meters Tab will appear on the Zen Tour display as well. 1 2 3 12 4 5 6 8&9 7 6 10 &11 14 15 13 16 17 8.5. Settings Tab Click on the gear icon to open the “Settings” window. 1. 2. 3. 4. 5. 6. 7. 8&9. 10&11. 12. 13. 14. 15. 16. 17.
9. In the Box • Zen Tour – Portable Thunderbolt™ and USB AD/DA Interface • Wall Wart Power Supply Unit • Cleaning Cloth • 1 USB cable • Owner’s Manual • Warranty Card 10. Troubleshooting Start up and Sound • Are you running the latest control panel and firmware? If not, please update your control panel and firmware. Note: Before performing a firmware update disconnect or switch of all peripherals and ensure only the Power Supply and USB / Thunderbolt™ connections are still active.
• Try a different cable and another source if available. • Check the routing on the control panel. Have you routed the signal path correctly? • If you have routed signals to the routing mixer, check their corresponding fader is up. • Check the relevant peak meters of the control panel by selecting them in the drop down menu to see if the relevant signal is being received or is being outputted. • Check if the Output / Input you’re having issues with is not muted.
11.Technical Specifications Inputs Analog 4 x Hi-Z / Line inputs on TRS ¼ jacks on front 4 x Mic / Line inputs on XLR & TRS ¼ combo on rear Digital 2 x ADAT (up to 16CH) 1 x S/PDIF Outputs Analog 2 x Main Monitor outs on TRS ¼ jacks 2 x Stereo Headphone outs on TRS 2 x ReAmp outs on TRS 1 x Line out on D-SUB 25, +20dBu, 56 Ohms Digital 2 x ADAT (up to 16CH) on optical fibre 1 x S/PDIF on RCA USB I/O: 1 x USB 2.
Clock Specs Clocking System 4th Generation Acoustically Focused Clocking 64-bit DDS Oven Controlled Crystal Oscillator Clocking Stability <+/-0.02 ppm, oven controlled at 64.5ºC/ 148.1ºF Clocking Aging < 1 ppm per year Clocking Calibration <+/-0.001 ppm Sample rates (kHz) 32, 44.1, 48, 88.2, 96, 176.4, 192 Operating temperature 0-50ºC/32-122ºF Power Supply DC Universal Input 18V Power Consumption 25 Watts Max Dimensions & Weight Width 255 mm / 10” Height 59 mm / 2.3” Depth 167 mm / 6.
12. Antelope Audio Support Resources Antelope Audio offers a range of services and support resources for your Antelope hardware,firmware and software control panels. FAQ Several categories of frequently asked questions are available on the website: http://www.antelopeaudio.com/en/support Telephone Support Phone line is for general inquiries and technical support: +1 734 418 8661 Hours of Operation: 7:00 a.m. – 3:00 p.m. (EST) Help Desk A ticketing system ensures a 24-hour response time: www.antelopeaudio.
Notes ��������������������������������������������������������������������������������������������������������������������������������������������������� ��������������������������������������������������������������������������������������������������������������������������������������������������� ��������������������������������������������������������������������������������������������������������������������������������������������������� ����������������������������������������������������������
Owner’s Manual ™ Portable Thunderbolt / USB Audio Interface Version 2.0 / 09.30.