
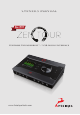
User Manual


8
4. Installation Guide
Connect the DC power source on the rear panel.
Windows:
1. Connect the USB cable to the USB port on your computer.
2. Download the Zen Tour launcher from www.antelopeaudio.com/products/zen-tour/.
3. Start the application, the launcher will automatically download
the Software Control Panel.
4. Open your Control Panel by double clicking and follow the device activation procedure.
5. Connect your inputs and outputs of choice to Zen Tour.
6. Open your preferred DAW and ensure the device is selected as an input and output.
Note Make sure your Zen Tour has the most recent firmware installed. Check this by
selecting the Options panel and clicking on the Firmware Update button.
Mac OS:
1. Connect the Thunderbolt™ (TB) or the USB cable to the TB or USB port on your
computer.
2. Download the Zen Tour launcher from www.antelopeaudio.com/products/zen-tour/.
3. Start the application, the launcher will automatically download the Software Control
Panel.
4. Open your Control Panel by double clicking and follow the device activation procedure.
5. Connect your inputs and outputs of choice to Zen Tour.
6. Open your preferred DAW and ensure the device is selected as an input and output.
Note Make sure your Zen Tour has the most recent firmware installed. Check this by
selecting the Options panel and clicking on the Firmware Update button.
See picture: