
Instructions


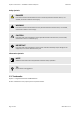
Table Of Contents
- Anybus® Communicator™ - PROFIBUS to Modbus RTU/Serial
- Table of Contents
- 1. Preface
- 2. Safety
- 3. Preparation
- 4. About Anybus Communicator
- 5. Installation
- 6. Configuration Quick Guide
- 7. Communicator Configuration
- 7.1. Connect the Communicator
- 7.2. Access the Built-In Web Interface From HMS IPconfig
- 7.3. Access the Built-In Web Interface From a Web Browser
- 7.4. Communicator Built-In Web Interface Overview
- 7.5. General Subnetwork Settings
- 7.6. About Transaction Templates
- 7.7. Build Transaction Template
- 7.8. Nodes and Transactions
- 7.9. High Level Network Settings
- 7.10. I/O Data Map
- 7.11. Apply Configuration
- 7.12. To Use an Existing Configuration
- 7.13. To Use an Communicator Classic Configuration
- 8. PLC Configuration
- 9. Verify Operation
- 10. Use Cases
- 11. Maintenance
- 12. Troubleshooting
- 13. Technical Data
- 14. Reference Guides

2. Safety
2.1. Intended Use
The intended use of this equipment is as a communicaon interface and gateway.
The equipment receives and transmits data on various physical layers and connecon types.
If this equipment is used in a manner not specied by the manufacturer, the protecon provided by the
equipment may be impaired.
2.2. General Safety
CAUTION
Ensure that the power supply is turned o before connecng it to the equipment.
CAUTION
This equipment contains parts that can be damaged by electrostac discharge (ESD). Use ESD
prevenon measures to avoid damage.
CAUTION
To avoid system damage, the equipment should be connected to ground.
IMPORTANT
Using the wrong type of power supply can damage the equipment. Ensure that the power supply is
connected properly and of the recommended type.
Safety Anybus
®
Communicator
™
- PROFIBUS to Modbus RTU/Serial
SCM-1202-177 1.2 Page 3 of 134