
User Guide

Hardware Installation
2-6
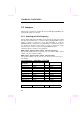
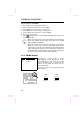
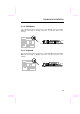
The procedure to clear CMOS:
1. Turn off the system and unplug the AC power.
2. Remove ATX power cable from connector PWR2.
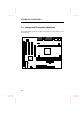
3. Locate JP14 and short pins 2-3 for a few seconds.
4. Return JP14 to its normal setting by shorting pins 1-2.
5. Connect ATX power cable back to connector PWR2.
6. Turn on the system power.
7. Press during bootup to enter the BIOS Setup Utility and specify a new
password, if needed.
Tip: If your system hangs or fails to boot because of over-clocking,
please clear CMOS and the system will go back to the default
setting (233MHz or 350MHz).
Tip: If your system hangs or fails to boot because of over-clocking,
simply use <Home> key to restore to the default setting. By this
smart design, it would be more convenient to clear CPU frequency
setting. For using this function, you just need to press <Home> key
first and then press Power button at the same time. Note that do
not release <Home> key until POST screen appearing.
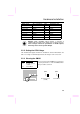
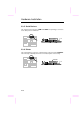
2.2.4 KB/MS Wakeup
JP28
1-2
2-3
KB/MS Wakeup
Disabled
Enabled
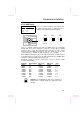
This jumper is used to enable or disable
Keyboard/Mouse Power ON function. If you
select Enabled, you may decide the wakeup
mode from BIOS Setup. To implement this
function, the 5V Stand By current must be
greater than 800mA.
Note that only PS/2 mouse supports Wake On
Mouse function.
JP28
1 2 3
Disabled
JP28
1 2 3
Enabled