AOR Searchlight User’s Manual © Simon Collings, G4SGI 1994~1999 Software and Manual Distributed by: AOR (UK) Ltd., 4E East Mill, Bridgefoot, Belper, Derbys DE56 2UA England Tel: 01773 880788 Int’l: +44 1773 880788 Fax: 01773 880780 Int’l: +44 1773 880780 e-mail: info@aor.co.uk www.demon.co.
CONTENTS CONTENTS INTRODUCTION ........................................................................................................... 1 ACKNOWLEDGEMENT ............................................................................................... 3 MINIMUM SYSTEM REQUIREMENTS ..................................................................... 4 INSTALLING THE PROGRAM ................................................................................... 5 GETTING STARTED ...............................
CONTENTS SCANNING MENU OPTIONS .......................................................................................... Programmable Band Scan ...................................................................................... New PBS ................................................................................................................ x10 Magnify .................................................................................................... Setting the dwell time .......................
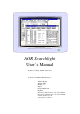
INTRODUCTION INTRODUCTION Welcome to AOR Searchlight, the control program for Microsoft® WindowsTM and AOR communications receivers. This program uses an RS-232 serial port to tune an AOR AR-3000A or AR-3000 communications receiver and has these (and many more) exciting features: F Microsoft® WindowsTM program.
INTRODUCTION F Single Frequency Watch. This includes graphical analysis showing full statistics compiled as the SFW is in progress and includes text based reports and a log file. F Spectrum analysis. A fully featured spectrum analyser display is provided which allows you to review signals using cursor operated tuning. You can have the results of several spectrum analyses available on-screen at once.
ACKNOWLEDGEMENT ACKNOWLEDGEMENT AOR Searchlight has been developed over a year using the Borland Turbo Pascal for WindowsTM development system. The result is a genuine WindowsTM program, not a DOS program running inside a window. AOR Searchlight is a substantial program offering a comprehensive range of facilities that may take a while to fully explore (there are nearly 17000 lines of source code in the main program).
MINIMUM SYSTEM REQUIREMENTS MINIMUM SYSTEM REQUIREMENTS F 25 MHz 80386 IBM PC compatible or above F 4 Mbytes of memory or more F Microsoft® mouse F at least two RS-232 serial ports (one for mouse) F 2 Mbytes of free disk space F Microsoft® WindowsTM 3.1 (or higher) or Microsoft® Windows for Workgroups 3.1 (or higher) running in enhanced mode F Printer (optional) F Optional WindowsTM multimedia compatible sound card (eg Creative Labs Sound BlasterTM 2.0 or compatible).
INSTALLING THE PROGRAM INSTALLING THE PROGRAM In these instructions, it is assumed that you are familiar with the way WindowsTM works, so there are few details included about using WindowsTM itself. If you need more information, you should consult your WindowsTM User’s Guide or run the WindowsTM tutorial that is available from program manager (under the Help|Windows Tutorial menu option). You should install and use AOR Searchlight using Microsoft® WindowsTM in enhanced mode.
INSTALLING THE PROGRAM Two push buttons are provided inside the window. You can abort the installation by clicking on the “Quit” push button (or by pressing ). Alternatively, to decompress and copy the program files onto your hard disk, click on the “Install...” push button (or press ). If you want to obtain help on the installation program, you can click on the Help menu option in the top right hand corner of the window.
INSTALLING THE PROGRAM NOTE: The installation program does not alter your WindowsTM “.INI” initial settings files; it uses its own. The file is called “SEARCH.INI” and is located in the AOR Searchlight directory. The installation program creates a new group in program manager and adds the AOR Searchlight icons to it.
INSTALLING THE PROGRAM At the end of the installation process the new program group will be displayed in program manager. You can re-size the AOR Searchlight group window or minimise it if you wish. When the installation procedure is finished you are ready to connect your radio and start using the software.
GETTING STARTED GETTING STARTED RS-232 connection You must connect your radio to an RS-232 port of your computer before you can operate the software. A screened cable with 5 conductors is required for connecting the PC to the receiver. If you have previously been using the DOS program AOR Spectrum Coordinator (AORSC), you can use the same cable. If screened cable is not used then digital noise may radiate from the conductors of the cable and cause interference to reception.
GETTING STARTED PC 9w Female 3 2 7 8 5 Radio 25w Male ————————————— ————————————— ————————————— ————————————— ————————————— 2 3 4 5 7 GND / SHIELD You should match the pin numbers for the PC 25w D-Type (female) in the table to those for your 9-way connector and make the cable accordingly. To check operation of the RS-232 connection between the radio and your PC, you can use WindowsTM Terminal to type in commands manually (AR-3000A owners only). Please read section 6.
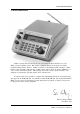
GETTING STARTED Remote switch Now open the AOR Searchlight group using program manager and double-click on the main program icon (which looks like an AOR radio). The program will then launch and display a copyright notice before opening it’s main window if all is well. The software should tune the radio to 145.5 MHz FMN as default. If your radio does not tune to 145.5 MHz, it may be because you have not configured AOR Searchlight for the right serial port or baud rate.
GETTING STARTED AOR Searchlight will store these settings, for use next time the program is run, in the “SEARCH.INI” initial setting file which is maintained automatically by the program. Correct operation of the software is only guaranteed at 4800 baud The Front Panel Window Once you have the program running and properly configured, you can check that your radio and computer are working correctly using the front panel window.
GETTING STARTED If the front panel window is focused (highlighted) it will also respond to keyboard commands. Example: To tune to 90.8 MHz Press <9>, <0>, <.>, <8>, . You must select the mode using your mouse. Front Panel functions Step Tuning You can tune up or down in steps using the UP and DN push buttons. The current step size is shown in the box in the bottom left hand corner of the window. Tuning Step Size To alter the tuning step size, click on the + and - push buttons.
GETTING STARTED Enter an offset (in kHz) and click on OK. If the offset is negative, VFO B is offset below VFO A. If positive, VFO B is above VFO A. NOTE: The VFO offset function is intended to be used in association with VFO tracking. VFO Tracking VFO tracking allows you to link the two VFOs together so that the offset between them kept is constant. Click on the TRACKING check box so that there is a cross in the box to switch on VFO tracking.
GETTING STARTED The topics that are available from the Help menu are shown below: The index contains a complete list of all the main help topics that are available. You can obtain help on any of the topics listed by selecting them with the mouse. Alternatively, you can list and search for information on topics using the search facility of WindowsTM Help (by clicking on the “Search” push button once WindowsTM Help is running).
GETTING STARTED Example: To find help on the Memory|Close Bank option First select the Memory menu, then press and to highlight the Close bank option of the Memory menu... ...now press to obtain help on Memory|Close bank.
MEMORY MENU OPTIONS MEMORY MENU OPTIONS Memory data is organised by AOR Searchlight into banks of 400 channels. Each bank is stored on disk in a file and is displayed on-screen inside a window. Up to ten banks can be loaded into the program at once; there is no limit to the number of memory bank files that can be saved on disk (disk space permitting).
MEMORY MENU OPTIONS New Bank To create a new (blank) memory bank, click on the New Bank menu option. You will see a memory bank window appear on screen inside the main AOR Searchlight window. The whole program window will look similar to: The lines inside the window indicate blank data. When you start using the memory bank, memory channel data will be listed neatly inside the memory window in the form of a table.
MEMORY MENU OPTIONS Store... Recall Edit... Mark Sort... Clear Add the current VFO to the highlighted channel Transfer the highlighted memory channel to the VFO Edit the highlighted memory channel data Toggle a * which indicates if the channel is included in a memory scan Sort the entire list of memory data Blank the highlighted memory channel Memory Window functions Storing a memory channel First select a memory channel inside the memory bank window. Now click on the Store...
MEMORY MENU OPTIONS NOTE: The Mark check box is checked by default. If you do not want to include the channel in memory scans, you should uncheck the box (as shown above). Recalling a memory channel Select a memory channel (as above) and click on the Recall push button to transfer the memory data to the VFO. An alternative way to recall a memory channel is to double-click on the line where it is listed in the memory bank window.
MEMORY MENU OPTIONS NOTE: Memory channels are marked by default when storing, uploading or are added by a programmable band scan. Sorting the memory bank Use this push button to sort the memory channels listed in the memory bank window according to the frequency in VFO A, the mode in VFO A or the mark indicator. The following dialog is opened when you click on the Sort... push button: Select the type of sort you want using the radio buttons and click on the OK push button.
MEMORY MENU OPTIONS Save Bank As Use this memory menu option to save the focused (highlighted) memory bank under a different name to that displayed on it’s title bar. NOTE: The file extension for the memory bank file must be “.MEM”! A WindowsTM standard dialog is used to let you type in the new filename. You can type in the name of the file you want in the File Name field of the dialog. Close Bank This option closes the focused (highlighted) memory bank window.
MEMORY MENU OPTIONS A WindowsTM standard dialog is used to control printing: Upload Bank from RX This option creates a new (blank) memory bank and uploads memory channel data from your radio into it. A simple progress dialog shows you how much of the upload has taken place so far. The upload may take several minutes.
MEMORY MENU OPTIONS THE TIMING OF RS-232 COMMANDS USED FOR UPLOADING DATA FROM THE RADIO IS CRITICAL. IT IS VITAL THAT NO OTHER PROGRAMS YOU MAY BE RUNNING INTERFERE WITH THE UPLOAD OR DATA MAY BE LOST. THE BEST WAY TO AVOID OTHER PROGRAMS INTERFERING WITH THE UPLOAD IS TO STOP THEM AND RUN AOR SEARCHLIGHT IN THE FOREGROUND. Download Bank to RX Existing data in the radio will be overwritten by this option! This option downloads memory data (VFO A only) from the focused memory bank to your radio.
MEMORY MENU OPTIONS Copy Bank from Clipboard This memory menu option allows you to copy data back from WindowsTM Clipboard into the currently focused memory bank. This facility complements copying to Clipboard. Any occupied memory channels in the focused memory bank will be overwritten if they are also in the Clipboard data. Create a new (blank) memory bank using the Memory|New menu option to copy memory bank data without overwriting.
SETUP MENU OPTIONS SETUP MENU OPTIONS The Setup menu options allow you to configure AOR Searchlight so that it runs correctly with your hardware. The four options that are provided are: Communications The communications options relate to the RS-232 serial port settings for your computer and have already been described in the GETTING STARTED section. Delays When RS-232 communications take place with your radio, they must be slowed down so that the radio can process commands properly.
SETUP MENU OPTIONS S-meter readings This is the delay between S-meter commands being sent to the radio and the program attempting to read the signal level. It gives the radio time to obtain the S-meter reading. Downloading This is the period of time between download commands and gives the radio time to add previous data to local memory before the next arrives. Uploading This is the period of time between upload commands and allows the radio time to prepare memory data for output to the computer.
SETUP MENU OPTIONS Sound Recording Further details of the requirements for sound recording are given in the SOUND RECORDING section. NOTE: This setup menu option is greyed out if you do not have a sound card and suitable MCI driver installed on your system. If you have a WindowsTM compatible sound card fitted, you can use the sound recording facilities of AOR Searchlight. Many functions of the program let you record up to 60 seconds of audio and make automatic entries in a sound log.
SETUP MENU OPTIONS Not all WindowsTM compatible cards support 8 kHz sampling at 8-bits since this is not a standard WindowsTM format, but it is included with AOR Searchlight as an option. If you want to use this compact sound recording format, use the Setup|Sample Rate Select option to open the following dialog: Select the format you want using the radio buttons provided in the dialog. The default for your card is normally 11.025 kHz or 22.050 kHz depending on it’s specification.
SCANNING MENU OPTIONS SCANNING MENU OPTIONS A number of scanning functions are provided by the Scanning menu. The options are shown below: Programmable Band Scan A programmable band scan lets you scan the radio between two specific frequency limits. New active frequencies are added to a memory bank as they are found. You can even add recordings of the signals into the sound log. New PBS The New PBS option allows you to setup a programmable band scan from scratch.
SCANNING MENU OPTIONS Once the PBS has started, a programmable band scan window and a new (blank) memory bank window are opened. Your main AOR Searchlight window should look similar to: As new frequencies are found, they are added to the memory bank. If you selected sound recording, the transmissions are also added to the sound log. A histogram display is provided in the centre of the window. This shows graphically what level of activity has been detected on each frequency found.
SCANNING MENU OPTIONS If you stop the PBS, the programmable band scan window stays open and you can then use the cursor to review channels. The radio is also tuned when you select each channel using the cursor. Setting the dwell time The dwell time is the period of time spent on a frequency when activity is present. Scanning resumes again after the dwell time has expired. When you click on the Dwell...
SCANNING MENU OPTIONS Open PBS This Scanning option lets you open a programmable band scan parameters file and append new frequencies to a memory bank. The following dialog is opened when you select Scanning|Open PBS: The frequency limits are copied automatically into the dialog, but you must choose a memory bank to add new frequencies to from the list box at the bottom. You can also setup sound recording using the Sound... push button.
SCANNING MENU OPTIONS Only memory channels marked with a * in each bank are included in the memory scan. Two other push buttons are provided in the memory scan setup dialog: Clear All Clear all the entries in the Selected box Transfer all the entries in the Available box You can setup sound recording using the Sound... push button. Click on the OK push button to open the memory scan window and begin scanning.
SCANNING MENU OPTIONS Spectrum Analysis You can obtain a graphical display of signals in a portion of the radio spectrum using this Scanning menu option. A spectrum analysis window is opened when you select Scanning|Spectrum Analysis. Click on the Setup push button to obtain the following dialog: Type in the centre frequency you require, select a step size and mode, then click on OK to start scanning to produce a spectrum display.
SCANNING MENU OPTIONS The signal level detected at each step is displayed in the form of a graph as the radio scans, The range of frequencies is determined by the centre frequency and step size you chose. You can click on the display to measure frequencies precisely while scanning is in progress, or you can tune the radio using the cursor once you have stopped scanning. The following push buttons are provided: Abort Exit Setup... Print... Pause...
TOOLS MENU OPTIONS TOOLS MENU OPTIONS The Tools menu provides two radio monitoring tools and facilities for managing the sound log. The menu options are: Offset Simplex Reconstruction This is a special tool for intelligently tuning the radio between two simplex frequencies that carry different halves of the same conversation. Offset simplex reconstruction does not work with full duplex transmissions.
TOOLS MENU OPTIONS In the above picture, a pair of frequencies has been chosen and OSR started. The dialog in the middle of the window is open while OSR is operating. The four push buttons provide the following functions: Stop Dwell... Sound... Help...
TOOLS MENU OPTIONS You can enter the period (in minutes) between reports that contain simple analyses of channel activity. You can also direct reports to a file for examination off-line and synchronise reports so that they occur at specific times. Do not include a file extension if you want report files to be produced. AOR Searchlight creates three files each with a different extension. Report synchronisation Reports are synchronised to specific times when the Synchronise check box has a cross in it.
TOOLS MENU OPTIONS If you entered a file name into the SFW setup dialog, text reports are produced at regular intervals so that you can review a range of statistics over a long period of time. The file containing these reports has a “.TXT” extension. There is also a text format file containing a list of the transmissions observed; this has a “.LOG” extension. The report file name you enter is used to produce all three data file names that are needed for a single frequency watch.
TOOLS MENU OPTIONS The previous picture shows a typical Graphical Analysis obtained using a Single Frequency Watch on 144.650 MHz. The following four push buttons are located in the Graphical Analysis window: Open Print... More... Next...
PASS LIST MENU OPTIONS PASS LIST MENU OPTIONS The pass list is a list of 100 frequencies that are excluded from AOR Searchlight scans. You can maintain the list as you use the program, or you may use the 100 pass list channels that are stored in your radio (AR-3000A only) by uploading them into the software. The Pass List menu offers two options: Save Use this menu option to save the complete pass list to disk. Upload Uploading is only available with the AR-3000A.
PASS LIST MENU OPTIONS NOTE: Most of these push buttons only operate on selected pass list entries. To select an entry, just click on it. Add Add the current active VFO (A or B) to the pass list Del Delete the selected pass list frequency from the list Sort Sort the pass list into frequency order Edit... Edit the highlighted pass list frequency Adding a frequency You can do this from within scans or directly by clicking on the Add push button.
PASS LIST MENU OPTIONS The pass list frequency you highlighted is copied automatically into the dialog so that you can edit it. Click on OK to finish modifying the entry. If you want to check frequencies in the pass list, you can tune your radio by double-clicking on lines listed in the pass list window’s list box.
WINDOW MENU OPTIONS WINDOWS MENU OPTIONS This menu option lets you arrange the windows you have open within AOR Searchlight and helps you tidy up icons. The Windows menu options vary because a list of the windows you have open is included: In the picture above, there are four windows open: front panel, pass list, sound log and a memory bank. The ü mark indicates which window is currently focused (highlighted).
SOUND RECORDING SOUND RECORDING Sound recording and playback is provided by WindowsTM using a Media Control Interface (MCI) driver for a sound card (eg Creative Labs Sound BlasterTM 2.0). AOR Searchlight uses MCI to provide the sound log facility, so you must have a suitable sound card (recognised by WindowsTM) installed for it to work.
SOUND RECORDING There is an option in the Setup menu or AOR Searchlight to use 8 kHz sampling with 8-bit resolution. This is a format that is not supported by all sound cards, but produces the smallest files (and the lowest quality audio). You should use this if you are short of disk space. Not all sound cards support 8 kHz sampling. Please check with the supplier of your sound card if you are considering using this option when purchasing a card.
SOUND RECORDING The push buttons inside the sound log window have the following functions: P_all Play Stop Pause Skip Rec Play all the entries in the sound log from the highlighted one onwards Play just the highlighted entry Stop if playing or recording Pause if playing If playing all entries, skip onto the next one Start recording manually Additionally, you can play an individual sound log entry by double-clicking on it or pause by single-clicking on it.
MEMORY DATA IN WINDOWS CLIPBOARD MEMORY DATA IN WINDOWSTM CLIPBOARD Data from a memory bank window can be copied to, or from, WindowsTM Clipboard as text. This allows you to edit a memory bank in bulk using a text editor (such as WindowsTM Notepad).
ADDENDUM - Copy Protection ADDENDUM TO AOR SEARCHLIGHT MANUAL Copy Protection AOR Searchlight is now copy protected. The protection does not use a dongle or other cumbersome devices, however, there are a few simple points that you may need to refer to. Please read this section carefully. AOR Searchlight is now copy protected using a system which places two “tokens” on your hard disk when you install the program. The program will only work on the disk you installed it to.
ADDENDUM - Copy Protection 7. The copy protection scheme is known to be compatible with the following disk defragmenters: Central Point’s Compress, Digital Research’s Diskopt, Stac’s Sdefrag and Microsoft’s Defrag. Moving Copy Protection A simple utility has been provided so you can move the copy protection “token” that is installed by the software back onto the distribution floppy disk or between hard disks.
® AOR Ltd 2-6-4 Misuji, Taito-ku, Tokyo 111-0055, Japan. Tel: +81 3 3865 1695 Fax: +81 3 3865 1697 post@aorja.com www.aorja.com AOR (UK) Ltd 4E East Mill, Bridgefoot, Belper, Derbys DE56 2UA, England Tel: +44 1773 880788 Fax: +44 1773 880780 info@aoruk.com www.aoruk.com AOR USA, INC. 20655 S. Western Avenue, Suite # 112 Torrance, CA. 90501, USA Tel: (310) 787 8615 Fax: (310) 787 8619 info@aorusa.com www.aorusa.