
Central Server Installation Manual

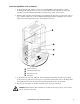

Table Of Contents
- Product Description
- Installation
- Installation Instructions
- Before You Begin
- RapidRails Rack Kit Contents
- Installation Tasks
- Communication Connection
- Network overview
- Set up the Private LAN
- Route network cables to the InfraStruXure Central server and switch (or hub)
- Connect the InfraStruXure Central server to your Public LAN
- Connect the InfraStruXure Central server to your Private LAN
- Apply power to the InfraStruXure Central server and switch (or hub)
- Initial Configuration
- Product Information
- Appendix A: LED Error Codes
- Appendix B: Diagnostic Messages
- Warranties and Policies
InfraStruXure Central Installation Manual6
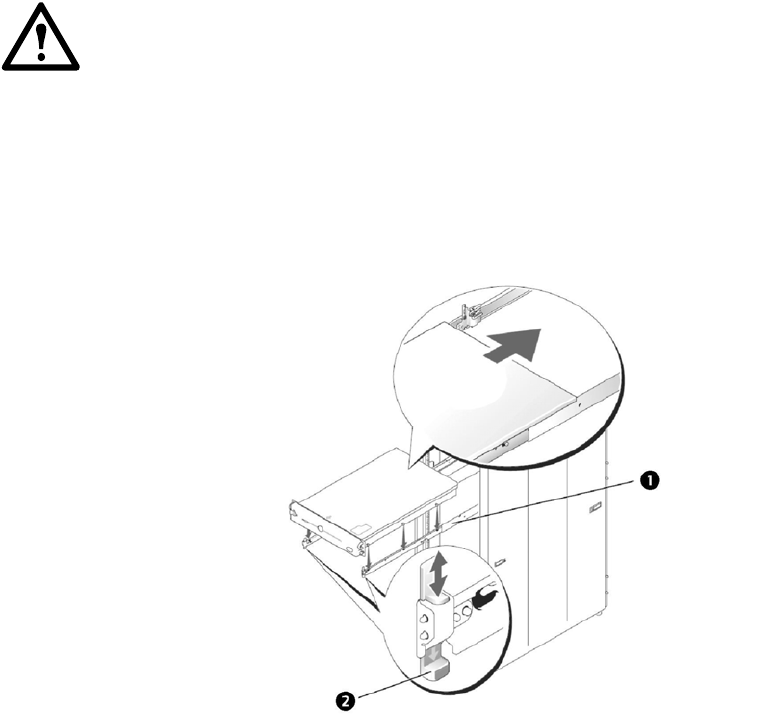
Install the system in the rack
1. Pull the two slide assemblies out of the rack until they lock in the fully extended position. Lift the
system into position in front of the extended slides (see below).
2. Place one hand on the front-bottom of the system and the other hand on the back-bottom of the
system.
3. Tilt the back of the system down while aligning the back shoulder screws on the sides of the
system with the back slots on the slide assemblies.
4. Engage the back shoulder screws into their slots.
5. Lower the front of the system and engage the front and middle shoulder screws in their slots (the
middle slot is just behind the yellow system release latch). When all shoulder screws are properly
seated, the system locking mechanism at the front of each slide assembly clicks and locks the
system into the slide assembly.
Caution:
• If you are installing more than one system, install the first system in the lowest available
position in the rack.
• Never pull more than one component out of the rack at a time.
• Because of the size and weight of the system, never attempt to install the system in the slide
assemblies by yourself.
shoulder screw on system
system locking mechanism