Multi–Channel, 24bit/192kHz Audio Interface for the Macintosh User’s Guide - OSX LION V2.
User’s Guide Contents Owner’s Record 2 Introduction 3 Getting Started Quickly 1. Installing software 2. Hardware connections 4 4 4 Getting Started Quickly 3. OS X configuration 4. iTunes playback 5 5 5 Getting Started Quickly 5. DAW configuration 6 6 Getting Started Quickly 6. Recording 7 7 General Operation Making Settings with Software Control Panels Making Settings with Ensemble’s Front Panel Encoder Knobs Setting Sample Rate Using 176.
Ensemble – User’s Guide APOGEE ELECTRONICS Owner’s Record The serial number is located on the rear panel of the unit. We suggest you record the serial number in the space provided below. Refer to it whenever you call an authorized Apogee Electronics repair facility or the manufacturer. Please be sure to return your completed warranty card immediately! Ensemble Serial No.
Ensemble – User’s Guide APOGEE ELECTRONICS Introduction Ensemble is a digitally–controlled Firewire audio interface specifically designed for Apple Macintosh computers. From mic preamps to Mac Core Audio connectivity to headphone outputs, Ensemble includes all that’s necessary for a high–quality Mac–based recording system.
Ensemble – User’s Guide APOGEE ELECTRONICS Getting Started Quickly Installing software Insert the included CD in your Mac’s optical drive slot, double click on the Ensemble Software Installer icon, and follow the onscreen directions provided by the installer program. After the installation is complete, it will be necessary to restart your Mac. figure 1 Hardware connections Using the enclosed FireWire cable, connect one of Ensemble’s FireWire ports to a FireWire 400 port on your Mac (figure 2).
Ensemble – User’s Guide APOGEE ELECTRONICS Getting Started Quickly OS X configuration From your Mac’s Apple menu bar, open the System Preferences window, then click on the sound icon (figure 5). figure 5 In the Sound Preferences window click on the Output tab and select Ensemble (figure 6). figure 6 iTunes playback Open iTunes, select an audio file and initiate playback (figure 7). figure 7 Press the OUTPUT encoder knob until the LED is lit and adjust the level in your headphones (figure 8).
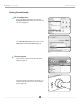
Ensemble – User’s Guide APOGEE ELECTRONICS Getting Started Quickly DAW configuration Configure your Core Audio compatible software to communicate with Ensemble hardware I/O. For example, in Logic 8 Pro : Choose Preferences > Audio and click on the Devices tab. In the Devices window, click on the Core Audio tab (figure 9). figure 9 Check the Enabled box, select Ensemble in the Device field, and verify that the 24 Bit Recording box is checked. Click on Apply Changes when compete (figure 10).
Ensemble – User’s Guide APOGEE ELECTRONICS Getting Started Quickly Recording Connect a mic to the MIC 1 rear panel connnection (figure 13). figure 13 or an instrument to the HI–Z 1 front panel connection (figure 14). figure 14 In Logic, set a track’s input to Analog 1 and its output to Analog 1/2 and record-enable the track (figure 15).
Ensemble – User’s Guide APOGEE ELECTRONICS General Operation Making Settings with Software Control Panels All Ensemble settings are made from Apogee’s Maestro software Settings panel or Logic Pro’s Apogee Control Panel. Certain settings can be also be made from OS X audio control panels. It’s possible to open multiple control panels simultaneously, as settings made on one control panel are mirrored on all others.
Ensemble – User’s Guide APOGEE ELECTRONICS General Operation Setting Sample Rate To set Ensemble’s sample rate, choose the desired rate in your Core Audio compatible software application; Ensemble will set itself to this rate. If the application has no sample rate setting, open the OSX utility Audio Midi Setup, select Ensemble in the Properties For field and select the desired rate in the Format field. Using 176.4–192 kHz Sampling Rates To operate Ensemble at a sample rate of 176.
Ensemble – User’s Guide APOGEE ELECTRONICS General Operation Input Routing Diagram 18 Hardware Inputs 18 DAW Inputs MIC 1 or Hi-Z Analog 1 Analog 2 MIC 2 or Hi-Z MIC 3 or Hi-Z MIC 4 or Hi-Z FireWire Output Analog 3 Analog 4 Analog 5 Analog 6 Analog 7 Analog 8 S/PDIF (coax) L S/PDIF (coax) R ADAT 1 ANALOG 5 ADAT 2 ANALOG 6 ADAT 3 ANALOG 7 ADAT 4 ADAT 5 ANALOG 8 ADAT 6 S/PDIF (L,R) ADAT 7 OPTICAL ADAT 1-8, SMUX 1-4 or S/PDIF (L,R) ADAT 8 10
Ensemble – User’s Guide APOGEE ELECTRONICS General Operation Output Routing Diagram 18 DAW Outputs 18 Hardware Outputs ANALOG 1 Analog 1 Analog 2 ANALOG 2 FireWire Input Analog 3 Analog 4 Analog 5 Analog 6 Analog 7 Analog 8 ANALOG 3 ANALOG 4 ANALOG 5 S/PDIF (coax) L S/PDIF (coax) R ANALOG 6 ADAT 1 ADAT 2 ANALOG 7 ADAT 3 ADAT 4 ANALOG 8 ADAT 5 ADAT 6 S/PDIF (L,R) ADAT 7 OPTICAL ADAT 1-8, SMUX 1-4 or S/PDIF (L,R) ADAT 8 11
Ensemble – User’s Guide APOGEE ELECTRONICS Maestro 2 Toolbar The toolbar is reserved for system controls that must remain easily accessible.  Clear Meters - This button clears all held peak and over indications on all hardware and software meters. System Status - This window displays the sample rate, clock source and system status of the currently selected system.
Ensemble – User’s Guide APOGEE ELECTRONICS Maestro 2 Input Tab Window Analog Level - Use this menu to select the analog input format and nominal reference level for each channel. The choices are +4dBu, -10dBV, and Mic for Channels 1-4, and +4dBu, -10dBV for Channels 5-8. Soft Limit - Use this menu to engage Soft Limit. Soft Limit is Apogeeʼs proprietary analog process for taming transients before A/D conversion.
Ensemble – User’s Guide APOGEE ELECTRONICS Maestro 2 Output Tab Window Analog Level - Use this menu to select the nominal reference level for each analog output. The choices are +4dBu, -10dBV for Channels 1-8. Analog/Digital Output Meters - These meters display the level of the audio outputs before D/A conversion and the level of the digital outputs, in the range -48 to 0 dBFS. Main Output Format Selection - This menu selects the format of the main outputs. A.
Ensemble – User’s Guide APOGEE ELECTRONICS Maestro 2 Device Settings Tab Window Peripheral Prefix - Use this drop-down menu to assign a letter prefix (A-Z) to each peripheral device displayed in the Devices Sidebar. The letter prefix is included in all graphic representations of the peripheral as well as I/O labels in Maestro and Core Audio compatible applications. UV22HR – UV22HR is applied to the stereo audio path selected in this drop down list.
Ensemble – User’s Guide APOGEE ELECTRONICS Maestro 2 Routing The input and output routing control is accomplished across a combination of routing grids. With this release of Maestro 2 software, it is now possible to route individual stereo pairs from hardware inputs directly to hardware outputs while also routing other pairs through a DAW or other software. Audio Routing is accomplished using the following three routing grids: Standalone Routing - Route Ensemble hardware inputs to hardware outputs.
Ensemble – User’s Guide APOGEE ELECTRONICS Maestro 2 Input Routing The Input Routing tab window determines how Ensemble hardware inputs are routed to audio software inputs. Hardware Inputs Columns - The hardware analog and digital inputs of the Ensemble are displayed in these columns. Software Inputs Rows - Available audio software inputs are displayed in these rows in pairs (1-2, 3-4, etc).
Ensemble – User’s Guide APOGEE ELECTRONICS Maestro 2 Output Routing The Output Routing tab window determines how audio software outputs are routed to Ensemble hardware outputs. Hardware Outputs Columns - The hardware analog and digital outputs of the Ensemble are displayed in these columns. Software Output Rows - Available audio software outputs are listed in these rows in pairs (1-2, 3-4, etc).
Ensemble – User’s Guide APOGEE ELECTRONICS Maestro 2 Standalone Routing Hardware Output Columns - The hardware analog and digital outputs of the Ensemble are displayed in these columns. Hardware Input Rows - The hardware analog and digital inputs of the Ensemble are displayed in these rows. Mixer Output Rows - The two low latency mixer outputs appear at the bottom of the Hardware Inputs list, and may be assigned to one or more hardware output pairs.
Ensemble – User’s Guide APOGEE ELECTRONICS Maestro 2 Mixer Tab Window This mixer provides a low latency path from Ensemble’s inputs to its outputs, for the case where latency through your software audio application is too long. For more information about what latency is and how to manage it, see Low Latency Mixing. Pan - This rotary knob pans the input signal between the left and right sides of the Maestro mixer’s stereo output.
Ensemble – User’s Guide APOGEE ELECTRONICS Maestro 2 System Setup Window Clock Source - This drop down selects the clock source for the Ensemble. The following sources may be selected: Internal - Ensemble is clocked from its internal crystal. Word Clock - Ensemble is clocked from an external word clock signal connected to the rear panel WC input. Optical - Ensemble is clocked from the Optical digital audio input. SPDIF Coax - Ensemble is clocked from the Coaxial digital audio input.
Ensemble – User’s Guide APOGEE ELECTRONICS Maestro 2 Menu Bar Menus About Apogee Maestro - Choose this menu item to display version information. Preferences - Choose this menu item to display Maestro’s Preference panel. Check the box next to “Launch Maestro automatically when connecting a device” to launch Maestro when the Mac is started. Check the box next to “Display Pop-ups” to display the Ensemble Pop-up on the Mac Desktop to show Speaker and Headphone Level adjustments.
Ensemble – User’s Guide APOGEE ELECTRONICS Maestro 2 Maestro Low Latency mixing While recording, if you notice a delay between the moment you play or sing a note and when you hear it in your headphones you are experiencing latency. Maestro’s low latency mixer may help and can be configured by clicking the Mixer tab in Maestro. A bit of background information concerning latency and computer-based digital recording setups will help you better understand these functions.
Ensemble – User’s Guide APOGEE ELECTRONICS Maestro 2 Working with the Maestro Mixer Do I need the Maestro Mixer? The Maestro mixer serves to provide a low latency listening mix while recording. Therefore if you’re using Ensemble to listen to iTunes or audio from another program, there’s no need to use the mixer. It’s also possible that the latency of your particular recording system is low enough to be unnoticeable by you or other performers.
Ensemble – User’s Guide APOGEE ELECTRONICS Maestro 2 Software monitoring Because the signal to be recorded is monitored through the Maestro mixer, the outputs of software tracks actively recording should be muted - after all, that’s the source of the latency. Most software applications provide an option to turn off software monitoring of recording tracks.
Ensemble – User’s Guide APOGEE ELECTRONICS Maestro 2 Step by Step instructions to record with the low latency mixer Set the software application’s mixer output to Out 1-2 (Stereo Output). Set the software application’s mixer output to Out 1-2 (Stereo Output). In the Maestro Output Routing tab window, assign Mixer 1 to hardware output Line 1/2, Mixer 2 to hardware output Line 3/4.
Ensemble – User’s Guide APOGEE ELECTRONICS Maestro 2 Step by Step instructions to record with the low latency mixer In the Mixer tab window, set the Software Return drop down menu, on both Mixer 1 and Mixer 2 (if desired), to Analog 1-2. Set both the Software Return and Mixer Master faders to 0dB. Play the session in your DAW. You should hear playback in headphones connected to Ensemble’s HP 1 and HP 2 outputs. Ensure the desired tracks are in “record ready” in your DAW.
Ensemble – User’s Guide APOGEE ELECTRONICS Navigating the Front Panel 1 2 3 5 4 7 6 9 8 10 11 12 1 1. Power Switch – Press this button to apply power to Ensemble. When Ensemble’s AC input is connected, the switch will light dimly to indicate that the unit is in Standby. 2 2. STATUS LED – This multi–color LED provides a quick visual indication of the status of various parameters.
Ensemble – User’s Guide APOGEE ELECTRONICS Connections on the Rear Panel 1 2 6 3 4 5 11 7 8 9 10 1.1 MIC1–4 – These XLR connectors accept balanced mic or line inputs; input level is determined in software control. 2.2 INSERT SEND – RETURN (channels 1–2) – These TRS connectors provide balanced analog insert points before the A/D conversion stage; inserting a jack in the RETURN connector activates insert return.
Ensemble – User’s Guide APOGEE ELECTRONICS Connecting Your Studio Basic studio configuration: 2 Instruments 2 Headphones DVD/CD Powered Monitors Synthesizer Microphones 30
Ensemble – User’s Guide APOGEE ELECTRONICS Connecting Your Studio 5.1 surround configuration: 5.
Ensemble – User’s Guide APOGEE ELECTRONICS Configuring Audio Software Apps Configuring Ensemble for use with audio software apps When configuring Ensemble for use with Core Audio applications it’s necessary to: 1) select Ensemble in the hardware drivers menu; 2) open a software control panel to control Ensemble’s settings. Apple Soundtrack Pro To select Ensemble as hardware I/O: 1.
Ensemble – User’s Guide APOGEE ELECTRONICS Configuring Audio Software Apps MOTU Digital Performer To select Ensemble as hardware I/O: 1. In Digital Performer, open Setup > Configure Audio System > Configure Hardware Driver. (figure 28) 2. Set Master Device to Ensemble (figure 29) 3. Set Work Priority to Low (figure 29) To control Ensemble’s settings: figure 28 1. In Apogee Maestro, open Window > Settings. figure 29 Steinberg Nuendo To select Ensemble as hardware I/O: 1.
Ensemble – User’s Guide APOGEE ELECTRONICS Troubleshooting The power switch’s blue LED is lit, but no other LEDs are on; is the unit in operation? – Not yet; when Ensemble is connected to AC power, the power switch illuminates dimly to indicate that the unit is in Standby. Press the power switch to power up Ensemble.
Ensemble – User’s Guide APOGEE ELECTRONICS Troubleshooting I want to run Ensemble at 176.4 –192 kHz, but I only see 44.1–96 kHz in AMS. – Ensemble can operate at sample rates of 44.1 to 96 kHz or 176.4 to 192 kHz, as determined by the Sample Rate Range setting in the Apogee Maestro Settings panel. To change the sample rate range, open the Maestro>Window>Settings panel and set Sample Rate Range to the desired setting.
Ensemble – User’s Guide APOGEE ELECTRONICS Warnings & Copyrights FCC warning This equipment has been tested and found to comply with the limits for a Class A digital device, pursuant to Part 15 of the FCC rules. These limits are designed to provide reasonable protection against harmful interference when operated in a commercial environment.
Ensemble – User’s Guide APOGEE ELECTRONICS Declarations of Conformity Declaration of Conformity—FCC Apogee Ensemble This device complies with Part 15 of the FCC Rules. Operation is subject to the following two conditions: (1) This device may not cause harmful interference (2) This device must accept any interference received, including interference that may cause undesired operation.
Ensemble – User’s Guide APOGEE ELECTRONICS Registration and Warranty Information Be sure to register your Ensemble, either by filling in the enclosed Registration Card or by completing the on–line registration form at our Web site: http://www.apogeedigital.com/support/. If you do so, Apogee can contact you with any update information. As enhancements and upgrades are developed, you will be contacted at the registration address.
User’s Guide - OSX LION V2.