ECM-3612 All-in-One VIA Eden ESP6000 Single Board with LCD, Dual LVDS, AC97 Audio, 10/100Base-Tx Ethernet, 4 COM & 2 USB 1.1 User’s Manual 1st Ed – 26 May 2005 Part No.
ECM-3612 FCC Statement THIS DEVICE COMPLIES WITH PART 15 FCC RULES. OPERATION IS SUBJECT TO THE FOLLOWING TWO CONDITIONS: (1) THIS DEVICE MAY NOT CAUSE HARMFUL INTERFERENCE. (2) THIS DEVICE MUST ACCEPT ANY INTERFERENCE RECEIVED INCLUDING INTERFERENCE THAT MAY CAUSE UNDESIRED OPERATION. THIS EQUIPMENT HAS BEEN TESTED AND FOUND TO COMPLY WITH THE LIMITS FOR A CLASS "A" DIGITAL DEVICE, PURSUANT TO PART 15 OF THE FCC RULES.
User’s Manual Disclaimer Evalue Technology Inc. reserves the right to make changes, without notice, to any product, including circuits and/or software described or contained in this manual in order to improve design and/or performance.
ECM-3612 Technical Support We want you to get the maximum performance from your products. So if you run into technical difficulties, we are here to help. For the most frequently asked questions, you can easily find answers in your product documentation. These answers are normally a lot more detailed than the ones we can give over the phone. So please consult the user’s manual first. To receive the latest version of the user’s manual; please visit our Web site at: http://www.evalue-tech.
User’s Manual Product Warranty Evalue warrants to you, the original purchaser, that each of its products will be free from defects in materials and workmanship for two years from the date of purchase. This warranty does not apply to any products which have been repaired or altered by persons other than repair personnel authorized by Evalue, or which have been subject to misuse, abuse, accident or improper installation.
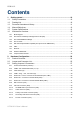
ECM-3612 Contents 1. Getting started ..........................................................................................................10 1.1 Safety Precautions ..................................................................................................10 1.2 Packing List.............................................................................................................10 1.3 Document Amendment History ...............................................................................
User’s Manual 2.3.15 PC/104+ Connector (CN10)....................................................................................................... 42 2.3.16 IrDA Connector (CN9)................................................................................................................ 46 2.3.17 LCD Inverter Connector (J1)...................................................................................................... 47 2.3.18 Auxiliary Power Connector (J2) ...............................
ECM-3612 Appendix A: BIOS Revisions ..........................................................................................92 Appendix B: AWARD BIOS POST Messages ................................................................93 Overview............................................................................................................................94 Post Beep ..........................................................................................................................
User’s Manual 32. Hard Disk(s) fail (20) → HDD initialization error.......................................................................... 98 33. Hard Disk(s) fail (10) → Unable to recalibrate fixed disk............................................................. 98 34. Hard Disk(s) fail (08) → Sector Verify failed................................................................................ 98 35. Keyboard is locked out - Unlock the key. .......................................................
ECM-3612 1. Getting started 1.1 Safety Precautions Warning! Always completely disconnect the power cord from your chassis whenever you work with the hardware. Do not make connections while the power is on. Sensitive electronic components can be damaged by sudden power surges. Only experienced electronics personnel should open the PC chassis. Caution! Always ground yourself to remove any static charge before touching the CPU card. Modern electronic devices are very sensitive to static electric charges.
User’s Manual 1.
ECM-3612 1.4 Manual Objectives This manual describes in detail the Evalue Technology ECM-3612 Single Board. We have tried to include as much information as possible but we have not duplicated information that is provided in the standard IBM Technical References, unless it proved to be necessary to aid in the understanding of this board. We strongly recommend that you study this manual carefully before attempting to interface with ECM-3612 series or change the standard configurations.
User’s Manual 1.5 System Specifications System Onboard VIA Eden ESP6000 667 MHz CPU Note: Available in different CPU speeds by request FSB 66/100/133 MHz BIOS Award 256 KB Flash BIOS System Chipset VIA TwisterT VT8606/VT82C686B I/O Chip VIA VT82C686B / Windbond W83977EF System Memory Onboard 128 MB SDRAM (32/64 MB by request) SSD One CompactFlash Type I/II socket Watchdog Timer Reset: 32 sec.~254 min., 1 min./step Monitoring system temperature, voltage, and cooling fan status.
ECM-3612 Ethernet Chipset Realtek RTL8101L Ethernet Interface IEEE 802.3u 100Base-Tx Fast Ethernet compatible Remote Boot ROM Optional built-in boot ROM in Flash BIOS Mechanical & Environmental +5 V @ 2.15 A, +12 V @ 0.06 A (with VIA Eden ESP6000 CPU & onboard Power Requirement 64M SDRAM) Power Type AT/ATX Operation Temperature 0~60® C (32~140® F) Operating Humidity 0%~90% relative humidity, non-condensing Size ( L x W ) 5.7" x 4" (146 mm x 101mm) Weight 0.44 lbs (0.
User’s Manual 1.6 Architecture Overview 1.6.1 Block Diagram The following block diagram shows the architecture and main components of ECM-3612. The following sections provide detail information about the functions provided onboard.
ECM-3612 1.6.2 VIA TwisterT VT8606 (ProSavage PN133T Chipset) The VIA Apollo PLE133T combines integrated AGP 4X graphics and AC'97 audio capabilities with support for PC133 SDRAM to provide a highly scalable solution for building Value PCs using the industry standard Socket 370 platform. The VIA Apollo PLE133T is also fully compatible with both the Intel® Pentium® III and Intel® Celeron™ processors, as well as the VIA C3™ processor.
User’s Manual TwisterT's advanced 128-bit 2D graphics engine delivers high-speed 2D acceleration for productivity applications. Several enhancements have been made to the 2D architecture to optimize SMA performance and to provide acceleration in all color depths. TwisterT supports a wide variety of DSTN or TFT panels through a 36-bit CMOS interface.
ECM-3612 • • • • Real Time Clock with 256 byte extended CMOS. In addition to the standard ISA RTC functionality, the integrated RTC also includes the date alarm, century field, and other enhancements for compatibility with the ACPI standard. Notebook-class power management functionality compliant with ACPI and legacy APM requirements. Multiple sleep states (power-on suspend, suspend-to-DRAM, and suspend-to-Disk) are supported with hardware automatic wake-up.
User’s Manual 1.6.4 VIA VT1612A The VIA VT1612A Audio Codec conforms to the AC'97 2.2 specification providing 18-bit resolution performance. With 2 channel outputs the VIA VT1612A provides high-performance stereo quality for headphones or speaker connections. Furthermore, an integrated headphone amplifier with thermal shutdown reduces the need for further external components.
ECM-3612 1.6.5 IDE Interface (Bus Master Capability and Synchronous DMA Mode ) Master mode enhanced IDE controller with dual channel DMA engine and interlaced dual channel commands. Dedicated FIFO coupled with scatter and gather master mode operation allows high performance transfers between PCI and IDE devices. In addition to standard PIO and DMA mode operation. The VT82C686B also supports the UltraDMA-33, UltraDMA-66, and UltraDMA-100 (ATA-100) standards. The IDE controller is SFF-8038I v1.
User’s Manual 1.6.8 Winbond W83977EF The W83977EF is an evolving product from Winbond's most popular I/O chip W83877F which integrates the disk drive adapter, serial port (UART), IrDA 1.0 SIR, parallel port, and configurable plug-and-play registers for the whole chip --- plus additional powerful features: ACPI, 8042 keyboard controller with PS/2 mouse support, 14 general purpose I/O ports, full 16-bit address decoding, OnNow keyboard Wake-Up, and OnNow mouse Wake-Up.
ECM-3612 The W83977EF also supports Power-loss control, and ensures that the system never fails to detect any Wake-Up event provided by a chipset such as INTEL PIIX4 TM. W83977EF is made to fully comply with Microsoft PC98 Hardware Design Guide. IRQs, DMAs, and I/O space resource are flexible to adjust to meet ISA PnP requirements. Moreover, W83977EF is made to meet the specification of PC98's requirements in power management: ACPI and DPM (Device Power Management).
User’s Manual 2.
ECM-3612 2.
User’s Manual 2.2 Jumper and Connector List You can configure your board to match the needs of your application by setting jumpers. A jumper is the simplest kind of electric switch. It consists of two metal pins and a small metal clip (often protected by a plastic cover) that slides over the pins to connect them. To “close” a jumper you connect the pins with the clip. To “open” a jumper you remove the clip. Sometimes a jumper will have three pins, labeled 1, 2, and 3.
ECM-3612 Connectors Label Function CM1 Serial port 3 connector in RS-232 mode 5 x 2 header, pitch 2.0mm CM2 Serial port 1 connector in RS-232 mode 9-pin male D-sub connector CM3 Serial port 4 connector in RS-232 mode 5 x 2 header, pitch 2.0mm CM4 Serial port 2 connector in RS-232/422/485 mode 5 x 2 header, pitch 2.0mm CN1 IDE connector 20 x 2 header, pitch 2.54mm CN2 CPU fan connector 2 x 1 wafer, pitch 2.
User’s Manual 2.3 Setting Jumpers & Connectors 2.3.1 AT/ATX Power Select (ATATX1) AT P/S* ATX P/S * Default 2.3.
ECM-3612 2.3.3 Clear CMOS (J4) Protect * Clear CMOS * Default Note: You can use J4 to clear the CMOS data if necessary. To reset the CMOS data, set J4 to 2-3 closed for just a few seconds, and then move the jumper back to 1-2 closed. 2.3.
User’s Manual 2.3.5 Serial Port 3 / Port 4 Connector in RS-232 Mode (CM1, CM3) Signal CM3 CM1 2.3.
ECM-3612 2.3.6.1 Signal Description –Serial Port 3/4/1 Connector in RS-232 Mode (CM1, CM3, CM2) Signal Signal Description Serial output. This signal sends serial data to the communication link. The signal TxD is set to a marking state on hardware reset when the transmitter is empty or when loop mode operation is initiated. RxD DTR DSR RTS CTS DCD RI Serial input. This signal receives serial data from the communication link. Data Terminal Ready.
User’s Manual 2.3.7 Serial Port 2 Connector in RS-232/422/485 Mode (CM4) 2.3.7.1 Serial Port 2 Connector in RS-232 Mode Signal PIN PIN Signal DCD 1 2 RxD TxD 3 4 DTR GND 5 6 DSR RTS 7 8 CTS RI 9 10 NC 2.3.7.1.1 Signal Description – Serial Port 2 Connector in RS-232 Mode (CM4) Signal Signal Description Serial output. This signal sends serial data to the communication link.
ECM-3612 2.3.7.2 Serial Port 2 Connector in RS-422 Mode Signal PIN PIN Signal Tx- 1 2 Rx+ Tx+ 3 4 Rx- NC 5 6 NC NC 7 8 NC NC 9 10 NC 2.3.7.2.1 Signal Description – Serial Port 2 Connector in RS-422 Mode (CM4) Signal Signal Description Serial output. This differential signal pair sends serial data to the communication Tx +/- link. Data is transferred from Serial Port 2 Transmit Buffer Register to the communication link, if the RTS register of the Serial Port 2 is set to LOW.
User’s Manual 2.3.7.3 Serial Port 2 Connector in RS-485 Mode Signal PIN PIN Signal DATA- 1 2 NC DATA+ 3 4 NC NC 5 6 NC NC 7 8 NC NC 9 10 NC 2.2.7.3.1 Signal Description – Serial Port 2 Connector in RS-485 Mode (CM4) Signal Signal Description This differential signal pair sends and receives serial data to the communication DATA +/- link. The mode of this differential signal pair is controlled through the RTS register of Serial Port 2.
ECM-3612 2.3.
User’s Manual 2.3.8.1 Signal Description – IDE Connector (CN1) The IDE interface supports PIO modes 0 to 4 and Bus Master IDE. Data transfer rates up to 100 MB/Sec is possible. Signal PDA [2:0] PDCS1#, PDCS3# PDD [15:0] PIOR# PIOW# PIORDY Signal Description IDE Address Bits. These address bits are used to access a register or data port in a device on the IDE bus. IDE Chip Selects. The chip select signals are used to select the command block registers in an IDE device.
ECM-3612 2.3.9 2.3.10 CPU Fan Connector (CN2) PIN Signal 1 GND 2 +5V PIN Signal 1 CD_GND 2 CD_L 3 CD_GND 4 CD_R CD-ROM Audio Input Connector (CN4) 2.3.10.
User’s Manual 2.3.11 Audio Connector (CN5) Signal PIN PIN Signal Line out R 1 2 Line out L GND 3 4 GND Line in R 5 6 Line in L Mic In 7 8 Mic Bias NC 9 10 NC 2.3.11.1 Signal Description – Audio Connecter (CN5) Signal Signal Description The MIC signal is used for microphone input. This input is fed to the left Mic / Mic Bias microphone channel. Mic Bias provides 3.3V supplied through 3.2K Ω with capacitive decoupling to GND.
ECM-3612 2.3.12 Primary LCD Panel Connector (CN6) 38 ECM-3612 User’s Manual Signal PIN PIN Signal ENBKL 39 40 ENVEE M 37 38 LP SHFCLK 35 36 FLM GND 33 34 GND P22 31 32 P23 P20 29 30 P21 P18 27 28 P19 P16 25 26 P17 P14 23 24 P15 P12 21 22 P13 P10 19 20 P11 P8 17 18 P9 P6 15 16 P7 P4 13 14 P5 P2 11 12 P3 P0 9 10 P1 Vcon 7 8 GND 3.3V 5 6 3.
User’s Manual 2.3.13 Secondary LCD Panel Connector (CN8) Signal PIN PIN Signal Y1P 39 40 Y1M Z2P 37 38 Z2M Y0P 35 36 Y0M GND 33 34 GND YCP 31 32 YCM Z0P 29 30 Z0M ZCP 27 28 ZCM Z1P 25 26 Z1M Y2P 23 24 Y2M GND 21 22 GND P34 19 20 P35 P32 17 18 P33 P30 15 16 P31 P28 13 14 P29 P26 11 12 P27 P24 9 10 P25 Vcon 7 8 GND 3.3V 5 6 3.
ECM-3612 2.3.13.1 Signal Description – Primary & Secondary LCD Panel Connector (CN6, CN8) Signal Signal Description P [35:0] Flat Panel Data Bit 35 to Bit 0 for panel implementation. SHFCLK Shift Clock. Pixel clock for flat panel data LP Latch Pulse. Flat panel equivalent of HSYNC (horizontal synchronization) FLM First Line Marker. Flat panel equivalent of VSYNC (vertical synchronization) M ENBKL ENVEE Multipurpose signal, function depends on panel type.
User’s Manual 2.3.
ECM-3612 2.3.
User’s Manual 2.3.15.1 Signal Description – PC/104+ Connecter (CN7, CN10) Signal Signal Description The address signals LA [23:17] define the selection of a 128KB section of memory space within the 16MB address range of the 16-bit data bus. These signals are active high. The validity of the MEMCS16# depends on these signals LA[23:17] only. These address lines are presented to the system with tri-state drivers.
ECM-3612 Signal Signal Description This is an active low signal driven by the current master to indicate an I/O read operation. I/O mapped devices using this strobe for selection should decode IOR#, addresses SA [15:0] and AEN. IOW# Additionally, DMA devices will use IOR# in conjunction with DACKn# to decode a DMA transfer from the I/O device. The current bus master will drive this line with a tri-state driver.
User’s Manual Signal Signal Description This clock signal may vary in frequency from 2.5 MHz to 25.0 MHz depending on the setup made in the BIOS. Frequencies above 16 MHz are not recommended. SYSCLK The standard states 6 MHz to 8.33 MHz, but most new adapters are able to handle higher frequencies. The PCAT/PC104 bus timing is based on this clock signal. OSC This is a clock signal with a 14.31818 MHz ± 50 ppm frequency and a 50 ± 5% duty cycle. The signal is driven by the permanent master.
ECM-3612 2.3.16 IrDA Connector (CN9) PIN Signal 1 +5V 2 NC 3 IRRX 4 GND 5 IRTX 2.3.16.
User’s Manual 2.3.17 LCD Inverter Connector (J1) PIN Signal 1 +12V 2 GND 3 ENBKL 4 VR 5 +5V Note: For inverters with adjustable Backlight function, it is possible to control the LCD brightness through the VR signal (pin 4) controlled by VR1 Please see the VR1 section for detailed circuitry information. 2.3.17.1 Signal Description – LCD Inverter Connecter (J1) Signal Signal Description VR Vadj = 5V ~ 0V. ENBKL LCD backlight ON/OFF control signal.
ECM-3612 2.3.18 Auxiliary Power Connector (J2) PIN Signal 3 VCCSB 2 +5V 1 PSON# Note: To use ATX Power supply, connect pin 3 to ATX power supply VCCSB and pin 1 to ATX power supply PSON. Set J2 to 2-3 closed, If AT power supply is to be used. 2.3.
User’s Manual 2.3.
ECM-3612 2.3.20.1 Signal Description – Parallel Port Connecter (PNT1) The following signal description covers the signal definitions, when the parallel port is operated in standard centronic mode. The parallel port controller also supports the fast EPP and ECP modes. Signal PD[7:0] SLIN# SLCT STB# BUSY ACK# INIT# Signal Description Parallel data bus from PC board to printer. The data lines are able to operate in PS/2 compatible bi-directional mode. Output line for detection of printer selection.
User’s Manual 2.3.21 2.3.
ECM-3612 2.3.23 USB Connector (USB1) Signal PIN PIN Signal VCC1 1 2 GND D1- 3 4 GND D1+ 5 6 D2+ GND 7 8 D2- GND 9 10 VCC2 2.3.23.1 Signal Description – USB Connector (USB1) Signal D1+ / D1- D2+ / D2VCC Signal Description Differential bi-directional data signal for USB channel 0. Clock is transmitted along with the data using NRZI encoding. The signalling bit rate is up to 12 Mbs. Differential bi-directional data signal for USB channel 1.
User’s Manual 2.3.24 LCD Backlight Brightness Adjustment Connector (VR1) PIN Signal 1 GND 2 VR 3 VCC VCC VR1 3 J1 pin 4 2 1 Variation Resistor (Recommended: 4.7KΩ, >1/16W) 2.3.
ECM-3612 3.
User’s Manual 3.1 Starting Setup The AwardBIOS™ is immediately activated when you first power on the computer. The BIOS reads the system information contained in the CMOS and begins the process of checking out the system and configuring it. When it finishes, the BIOS will seek an operating system on one of the disks and then launch and turn control over to the operating system.
ECM-3612 3.2 Using Setup In general, you use the arrow keys to highlight items, press to select, use the PageUp and PageDown keys to change entries, press for help and press to quit. The following table provides more detail about how to navigate in the Setup program using the keyboard.
User’s Manual • To Display a Sub Menu Use the arrow keys to move the cursor to the sub menu you want. Then press . A “¾” pointer marks all sub menus. 3.3 Getting Help Press F1 to pop up a small help window that describes the appropriate keys to use and the possible selections for the highlighted item. To exit the Help Window press or the F1 key again. 3.
ECM-3612 3.5 Main Menu Once you enter the AwardBIOS™ CMOS Setup Utility, the Main Menu will appear on the screen. The Main Menu allows you to select from several setup functions and two exit choices. Use the arrow keys to select among the items and press to accept and enter the sub-menu. Note that a brief description of each highlighted selection appears at the bottom of the screen.
User’s Manual 3.5.1 Standard CMOS Features The items in Standard CMOS Setup Menu are divided into few categories. Each category includes no, one or more than one setup items. Use the arrow keys to highlight the item and then use the or keys to select the value you want in each item. 3.5.1.1 Main Menu Selection This reference table shows the selections that you may make on the Main Menu.
ECM-3612 Item Select Display Device Panel Type Options Auto CRT LCD CRT+LCD 640x480 TFT 800x600 TFT LVDS 1024x768 TFT 2P/C32M 1280x1024 TFT 640x480 DSTN 800x600 DSTN 1024x768 DSTN 1024x768 TFT 1P/LVDS 640x480 LVDS 800x600 TFT 1024x768 TFT 1400x1050 TFT 2P/LVDS 1280x1024 DSTN 60 ECM-3612 User’s Manual Description Select Display Device that the screen will be shown Select Panel Resolution that will be displayed depending on the LCD Panel (LFP)
User’s Manual 3.5.1.2 IDE Adapter Setup The IDE adapters control the hard disk drive. Use a separate sub menu to configure each hard disk drive. The below Figure will shows the IDE primary master sub menu. Use the following table to configure the hard disk.
ECM-3612 3.5.2 Advanced BIOS Features This section allows you to configure your system for basic operation. You have the opportunity to select the system’s default speed, boot-up sequence, keyboard operation, shadowing and security. 3.5.2.1 Virus Warning Allows you to choose the VIRUS Warning feature for IDE Hard Disk boot sector protection. If this function is enabled and someone attempt to write data into this area, BIOS will show a warning message on screen and alarm beep.
User’s Manual 3.5.2.4 CPU L2 Cache ECC Checking This item allows you to enable the CPU external L2 cache use ECC checking method in memory access. Item Enabled Disabled Description Enable ECC checking Disable ECC checking 3.5.2.5 Processor Number Feature This feature allows to control the use of the processor’s embedded unique identification number. Item Enabled Disabled Description Enable to control processor number Disable to control processor number 3.5.2.
ECM-3612 3.5.2.9 Boot Up NumLock Status Select power on state for NumLock. Item Enabled Disabled Description Enable NumLock Disable NumLock 3.5.2.10 Gate A20 Option Select if chipset or keyboard controller should control Gate A20. Item Normal Fast Description A pin in the keyboard controller controls Gate A20 Lets chipset control Gate A20 3.5.2.11 Typematic Rate Setting Key strokes repeat at a rate determined by the keyboard controller.
User’s Manual 3.5.2.16 Video BIOS Shadow To allow copying Video BIOS into shadow RAM to improve video performance. Item Enable Disable Description Copy Video BIOS into shadow RAM Do not copy Video BIOS into shadow RAM 3.5.2.17 C8000-CBFFF/CC000-CFFFF/D0000-D3FFF/D4000-D7FFF/D8000-DBFFF/DC0 00-DFFFF Shadow These categories determine whether option ROMs will be copied to RAM. An example of such option ROM would be support of on-board SCSI.
ECM-3612 3.5.3 Advanced Chipset Features This section allows you to configure the system based on the specific features of the installed chipset. This chipset manages bus speeds and access to system memory resources, such as DRAM and the external cache. It also coordinates communications between the conventional ISA bus and the PCI bus. It must be stated that these items should never need to be altered.
User’s Manual 3.5.3.3 Bank Interleave Enables to set the interleave mode of the SDRM interface which allows banks of SDRAM to alternate their refresh and access cycles. The choices: Disabled, 2 Bank, 4 Bank. 3.5.3.4 Memory Hole When this item is enabled, ISA ROM will be mapped to 15-16M area and also support legacy ISA devices. While this item is disabled and legacy ISA devices are not utilized, the graphic performance will be enhanced. The choices: Disabled, 512K-640K, 15M-16M, 14M-16M. 3.5.3.
ECM-3612 3.5.3.11 AGP Driving Control This item allows you to select the AGP Driving Control to auto / disable Mode. The choices: Auto, Manual. 3.5.3.12 AGP Driving Value This item allows you to set the AGP Driving value. 3.5.3.13 On-Chip USB This item allows you to set the USB Controller. The choices: Enabled, Disabled. 3.5.3.14 USB Keyboard Support This item allows you to set the system’s USB keyboard to Enabled/Disabled.. The choices: Enabled, Disabled. 3.5.3.
User’s Manual 3.5.3.19 PCI Delayed Transaction This feature is used to meet the latency of PCI cycles to and from the ISA bus. The ISA bus is much, much slower than the PCI bus. Thus, PCI cycles to and from the ISA bus take a longer time to complete and this slows the PCI bus down. However, enabling Delayed Transaction enables the chipset's embedded 32-bit posted write buffer to support delayed transaction cycles.
ECM-3612 3.5.4 Integrated Peripherals Use this menu to specify your settings for integrated peripherals. 3.5.4.1 OnChip IDE Channel10/11 The chipset contains a PCI IDE interface with support for two IDE channels. Select Enabled to activate the primary IDE interface. Select Disabled to deactivate this interface. The choices: Enabled, Disabled. 3.5.4.2 IDE Prefetch Mode For faster drive accesses.
User’s Manual 3.5.4.6 IDE HDD Block Mode Block mode is also called block transfer, multiple commands, or multiple sector read/write. If your IDE hard drive supports block mode (most new drives do), select Enabled for automatic detection of the optimal number of block read/writes per sector the drive can support. The choices: Enabled, Disabled. 3.5.4.7 Onboard Lan Boot ROM This item allows to boot over the network when system POST and shorten the booting time by set disabled. The choices: Enabled, Disabled.
ECM-3612 3.5.4.15 ECP Mode Use DMA Select a DMA channel for the port. The choices: 3, 1. 3.5.4.16 Parallel Port EPP Type Select EPP port type 1.7 or 1.9. The choicse: EPP1.7, EPP1.9. 3.5.4.17 Onboard Serial Port 3 / 4 Select an IO address for the third and forth ports. The choices: 3F8, 2F8, 3E8, 2E8, Disabled. 3.5.4.18 Serial Port 3 / 4 Use IRQ Select an IRQ for the third and forth serial ports. The choices: IRQ5, IRQ10. 3.5.4.
User’s Manual 3.5.5 Power Management Setup The Power Management Setup allows you to configure you system to most effectively save energy while operating in a manner consistent with your own style of computer use. 3.5.5.1 ACPI Function This item allows you to enable/disable the ACPI function. The choices: Enable, Disable. 3.5.5.
ECM-3612 3.5.5.2.1 Power Management There are three selections for Power Management, and each of them has fixed mode settings. Item Min. Power Saving Max. Power Saving User Defined Description Minimum power management, HDD Power Down = 15 Min, Maximum power management, HDD Power Down =1 Min, Allows you to set each mode individually. When not disabled, each of the ranges are from 1 min. to 1 hr. except for HDD Power Down which ranges from 1 min. to 15 min. and disable. 3.5.5.2.
User’s Manual 3.5.5.7 MODEM Use IRQ This determines the IRQ in which the MODEM can use. The choices: NA, 3, 4, 5, 7, 9, 10, 11. 3.5.5.8 Soft-Off by PWR-BTTN Pressing the power button for more than 4 seconds forces the system to enter the Soft-Off state when the system has “hung”.(Only could working on ATX Power supply) The choices: Delay 4 Sec, Instant-Off. 3.5.5.9 State After Power Failure This item controls the system allowing enough time to save its state in memory.
ECM-3612 3.5.5.10.3 HDD & FDD System can be awaked by Hard Drive and Floppy Drive. The choices: On, Off. 3.5.5.10.4 PCI Master System can be awaked by system peripheral devices. The choices: On, Off. 3.5.5.10.5 PowerOn by PCI Card System can be awaked by PCI devices The choices: Enabled, Disabled. 3.5.5.10.6 Modem Ring Resume System can be awaked by Modem Ring The choices: Enabled, Disabled. 3.5.5.10.7 RTC Alarm Resume This function is for setting date and time for your computer to boot up.
User’s Manual 3.5.6 PnP / PCI Configuration This section describes configuring the PCI bus system. PCI, or Personal Computer Interconnect, is a system which allows I/O devices to operate at speeds nearing the speed the CPU itself uses when communicating with its own special components. This section covers some very technical items and it is strongly recommended that only experienced users should make any changes to the default settings. 3.5.6.
ECM-3612 3.5.6.5 Assign IRQ For VGA While the system has one VGA controller and more than one VGA devices are connected, then “Enabled” is set. If the system VGA controller is not used, then “Disabled” is set. The choices: Enabled, Disabled. 3.5.6.6 Assign IRQ For USB While the system has one USB controller and more than one USB devices are connected, then “Enabled” is set. If the system USB controller is not used, then “Disabled” is set. The choices: Enabled, Disabled. 3.5.
User’s Manual 3.5.8 Frequency / Voltage Control This menu specifies your setting for frequency/voltage control. 3.5.8.1 VIA C3 Clock Ratio This item allows you to select the VIA C3 CPU clock ratio. The choices: Default, X3, X3.5, X4, X4.5, X5, X5.5, X6, X6.5, X7, X7.5, X8, X8.5, X9, X9.5, X10, X10.5, X11, X12. 3.5.8.2 Auto Detect DIMM/PCI Clk This item allows you to enable/disable auto detect PCI Clock. The choice: Enable, Disable. 3.5.8.
ECM-3612 3.5.9 Load Fail-Safe Defaults Use this menu to load the BIOS default values for the minimal/stable performance for your system to operate. Press to load the BIOS default values for the most stable, minimal-performance system operations. 3.5.10 Load Optimized Defaults Use this menu to load the BIOS default values that are factory settings for optimal performance system operations.
User’s Manual 3.5.11 Set Supervisor / User Password You can set either supervisor or user password, or both of them. Supervisor Password: able to enter/change the options of setup menus. User Password: able to enter but no right to change the options of setup menus. Type the password, up to eight characters in length, and press . The password typed now will clear any previously entered password from CMOS memory. You will be asked to confirm the password. Type the password again and press .
ECM-3612 PASSWORD DISABLED. When a password has been enabled, you will be prompted to enter it every time you try to enter Setup. This prevents an unauthorized person from changing any part of your system configuration. Additionally, when a password is enabled, you can also require the BIOS to request a password every time your system is rebooted. This would prevent unauthorized use of your computer.
User’s Manual 3.5.13 Exit Without Save Abandon all CMOS value changes and exit setup, and the system is restarted after exiting.
ECM-3612 4. Drivers Installation Note: Installation procedures and screen shots in this section are for your reference and may not be exactly the same as shown on your screen.
User’s Manual 4.1 Install Chipset Driver (For VIA VT82C686B) Insert the Supporting CD-ROM to CD-ROM drive, and it should show the index page of Evalue’s products automatically. If not, locate Index.htm and choose the product from the menu left, or link to \Driver_Chipset\VIA\ VT82C686B \4in1. Note: The installation procedures and screen shots in this section are based on Windows 2000 operation system. Step1. Locate 「\Driver_Chipset\VIA\ VT82C686B\ 4in1\Setup.exe」. Step 2. Click Next. Step 3. Click Yes.
ECM-3612 Step 6. Click Next. Step7. Click Next. Step 8. Click Finish to complete setup and restart the computer.
User’s Manual 4.2 Install Display Driver (For VIA TwisterT VT8606) Insert the Supporting CD-ROM to CD-ROM drive, and it should show the index page of Evalue’s products automatically. If not, locate Index.htm and choose the product from the menu left, or link to \Driver_Video\VIA\S3_Twister\ 2K_XP. Note: The installation procedures and screen shots in this section are based on Windows 2000 operation system. Step 1. Locate 「Driver_Video\VIA\ S3_Twister\2K_XP\setup.exe」. Step 3. Click Next. Step 4.
ECM-3612 4.3 Install Audio Driver (For VIA VT1612A) Insert the Supporting CD-ROM to CD-ROM drive, and it should show the index page of Evalue’s products automatically. If not, locate Index.htm and choose the product from the menu left, or link to \Driver_Audio\VIA\VT823X\ VT1612A\A1mu550a. Note: The installation procedures and screen shots in this section are based on Windows 2000 operation system. Step 1. Locate 「\ Driver_Audio\VIA\ VT823X\ VT1612A\A1mu550a\setup.exe」. Step 2. Click Next.
User’s Manual 4.4 Install Ethernet Driver (For Realtek RTL810x, RTL813x Family) Insert the Supporting CD-ROM to CD-ROM drive, and it should show the index page of Evalue’s products automatically. If not, locate Index.htm and choose the product from the menu left, or link to \Driver_Network\Realtek\ RTL810x_813X Family. Note: The installation procedures and screen shots in this section are based on Windows XP operation system. Step 1. Locate 「\Driver_Network\Realtek\ RTL810x_813X Family\Setup.exe」.
ECM-3612 5.
User’s Manual (Unit: mm) ECM-3612 User’s Manual 91
ECM-3612 Appendix A: BIOS Revisions BIOS Rev.
User’s Manual Appendix B: AWARD BIOS POST Messages ECM-3612 User’s Manual 93
ECM-3612 Overview During the Power On Self-Test (POST), if the BIOS detects an error requiring you to do something to fix, it will either sound a beep code or display a message. If a message is displayed, it will be accompanied by: PRESS F1 TO CONTINUE, CTRL-ALT-ESC OR DEL TO ENTER SETUP Post Beep Currently there are two kinds of beep codes in BIOS. This code indicates that a video error has occurred and the BIOS cannot initialize the video screen to display any additional information.
User’s Manual 5. DISPLAY SWITCH IS SET INCORRECTLY Display switch on the motherboard can be set to either monochrome or color. This indicates the switch is set to a different setting than indicated in Setup. Determine which setting is correct, and then either turn off the system and change the jumper, or enter Setup and change the VIDEO selection. 6. DISPLAY TYPE HAS CHANGED SINCE LAST BOOT Since last powering off the system, the display adapter has been changed.
ECM-3612 12. Invalid EISA Configuration PLEASE RUN EISA CONFIGURATION UTILITY The non-volatile memory containing EISA configuration information was programmed incorrectly or has become corrupt. Re-run EISA configuration utility to correctly program the memory. Note: When either of these errors appears, the system will boot in ISA mode, which allows you to run the EISA Configuration Utility. 13. KEYBOARD ERROR OR NO KEYBOARD PRESENT Cannot initialize the keyboard.
User’s Manual 20. PRESS A KEY TO REBOOT This will be displayed at the bottom screen when an error occurs that requires you to reboot. Press any key and the system will reboot. 21. PRESS F1 TO DISABLE NMI, F2 TO REBOOT When BIOS detects a Non-maskable Interrupt condition during boot, this will allow you to disable the NMI and continue to boot, or you can reboot the system with the NMI enabled. 22. RAM PARITY ERROR - CHECKING FOR SEGMENT ... Indicates a parity error in Random Access Memory. 23.
ECM-3612 27. Wrong Board In Slot PLEASE RUN EISA CONFIGURATION UTILITY The board ID does not match the ID stored in the EISA non-volatile memory. Note: When either of these errors appears, the system will boot in ISA mode, which allows you to run the EISA Configuration Utility. 28. 29. 30. 31. 32. 33. FLOPPY DISK(S) fail (80) → Unable to reset floppy subsystem. FLOPPY DISK(S) fail (40) → Floppy Type dismatch. Hard Disk(s) fail (80) → HDD reset failed.
User’s Manual 40. POST Codes POST (hex) Description CFh Test CMOS R/W functionality. Early chipset initialization: -Disable shadow RAM C0h -Disable L2 cache (socket 7 or below) -Program basic chipset registers Detect memory C1h -Auto-detection of DRAM size, type and ECC. -Auto-detection of L2 cache (socket 7 or below) C3h Expand compressed BIOS code to DRAM C5h Call chipset hook to copy BIOS back to E000 & F000 shadow RAM.
ECM-3612 POST (hex) 15h 16h 17h 18h 19h 1Ah 1Bh 1Ch 1Dh 1Eh 1Fh 20h 21h 22h 23h 24h 25h 26h 27h 28h 29h 2Ah 2Bh 2Ch Description Reserved Initial Early_Init_Onboard_Generator switch. Reserved Detect CPU information including brand, SMI type (Cyrix or Intel) and CPU level (586 or 686). Reserved Reserved Initial interrupts vector table. If no special specified, all H/W interrupts are directed to SPURIOUS_INT_HDLR & S/W interrupts to SPURIOUS_soft_HDLR. Reserved Initial EARLY_PM_INIT switch.
User’s Manual POST (hex) 2Dh 2Eh 2Fh 30h 31h 32h 33h 34h 35h 36h 37h 38h 39h 3Ah 3Bh 3Ch 3Dh 3Eh 3Fh 40h 41h 42h 43h 44h 45h 46h 47h 48h 49h 4Ah 4Bh 4Ch 4Dh 4Eh 4Fh 50h Description 1. Initialize multi-language 1. Put information on screen display, including Award title, CPU type, CPU speed …. Reserved Reserved Reserved Reserved Reserved Reset keyboard except Winbond 977 series Super I/O chips.
ECM-3612 POST (hex) 51h 52h 53h 54h 55h 56h 57h 58h 59h 5Ah 5Bh 5Ch 5Dh 5Eh 5Fh 60h 61h 62h 63h 64h 65h 66h 67h 68h 69h 6Ah 6Bh 6Ch 6Dh 6Eh 6Fh 70h 71h 72h Description Reserved Test all memory (clear all extended memory to 0) Reserved Reserved Display number of processors (multi-processor platform) Reserved 1. Display PnP logo 2. Early ISA PnP initialization -Assign CSN to every ISA PnP device. Reserved Initialize the combined Trend Anti-Virus code.
User’s Manual POST (hex) 73h 74h Description (Optional Feature) Enter AWDFLASH.EXE if : -AWDFLASH is found in floppy drive. -ALT+F2 is pressed Reserved 75h Detect & install all IDE devices: HDD, LS120, ZIP, CDROM….. 76h 77h 78h 79h 7Ah 7Bh 7Ch 7Dh 7Eh Reserved Detect serial ports & parallel ports. Reserved Reserved Detect & install co-processor Reserved Reserved Reserved Reserved 7Fh 1. Switch back to text mode if full screen logo is supported.
ECM-3612 POST (hex) 94h 95h 96h FFh Description 1. Enable L2 cache 1. Program boot up speed 2. Chipset final initialization. 3. Power management final initialization 4. Clear screen & display summary table 5. Program K6 write allocation 6. Program P6 class write combining 1. Program daylight saving 1. Update keyboard LED & typematic rate 1. Build MP table 2. Build & update ESCD 3. Set CMOS century to 20h or 19h 4. Load CMOS time into DOS timer tick 5. Build MSIRQ routing table.