
User`s manual
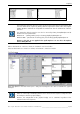
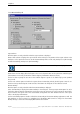
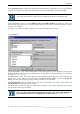
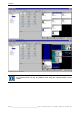
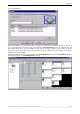

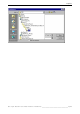
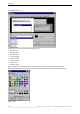
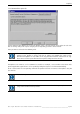
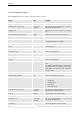
Table Of Contents
- Preliminary remarks
- Introduction
- New functions
- Installation
- Best practice
- Requirements
- Used ports
- Setup
- Upgrade from Apollo 1.3 to Apollo 1.4
- Upgrade from Apollo 1.4 to Apollo 1.4SR1
- Upgrading from Apollo 1.4 to Apollo 1.5
- Upgrading from Apollo 1.5 to Apollo 1.6
- Upgrading from Apollo 1.6 to Apollo 1.7
- Upgrading from Apollo 1.7 to Apollo 1.8
- Upgrading from Apollo 1.8 to Apollo 1.9
- Upgrading the Display Wall configuration
- Control Room Configurator
- Viewer
- Concept
- Apollo 1.9 Viewers
- Limitations
- Memory requirements (minimal RAM size)
- Communication memory
- Requirements
- Steps required to configure the FRG Viewer
- Steps required to configure the Visu Viewer
- Steps required to configure the Cottus Viewer
- Steps required to configure the VNC Viewer
- Steps required to configure the ProViewer
- Steps required to configure the Web Viewer
- Steps required to configure the MPEG Viewer
- Steps required to configure the VTplus Viewer
- Launching Viewer
- Controlling Viewers
- VNC Viewer
- Explorer
- Starting the Explorer
- Explorer User Interface
- Object Tree
- Source Tree View
- Explorer workspace
- Explorer menu bar
- Help menu
- Remote Desktop menu
- Layout Selector menu
- Explorer tool bar
- Device Manager in the Explorer
- Explorer Context Menu
- Drag&Drop functionality
- Layout Editor
- Desktop Server
- Project Backup
- Command Interface
- Device command Interface
- Desktop command Interface
- Viewer command Interface
- Apollo Explorer command interface
- Apollo Layout Editor command interface
- Apollo Layout Selector command interface
- Apollo Remote Desktop command interface
- Apollo Database Convertor command interface
- Apollo Window Detector command interface
- Control Room Bus services
- Control Room Bus
- Serial command interface
- TCPIP command interface
- Application management
- License management
- Time synchronization
- Log file
- Security Provider
- Defining accessGroups
- Configuration of restricted objects
- Permissions
- Restrictions for regions
- Restrictions for layouts
- Restrictions for shortcuts
- Restrictions for advanced menus
- Window Properties|Description
- Window Properties|Sizable
- Window Properties|Always on Top
- Window Properties|Visible
- Edit|Invisible Windows
- Edit|Keyboardinput
- Edit|CommandLine
- Edit|Permissions
- Edit|SaveLayout
- Customized configuration and uninstallation of Apollo
- Soap API Service
- Appendix
- Hotline

7. Explorer
Barco – Apollo – DOC-3197-2 – user's manual – Revision 08 – November 2006
_________________________________________________
209/402
7.6.3.5 Command Line options tab
Use the Command Line Options tab to open the Explorer using a shortcut with the preset values for such func-
tions as viewing settings. This requires assigning the corresponding parameters to the shortcut.
These parameters are listed in the following table.
The easiest way to pass the right parameter set to the shortcut is to customize the user
interface of the Explorer as desired and then to update and highlight the entries on the
Command Line Options tab. Use CTRL+C or the copy command from the context menu to copy
these entries and then paste them into the Properties dialog box of the shortcut.
The Explorer's user interface can be customized as needed. For example, a screen similar to the former inde-
pendent application Layout Selector can be specified by hiding the object tree and the Remote Desktop.
Cerate a shortcut incl. the corresponding command line options to launch an instance of the Explorer using this
user interface.
The number of parameters definable for a Windows shortcut is limited.
The user-specific ApolloExplorer.ini file is NOT overwritten when launching an Explorer instance
using a shortcut with an Ident parameter.